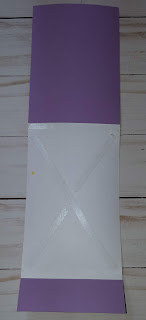
Showing posts with label Tim Holtz Distress Oxide Ink. Show all posts

Friday, March 20, 2020

Spring Egg-Centric House with Simply Crafty SVGs

Hello Crafty Friends - I am here with a fun Spring Egg-Centric House

This adorable design is from Simply Crafty SVGs. I
 love that Sandy provides easy to follow instructional videos with her designs.


Materials Used:
Simply Crafty SVG: Spring Egg-Centric House
Recollections Signature: Today, Tomorrow, Forever Collection
Recollections Brand: 12x12 Cardstock - Light Blue, Med. Pink and White
Craft Smart Brand Cardstock: Embossed Pastels - Pink
Tim Holtz Distress Oxide Ink: Worn Lipstick and Broken China
Aleene's Original Tacky Glue
Brother Scan N Cut Machine

Thank you for stopping by the blog today. I hope you found some inspiration!

Be sure to join the Simply Crafty SVGs Creators FB Group and share your creations with us.

Monday, September 30, 2019

10 Cards - 1 Kit Make Mine Monochrome Kit Part 1 with White Rose Crafts LLC


Hello Crafty Friends - I am here with the first 5 cards of the Make Mine Monochrome Kit.

I created a video of the cards. However, some of my data became corrupted and I lost it. I do my best to explain any of the missing data. Below are all 5 cards as well as the link to the video for you to see.

Card #1 - The Journey is the Destination
The stamped image and sentiment, gray dot and black stripe pattern paper,
 and bling are from the kit. 2 washi tapes and
 the Tim Holtz Distress Oxide ink: Aged Mohogany 
are from my stash. 

Card # 2 - Enjoy
The stamped image and sentiment, dot pattern paper and bling are from the kit. 
The card base, the scalloped pattern paper, and black cardstock are from my stash.

Card # 3 - Do Small Things with Great Love!
All items are from the kit. 

Card # 4 - Happiness
The jeweled butterfly, sentiment, black dot pattern paper, specialty Pearl cardstock, 
ribbon, lace, and bling are from the kit. 
The card base, the butterfly pattern paper, white and gray cardstock, 
and dies used are from my stash.

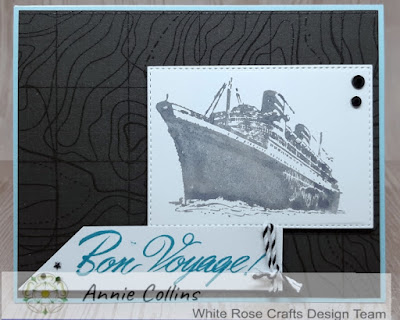
Card # 5 - Bon Voyage!
The stamped image and sentiment, glossy ocean map pattern paper, 
Tim Holtz Distress Oxide Ink: Hickory Smoke and bling are from the kit. 
The card base, pale blue cardstock, Tim Holtz Distress Oxide Ink: Broken China
and dies used are from my stash.

Here's the video of the cards.


Thank you for stopping by the blog today - I hope you found some inspiration!

Be sure to tag us White Rose Crafts LLC on social media 
if you create a project with products or kits purchased on the 

Sunday, August 25, 2019

Thank You for Being So Amazing Card - Vintage Rose Kit - White Rose Crafts LLC

Hello Crafty Friends - I am here with a  card using the New Release

The September Vintage Rose Kit is available for purchase now!

This gorgeous kit, with its rich color palette, is so evocative of the rose garden at the very end of summer... Deep, sultry reds and greens, with hints of pink and white. This bumper, jam-packed kit is a cardmaker's treasure trove!

TWENTY Double-Sided 6"x6" sheets Couture Creations "Vintage Rose" Collection papers
Kaisercraft 12" x 12" cardstock sticker sheet - "Romantique"
Tim Holtz Distress Oxide Ink Pad - Tattered Rose
Woodware Perfectly Clear Photopolymer Stamp Set - Sweet Sentiments
Ultimate Crafts Cutting Die - "Watercolor Bloom"
Bubble-pack of 4 Bronze-Colored Elegant Metal Roses from Enchanted UK
Selection of Dovecraft "In Bloom" Collection buttons
Pack of Kaisercraft soft pink floral adhesive rhinestones
Mid-Green Vine Style Leaf-Shaped Ribbon
Pack of Shaker Card Sparkles to coordinate with Kit colors
Selection of cards and envelopes from American Crafts, Kaisercraft and Jillibean Soup

Thank You for Being So Amazing Card

Let's Get started!

I start by gathering the components for the card. I trimmed the green gingham pattern paper to 3", the rose pattern to 1-1/4", I also trimmed a piece of Aspire Petallics Autumn Hay cardstock to 1". I die cut flowers from watercolor paper 5x, (I cut some of the leaves off for extra layering) and a card front panel from white cardstock. I pulled a few embellishments as well- washi, rhinestone flowers, puffy hearts and more (note - I didn't use all the embellishments I pulled - Yes, I am an overpuller 😉)

I used the Tim Holtz Distress Oxide Ink in Tattered Rose (from the Kit), Tim Holtz Distress Oxide Ink Worn Lipstick, Tim Holtz Distress Oxide Ink Bundled Sage & Tim Holtz Distress Oxide Ink Peeled Paint. I added a bit of water to the ink I smudged on my craft mat. I then used a paintbrush and colored the flowers and stems. On 2 of the flowers, I took out the little pieces, but on one of the flowers, I left all the pieces in - that is where I used the Worn Lipstick & Peeled paint to create some contrast and dimension. I set them aside to dry. 


Next, I start to assemble the card. I adhered the green pattern paper first, then the rose pattern paper. Then, I put a strip of gold washi onto the Aspire Autumn Hay Petallics cardstock.  Next, I placed the Aspire Autumn Hay Petallics cardstock on top of the seam of the two pattern papers.
 

Then, I gathered the dried flowers and adhere them to the front of the card. I place the two flowers that I removed the bits from down first. I then add a bit of foam adhesive to the flower with all the bit in and place it on top of the other flowers. arranging them to the left of the card. I tucked the extra leaves in under the flowers.


Next, I decide on the rhinestone flowers (from the kit) and some puffy hearts for embellishments. I added 3 of the rhinestone flowers on the watercolored flowers. I then added 2 tiny puffy gold hearts by the flowers.


Finally, I adhered the sentiment (from the kit) using a bit of foam. I add a tiny gold puffy heart onto the sentiment.

That's it the card is complete. 

Materials Used:
Couture Creations "Vintage Rose" Collection papers:
Green Gingham Pattern paper and Rose Pattern Paper
Kaisercraft 12" x 12" cardstock sticker sheet - "Romantique"
Thank you for being so Amazing
Tim Holtz Distress Oxide Ink Pad - Tattered Rose
Ultimate Crafts Cutting Die - "Watercolor Bloom"
Pack of Kaisercraft soft pink floral adhesive rhinestones

Other:
Canson Watercolor paper
Recollections Brand Cardstock: Heavy Weight White 110lb
Recollections Brand Washi: Gold Petite Bloom
Recollections Brand: Tiny Puffy Hearts 

Thank you for stopping by the blog today - I hope you found some inspiration!


Be sure to tag us White Rose Crafts LLC on social media 
if you create a project with products or kits purchased on the 

Friday, August 23, 2019

Warm Winter Wish with Maker's Movement

Hello Crafty Friends - I am here with a video tutorial for the Maker's Movement.

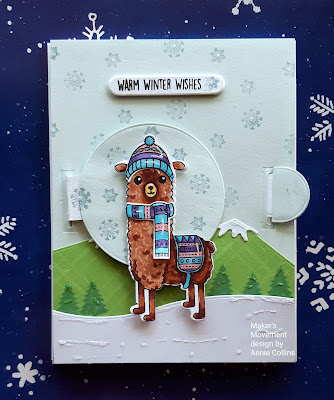
I am honored to have the opportunity to create a few projects for the Maker's Movement and to try out the Die Cutting Machine the Crafter's Edge Crossover II. Along with a Stamp and Die Set and some other dies. 


The front of both cards.


Card # 1 - Warm Winter Wish -- Alpaca Your Bags


Card #2 -- Warm Winter Wishes


Inside of both cards


Here's the Video Tutorial


Materials Used for both cards:

MMT206 - 3.5" Round Awesome Acrylic Block Product Image


MSD202 - Alpaca Your Bags Stamp & Die Set Packaging

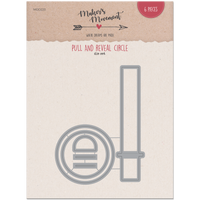
MOD220 - Pull and Reveal Circle Packaging

Xyron Mega Runner Adhesive
Tombow Multi-liquid Adhesive
Tsukeniko Memento Tuxedo Black Ink
Tsukeniko Versafine Onyx Black Ink
Tsukeniko VersaMagic Aegean Blue
Tim Holtz Distress Oxide Ink: Evergreen Bough
Sakura Gelly Roll Pens: Black, White & Sparkle
Neenah Solar White Cardstock
Recollections Brand Cardstock: Heavy Weight White, Light Blue, 
Green, Medium Blue
Martha Stewart Brand: Pattern Paper - Green Plaid

Thank you for stopping by the blog today, I hope you found some inspiration.

Wednesday, August 14, 2019

Tim Holtz Week with White Rose Crafts LLC

Hello Crafty Friends - I am here with a fun Mixed Media Art Piece and a card both using Tim Holtz Idea-ology, Stencil, & Inks 

All week long the White Rose Crafts Design Team has been creating beautiful projects using 

First: Mixed Media Art Piece -- Make Your Dreams Fly 
Please note that I will be posting a sperate tutorial on how I created this piece. 
I didn't want this post to be really long.


Materials Used:
Tim Holtz Alcohol Inks: Sail Boat Blue
Tim Holtz Alcohol Inks: Fossilized Amber
Tim Holtz Alcohol Inks: Citrus
Tim Holtz Alcohol Inks: Flamingo
Tim Holtz Alcohol Blending Solution
Tim Holtz Alcohol Cardstock
Tim Holtz Idea-ology Grungboard Elements: Wings, Flowers, Dots, Key & Swirl
Tim Holtz Stamper Anonymous Stencil: Bubble
Tim Holtz Idea-ology: Big Chat
ICraft Deco Foil Liquid Adhesive
ICraft Deco Foil Silver
Accent Acrylic Paint: Metallic Baroque Pearl
Chipboard


Second: Card -Enjoy the Journey 
Please note that I will be posting a sperate tutorial on how I created this card.


Materials Used:
Tim Holtz Idea-ology: Reinforcers
Tim Holtz Idea-ology: Chit Chat
Tim Holtz Idea-ology: Salvage Stickers (clock)
Tim Holtz Idea-ology: Crowed Attic Pattern Paper (butterfly)
Tim Holtz Idea-ology: Vintage Wire Pin
Sakura Gelly Roll Pen: Metallic Gold
Hero Arts Infinity Dies: Tags
Studio Calico: Tiny Kraft Heart & Tag
Recollections Brand: Fabric tag
Recollections Brand: Cardstock Kraft, White & Cream
Offray Ribbon Metallic Gold
Offray Brand: Pink Twine

Thank you for stopping by the blog today - I hope you found some inspiration!


Be sure to tag us White Rose Crafts LLC on social media 
if you create a project with products or kits purchased on the 

Wednesday, June 19, 2019

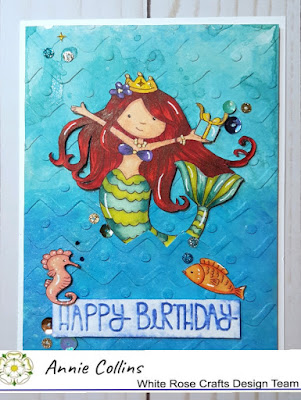
Happy Birthday Mermaid Card with White Rose Crafts LLC

Hello Crafty Friends - I am here with a fun card using embossing folders and an adorable mermaid stamp from Wild Rose Stamps.

If you haven't seen Design Team Member Alison's FB Live Embossapoolza Part 1 - You really need to check it out. 

Now, In keeping with her tutorials - I created this card.


As always - I start by stamping and coloring my images. I fussy cut them and colored the edges with the Memento marker. Then set them side. Next, I trim all my card pieces and grab two embossing folders.

I started by dying an A2 Card front panel of white cardstock using Distress Oxide in Broken China. I did the direct to the paper method and then sprayed some water that has a bit of perfect pearls mixed in. I heat set it.


Once the cardstock panel was dry I used the embossing folder. I then added some Distress Oxide in Mermaid Lagoon and some Distress Oxide in Blueprint Sketch watering them down with the perfect pearls mix for some shimmer.
  

Next, I embossed the sentiment and did the direct to paper technique with Distress Oxide Blueprint Sketch and did again a spray with the perfect pearls water mix.
 

Now, for assembling the card. I gathered all the card components and start by using the precision knife to cut into one of the waves so that I could tuck the mermaid. Then, I added some foam adhesive to the mermaid and placed her onto the card front panel. Next, I added foam adhesive to all of the card front panel and adhered it to the card base. I then adhered the sentiment and seahorse with some foam adhesive and I adhered the fish directly to the card front panel. 


Finally, I added a few sequins from Doodles Paper Playground and the card is complete!

Materials Used:
Memento Pen - Tuxedo Black
*(Please note that I used two folders from my stash.
 However, White Rose Crafts LLC carries a variety of embossing folders)
Sakura Gelly Roll Pens -Metallic Gold, Black & White
Recollections Brand Heavy Weight White Cardstock
Copic Markers: R59, BV17, BG72, BG09, G21, B00, & B01
Spectrum Noir Markers: CR10, DR1, HB1, CT4, GY4, 
BT3, CG1, CG2 MG1, CRI, & BO1,

Thank you for stopping by the blog today - I hope you found some inspiration!

Be sure to tag us White Rose Crafts LLC on social media 
if you create a project with products or kits purchased on the 

Monday, June 17, 2019

Mini Notepad Holder with A2Z Scrapbooking


Hello Crafty Friends - Annie here with a fun project you can make in about an hour or less.

These mini note pad holders are perfect to add to a gift basket or just as is.
Adobe_20190529_204825

So, Let's begin the project. - I like to break it down into a few steps.

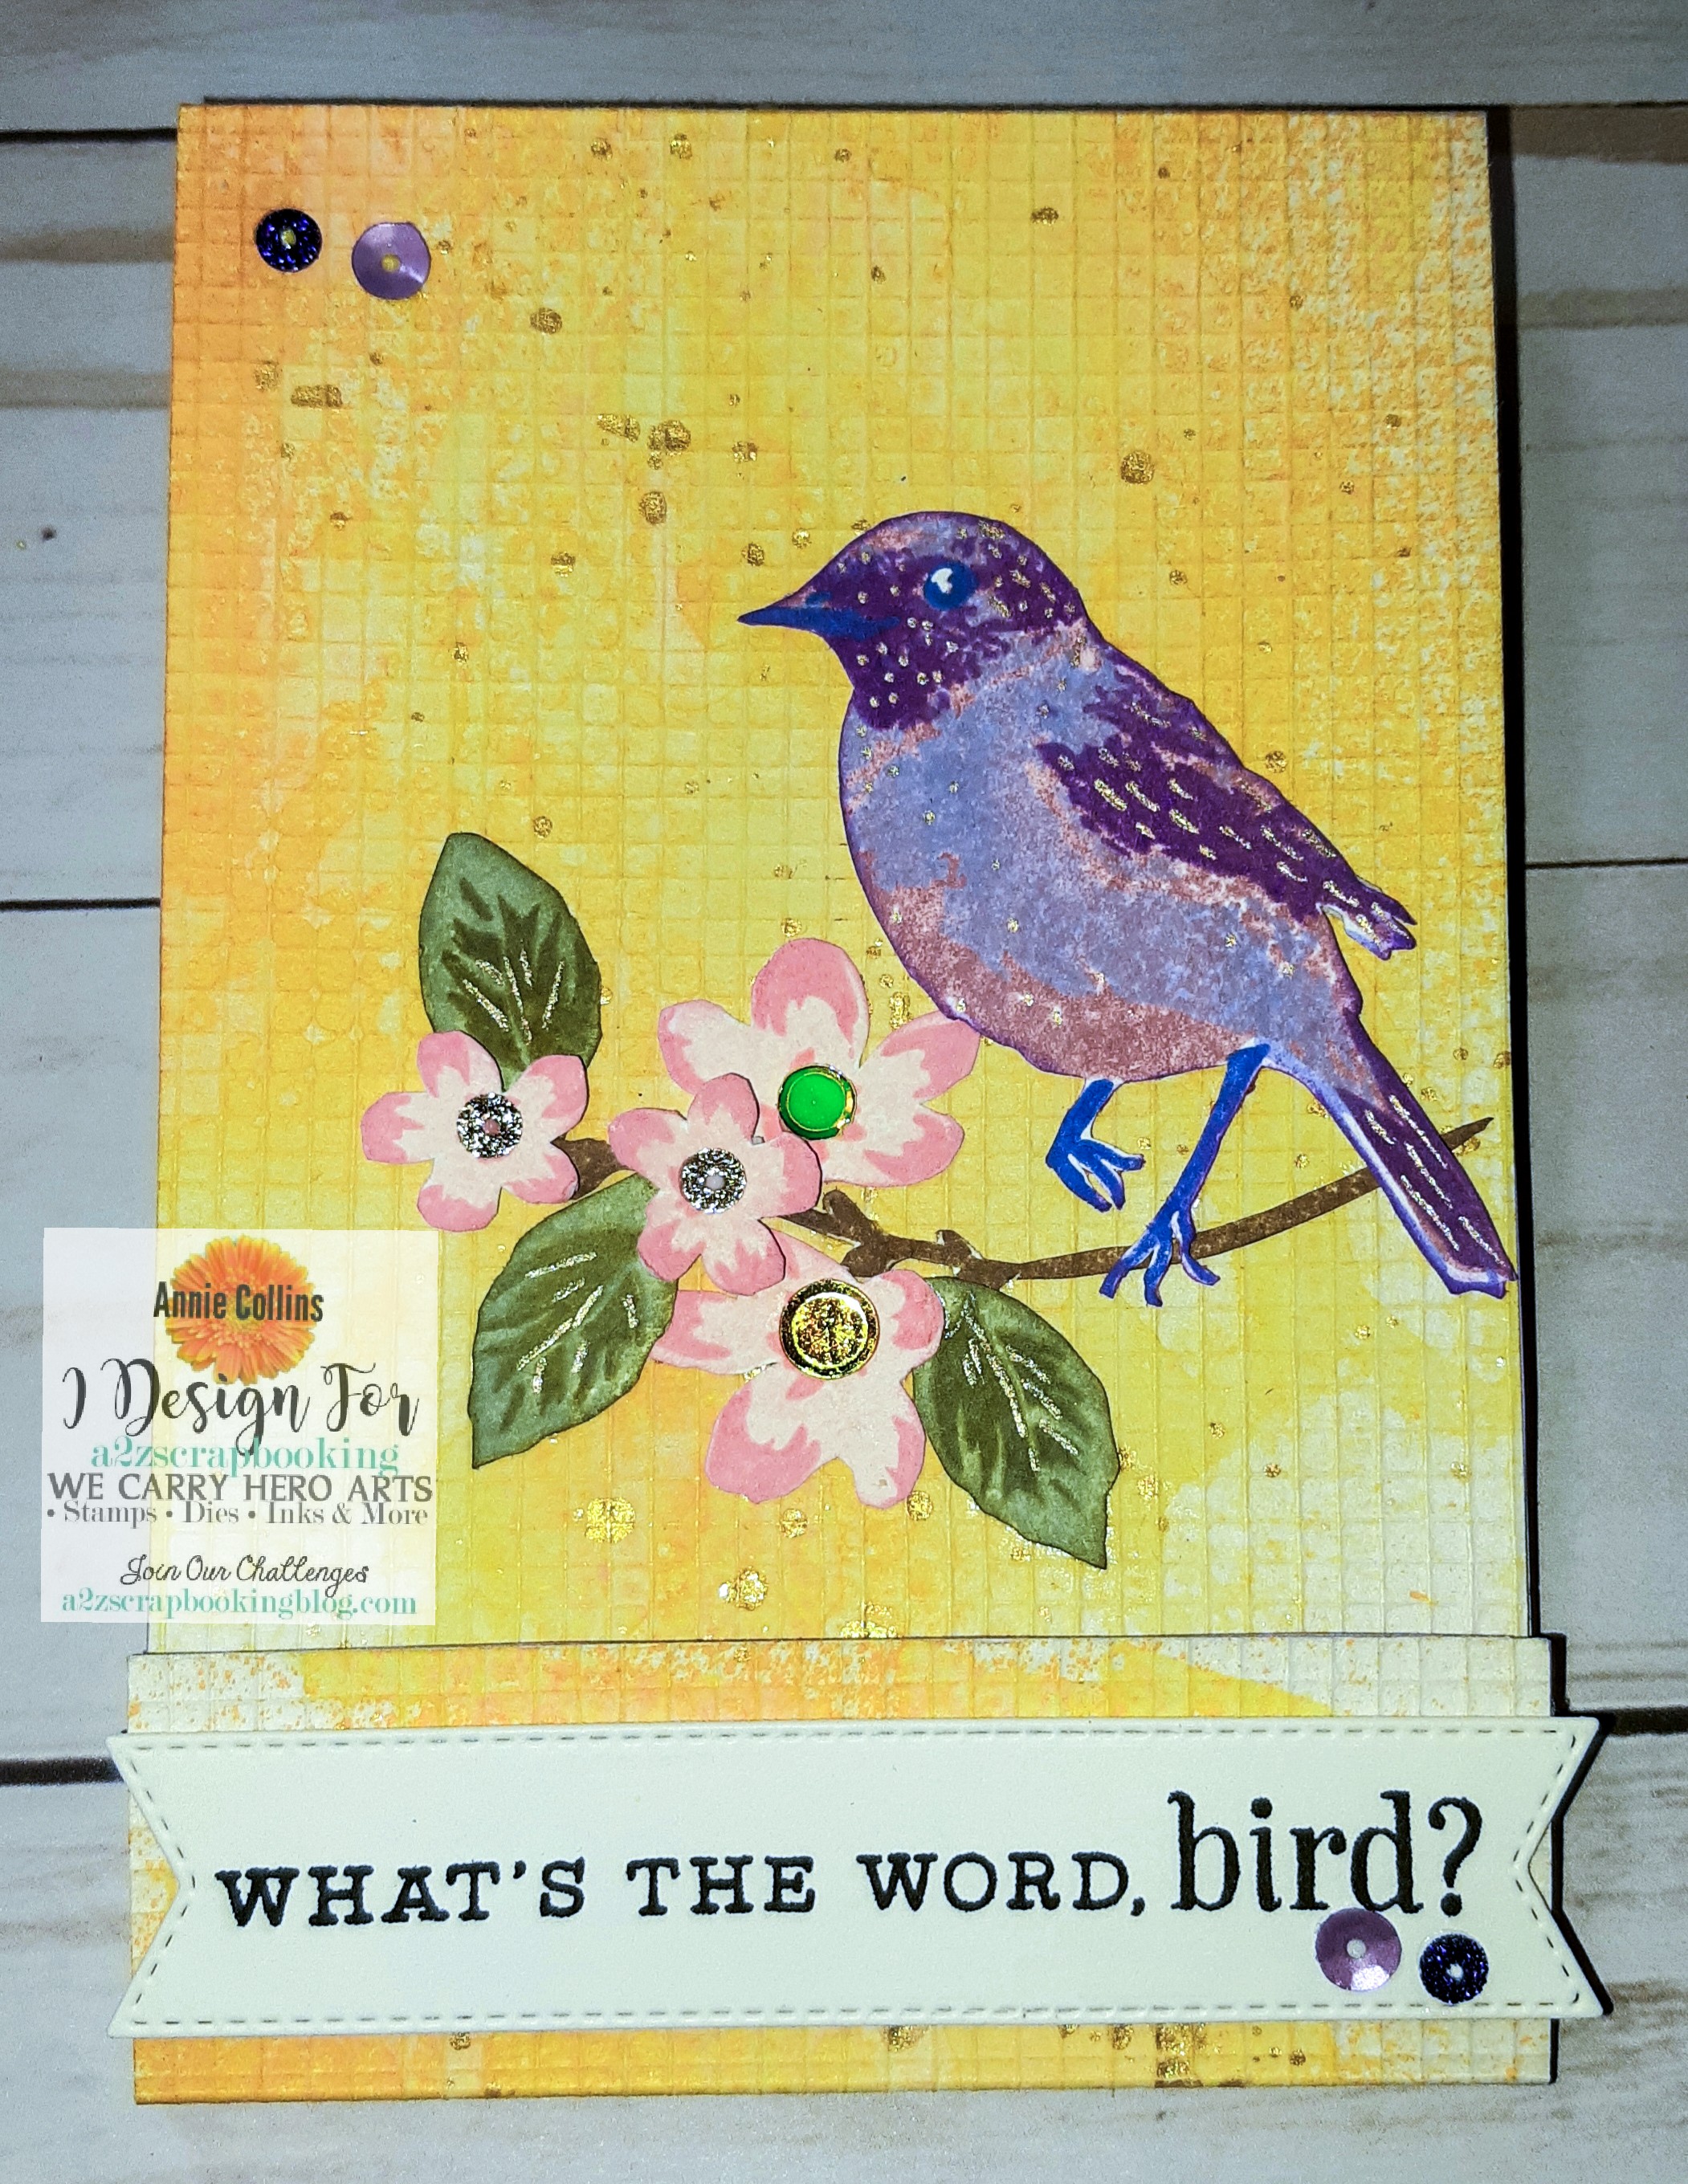
1. Stamp the images (which are layering bird, leaves, branch, and flowers). Fussy cut them. Then, Stamp the sentiment on a banner shape. Set them aside while you work on the cover. Next, trim the 12" x 12" White heavyweight card stock into 3-1/2" x 11-3/4". Save the remaining card stock for another project.
2. let's score the cover for our note pad. Using a scoring board or a trimmer channel - using the bone folder - score at  5" & 5-1/4".  Then at 10-1/4" & 10- 3/8". 
Next, crease the score lines - using the bone folder.


3. Apply a bit of Gesso on to your cover; heat set or air dry. (I heat set mine). Then, Spray some Tim Holtz Distress spray (heat Set). Next, do a few splatters with Heidi Swapp Colorshine.

4. Adhere the pad into the cover. Place adhesive of choice on the back of the note pad and the creased section of the cover. I added an extra piece cardstock to the inside of the cover as well as to the bottom closer.  Press firmly.    
 
 .  

Next, push on the crease to the top of the note pad really sticks to the cover. I use the bone folder to press it. Plus it will give it a nice crisp look.
5. Now, Adhere the branch to the cover. Then, the larger flowers. Followed by the leaves and the smaller flowers which I added a bit of foam adhesive.
 

Nest, adhere the bird to the branch having the back leg touching the branch. Then, add the sentiment onto a banner and adhere to the bottom flap.
 
   
6. Now, for the closer - I peel off one Velcro tab and center it onto the other - stacking them. The Velcro has strong adhesive this is why I only expose one side first - I then center the Velcro stack onto the lower tab - press in place - then remove the remain plastic backing and press the lower tab closed.
 

Finally, Add a few embellishments. I added a few sequins at the top left and by the sentiment. I added one to each of the flower centers.  

Now, your Mini Notepad Holder is complete!
You can Modify this tutorial using a masculine design and colors.

Materials Used:
Hero Arts Stamp Layering Bird and Branch CL866
Heavy Weight Textured White Cardstock
Liquitex Gesso
Dollar Tree Mini Notepad
Sakura Metallic Gelly Roll Pen - Gold
Heidi Swapp Colorshine Gold
Tim Holtz Distress Spray Spiced Marmalade
Recollections Brand Purple cardstock
Tim Holtz Distress Oxide Inks: Victorian Velvet, Shaded Lilac,
Wilted Violet, Blueprint sketch, Tattered Rose, Worn Lipstick,
Bundled Sage, Forest Moss, Gathered Twigs, Squeezed Lemonade
Doodles Paper Playground Sparkle Blend: Sunshine and
Birthstone Collection: February Amethyst

Thank you for stopping by the blog today. I hope you found some inspiration!
Annie