Friday, August 17, 2018

You Make My World Bright - with A2Z Scrapbooking & Hero Arts

 Today, I want to focus on highlighting someone special to you. That person that you feel puts the stars in your world. Hero Arts has created the prefect printable for to create a project for you to let that person or people know exactly how you feel. With the Hero Arts Constellation Printable PT101  PDF - it's so easy to make your projects.


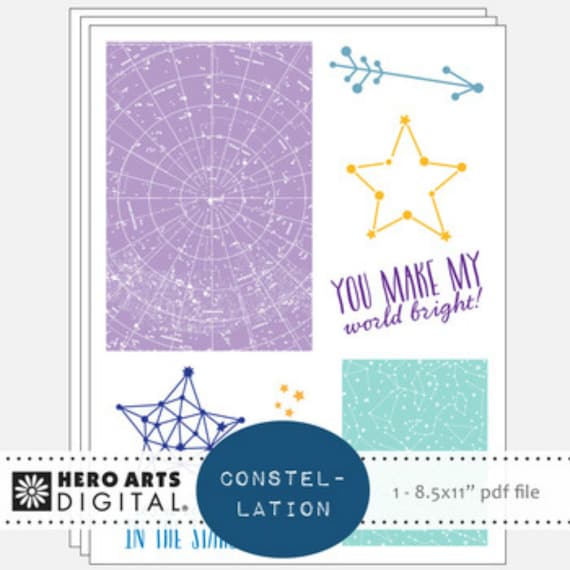
I created this card - I kept it very simple. I only used the Purple Constellation map(top left) and the Yellow Star (top right). Added a few embellishments - a finished card for my special love one that makes my world bright!
You Make my World Bright Card 1
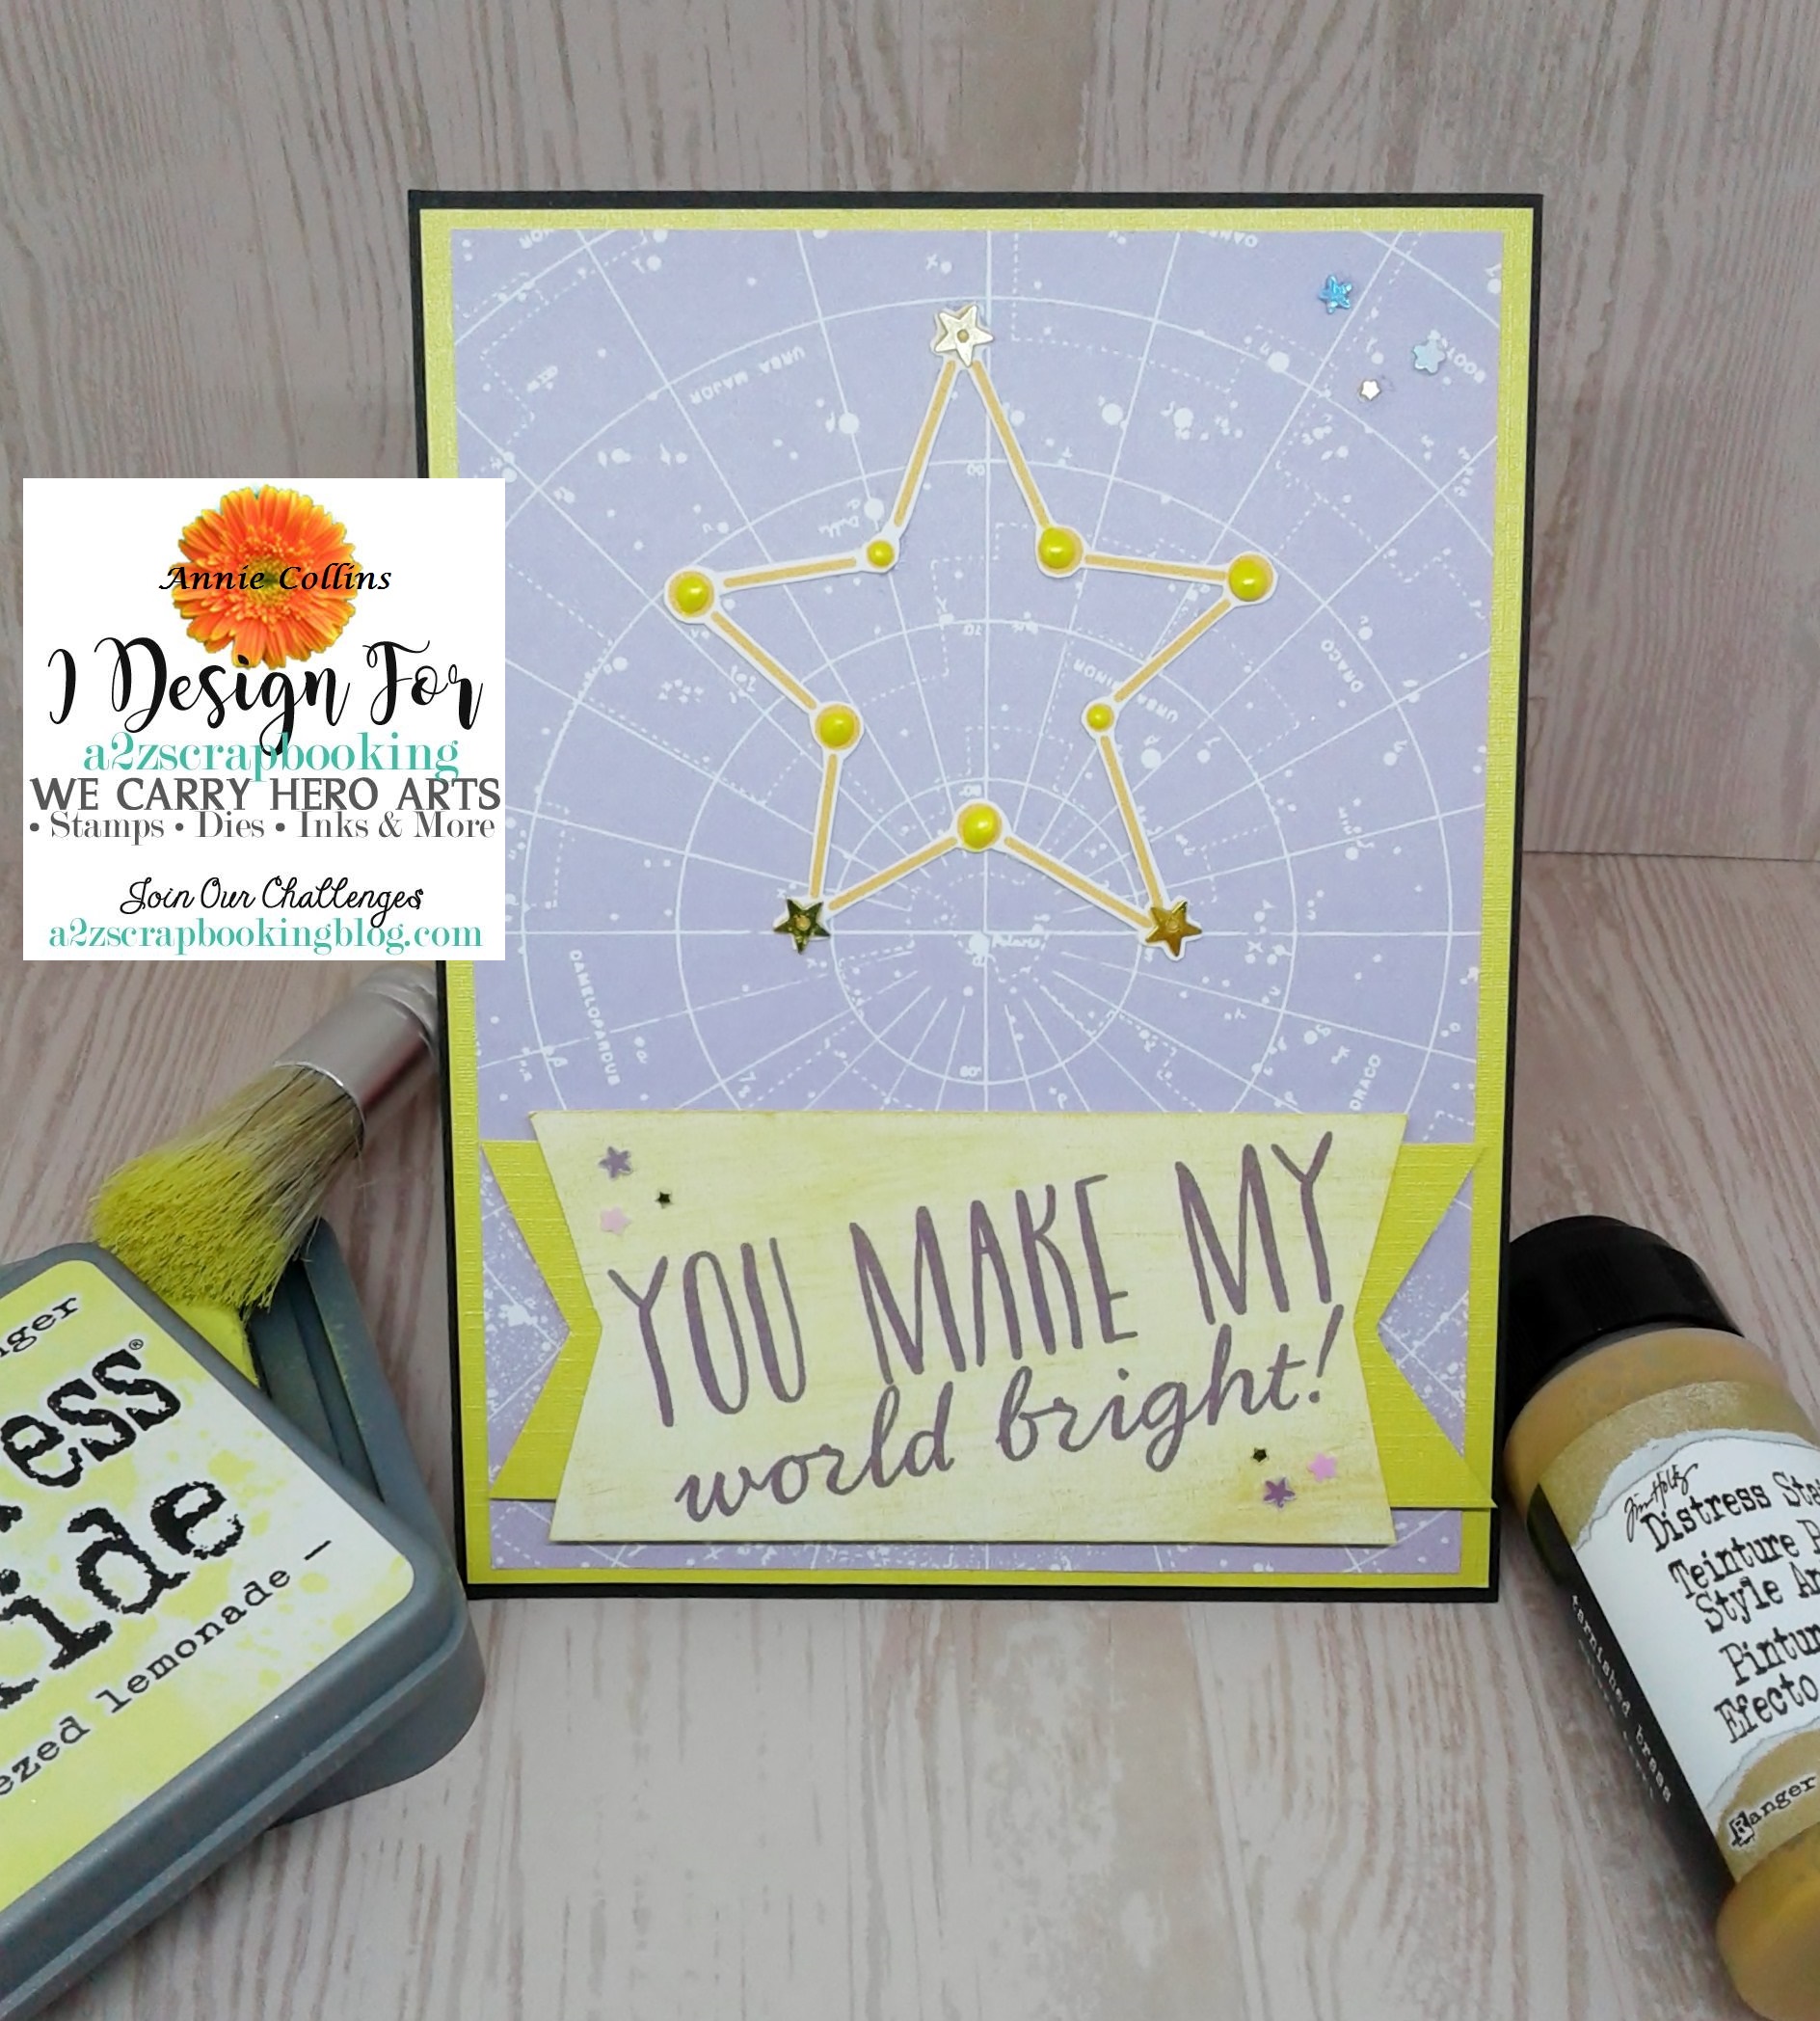
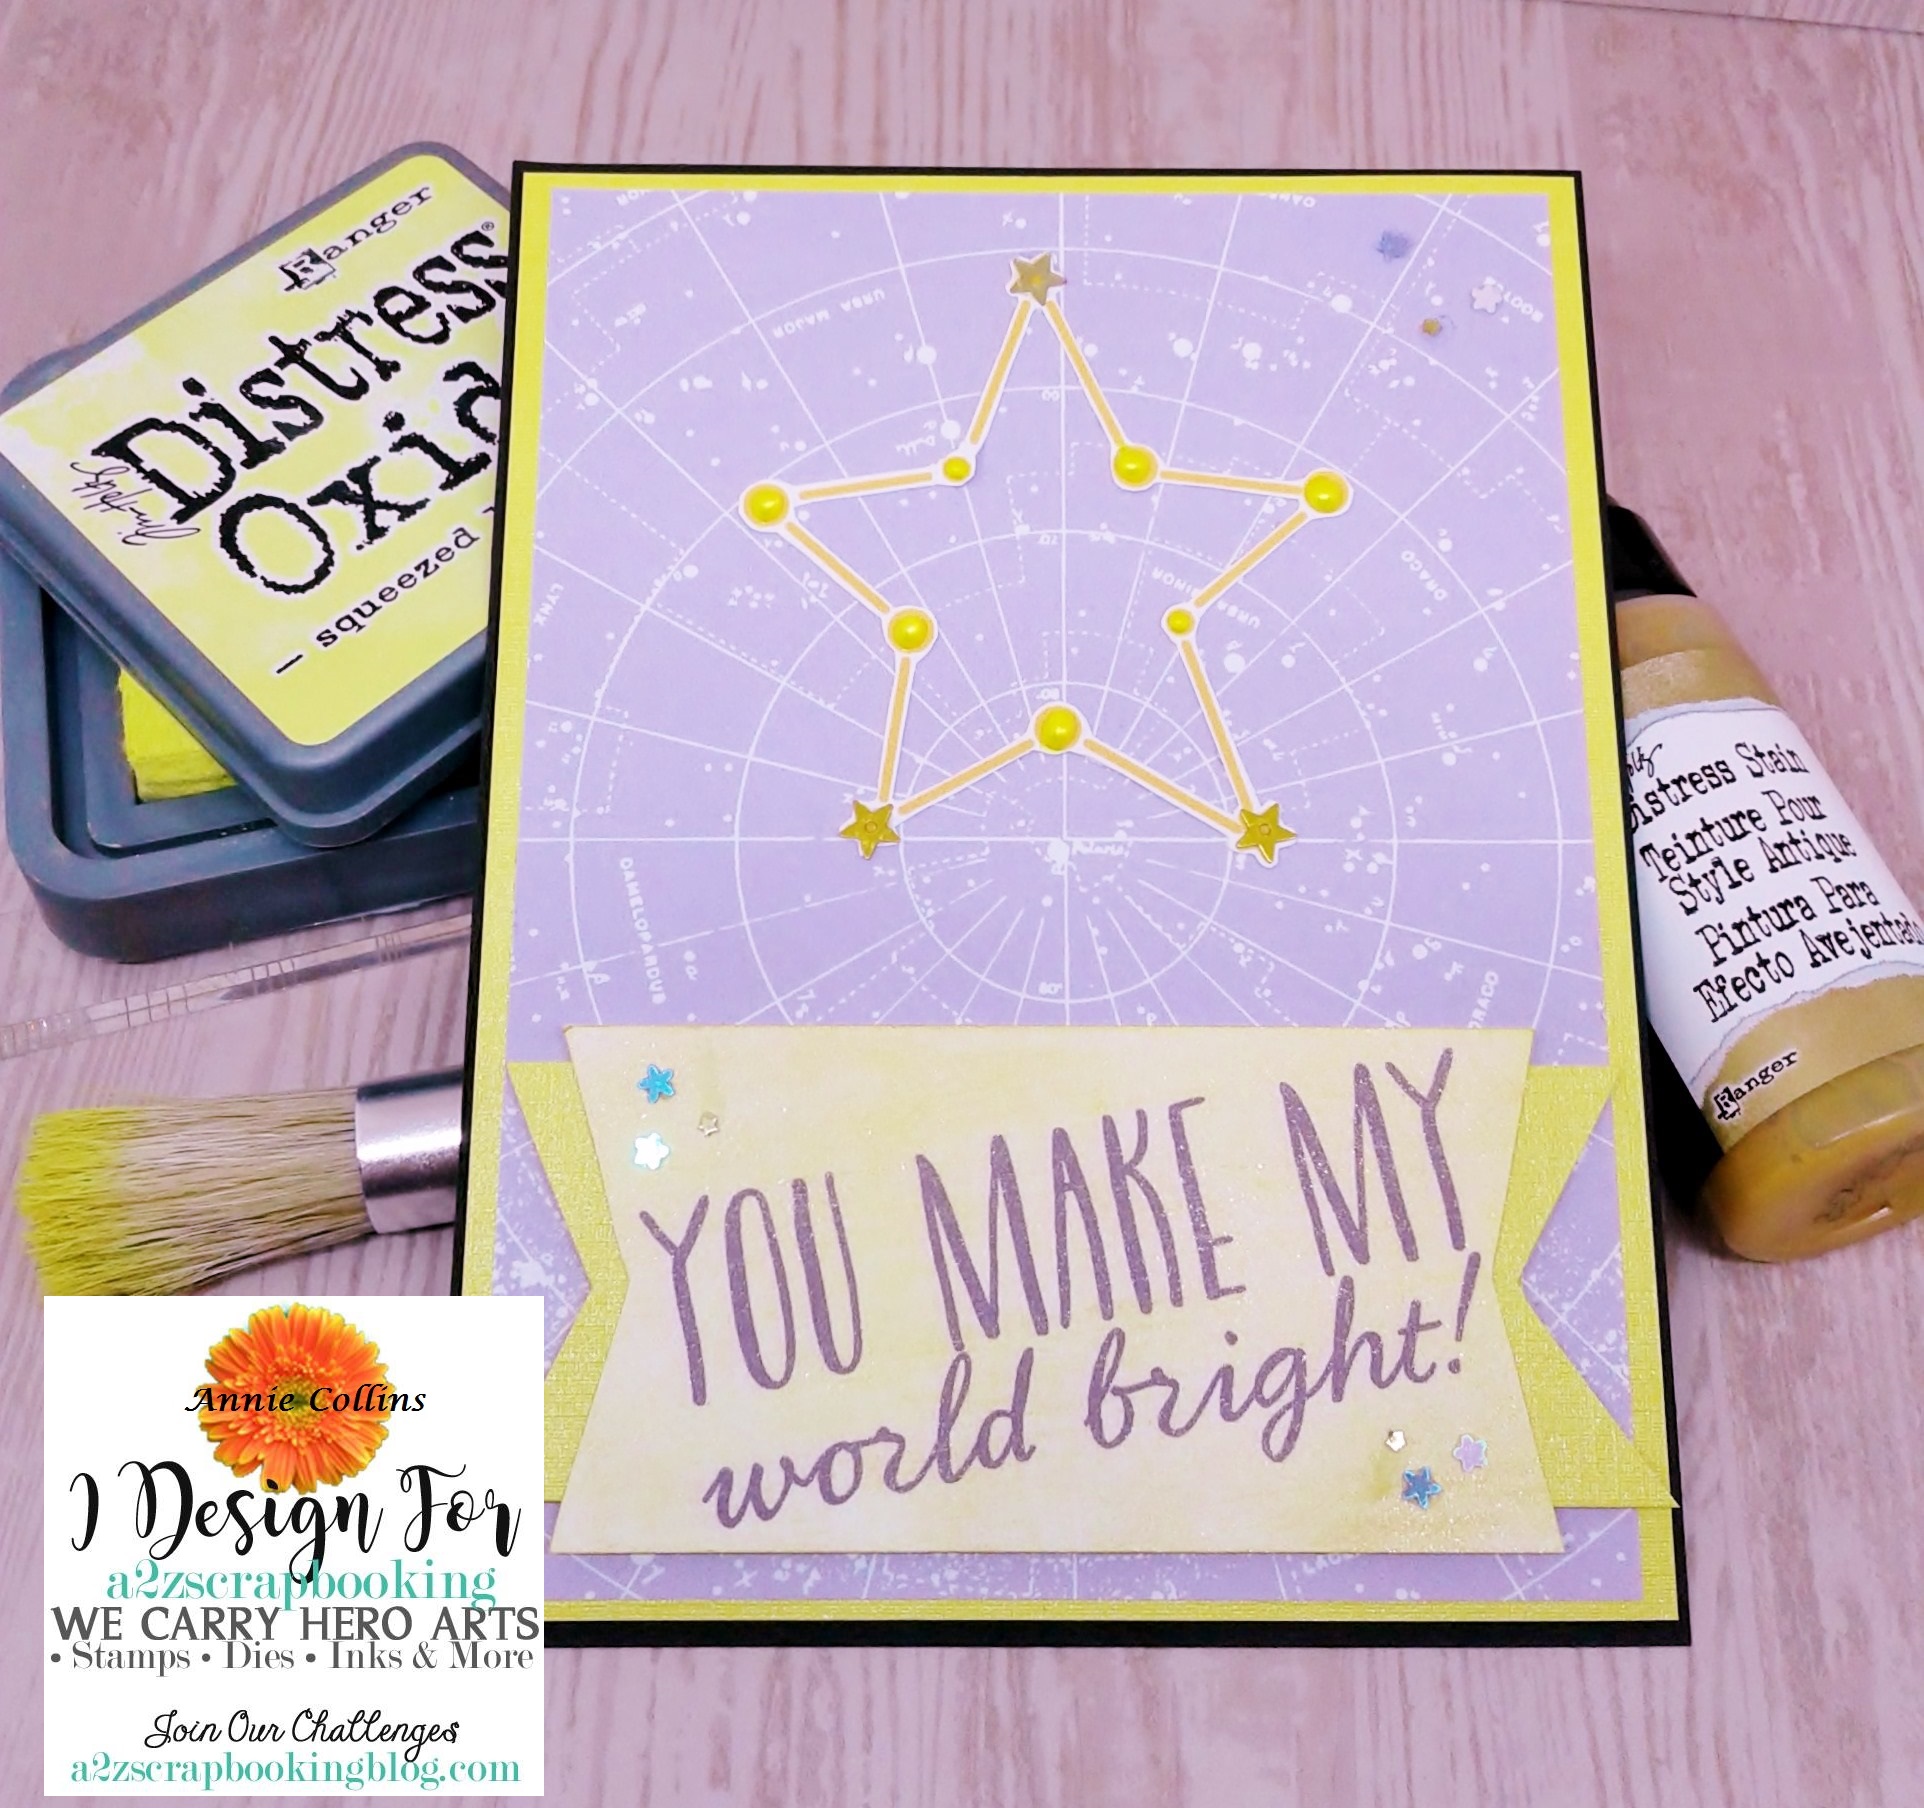
I used Distress Stains (yes they are still awesome) and Distress Oxide to add a bit of color the sentiment. I cut the Star from the pdf as well as the center - because I wanted more of the map to show. I layered the Map onto yellow shimmer cardstock, then put foam adhesive on the back and place it onto black cardstock card base. Next, I placed the Star in the center of the card. Then, I fishtailed my sentiment as well as a 2" piece of the yellow shimmer card stock. Next, I layered them together. Next I added foam adhesive to the back of them and placed the sentiment to the card. As a finishing touch I added a some tiny stars and a few dots of Liquid Pearls.
I hope you give the Hero Arts Constellation Printable PT101  PDF a try. So many possibilities for projects.
You Make My World Bright Card 2
I can't wait to see what you create with it! Have a fantastic crafting day!
Annie

The a2z scrapbooking store carries a wide variety of Hero Arts products! Get discounted new releases, sales, grab bags & more. Proceeds from our store benefit Celiac & Behcets disease foundations. Use my discount code Annie15 to get 15% off your purchase of $25 or more. If you’re looking for a Hero Arts product you don’t see in store, use the Request Custom Order button from with-in the shop.


  • Hero Arts Constellation Printable PT101  PDF
  • Tim Holtz Distress Oxide Ink -  Squeezed Lemonade
  • Tim Holtz Distress Stain -  Tarnished Brass
  • Ranger Liquid Pearls - Daffodil
  • Recollections Brand Heavy Weight cardstock -  Black, Yellow & White
  • Craft Sensations Grafix Brand Shimmer Pearl Finish cardstock - Yellow
  • Tonic Studios Nuvo Deluxe Adhesive
  • Scotch 3M Foam Adhesive
  • Lucy's Card - Little Things - Tiny Stars

Saturday, August 11, 2018

Treasure Tin with Rinea Foiled Paper

Hello Friends - I am here with a quick and easy DIY gift tin. This little tin is prefect for all those small treasures - earrings, rings or small photos of friends & family. Whatever, your special treasure is this tin is a great place to store it.
This simple and sweet tin features the Princess Foiled Paper Variety Pack and this month's special collaboration with Joy Clair Stamps. I was given the privilege to work with Joy Clair's Doodle Flowers stamps.
Materials Needed:
Princess Foiled Paper Variety Pack - Crafter's Pack -6" x 12"
Starstruck Jade foiled paper
Joy Clair - Doodle Flowers Stamp Set
Small 4" x 1-1/4" tin or box
Tsukineko Stazon Ink - Jet Black
Adhesive (I used Tonic Studio Nuvo Deluxe and Aleene Clear Gel Tacky Glue)
Small Embellishments (I used Ranger Liquid Pearls in Gold)
Trimmer & Scissors
Stamp block/ platform 

So, let's get started.
1. Trace the lid of the tin onto scratch paper. You just need it as a easy template. If you have a 4" circle die - you can use that instead. Cut the 4" circle from the desired Foil Paper. I used the Starstruck Lavender Light Purple. Next, cut 2 strips from the same Foil Paper - one measuring 1/4" x 12" and the other 3/4" x 12". these will go around the lid and base of the tin. The paper is just shy of the full circumference of the tin - I needed a small filler piece of the Starstruck Lavender Light Purple. 
2. Adhere all the cut pieces to the tin. Circle on the top of the lid. The 1/4"  x 12" around the lip of the lid. and 3/4" x 12" around the base of the tin. Set aside to dry.
3. Stamp the desired amount of flowers* using the Joy Clair - Doodle Flowers Stamp Set using Tsukineko Stazon Ink - Jet Black. You want a multi-surface ink - because the foil paper is slick. I used from the  Starstruck Blush Pink, Starstruck Silver Glossy Blush Pink/Gold and Glossy Lavender Light Purple/Gold.  I also used some Starstruck Jade foiled paper. Next, fussy cut the flowers out. Then arrange the flower as you wish onto the lid of the tin. Adhere in place.
4. Embellish as desired.
Now you have a complete Treasure Tin - Perfect to give to that special someone.
I hope you enjoyed this quick tutorial. If you create a Treasure Tin of your own be sure to share it with us!!
Have a Crafty Day!

Friday, July 27, 2018

Beth Duff Designs Summer Release Blog Hop

We are so happy you joined us for Beth Duf Desgns's Summer release blog hop!

These sets are so fun and we can't wait to see what is on your must have list.  Please join us and visit each page in the hop.  By leaving a comment on each of the blog posts you will automatically entered to win a coupon for 15 % your purchase on our site! This contest is open to both US and Int'l fans.  Thank you so much for joining us, and make sure you join us on Facebook to share your own projects and see what else our team comes up with!

Some Fun with the Hawaii Set - I created 5 x 5 cards with matching envelops with this set. I did lots of layers on both cards to really convey the ocean. A some shimmering washi tape to give the glimmer of the ocean.


Card One - Little Surfer Girl - Aloha 


Card Two - See you on the Next Wave.
Both of this cards images were colored with Spectrum Noir Markers. 1. I used Recollections Surf 's Up Signature Paper Pad and Heavy weight card stock in Light Yellow & White. Finishing touch of a bit of Zig Wink of Stella in Clear.
2. I used Recollections Heavy weight card stock in Light Blue & White.
Sandylion Tape Works Washi in Ocean Waves, Heidi Swapp Marquee Love Glitter tape in Blue.  


Next stamp set I had a blast playing with is Seekers of Justice. These Super Heroes seek to expose darkness and promote courage all while staying humble! They are simply adorable.


Card One - Expose Darkness

Card Two - Seek Justice

Card Three - Be Strong and Courageous

Card Four - Rise Up
All of these little heroes were colored with Spectrum Noir Markers. I used Momenta Super Hero Specialty Collection Pattern Paper Pad. I used Recollections Heavy weight card stock in White(card bases), Black and Yellow.. Finishing touches of Sequins and Zig Wink of Stella for some shimmer.

So, hop along to the rest of the design team to see their beautiful creations!! Don't forget to leave a comment on each team member's blog to be entered into the contest.

Beth Duff Designs - https://bethduffdesigns.blogspot.com/?m=1
Niccole - https://www.nicandviv.com/.../beth-duff-designs-summer...

Rachel - https://rwinncreates.blogspot.com/.../adventures-abroad...

Annie - https://littlewingscreates.blogspot.com/.../beth-duff...

Kel - http://www.scrap-photograffs.com/?p=9569


Marcia - https://www.thefrolickingfairy.com/.../beth-duff-designs...

Tania - https://paperandme2.blogspot.com/.../beth-duff-july...

BreAnn - https://breannlovelandcards.wordpress.com/.../seas-the-day

Lynnea - https://sparkliiecreations.blogspot.com/.../beth-duff...

Amanda - https://pearblossompress.com/super-birthday-box-card/

Annalisa - https://faith-dream-create.blogspot.com/.../beth-duff...

Alison - https://alisonsrandomthoughts.blogspot.com/.../this-trio...


Sprinkles Too!! with A2Z Scrapbooking


Hello Friends - here with another fun card. Today, I am using the Sugartree  Stamps Party Animal Set.  I thought why not make another card. Of course, I mentioned I would be using all the fun stamps and sentiments in this set.


This is the card I created for you today. Simple and fun!


I colored the Cupcake image using my Spectrum Noir Markers. Then, fussy cut it out. Next, I colored the edges with my Tuxedo Black Memento marker. I added highlights with a white gel pen to the cupcake wrapper. I added some Wink of Stella for some shimmer to the cupcake top. Next, I die cut the  sentiment using a rectangle die. I foam mount the sentiment and set it aside.

Now, I created my card base 5 x 5 size. Next, I cut the 2 cardstocks (black and shimmer deep purple) pattern paper 5 x 5 - then, I trimmed each  1/4″ smaller - so that I could have a nice border around each layer and the cardbase.  Adhered the cardstock & pattern paper to the card base. Next, I adhered the sentiment to the lower part of the card. I foam mounted the Cupcake and placed it above the sentiment making sure to center it.

For some finishing touches - I added some Nuvo Crystal Drop, Liquid Pearls to the cupcake top and 2 small shimmer Jewels and 1 small shimmer heart to the sentiment.

I hope you create your very own Party Cupcake card and celebrate with a Family member or a friend or two. I can’t wait to see what you create!!
Annie
Are you on social media? We are! Please join us on TwitterInstagram and Facebook? So – you don’t miss any fun promotions or new challenge announcements!
Hero Arts Monthly Challenge


a2z scrapbooking july 2018 challenge
Please join us in this month’s “Birthday Bash” challenge for your chance at a free digital stamp AND, if you used Hero Arts or Sugartree Stamps, a $20 gift card to our a2z Scrapbooking Etsy store. Our current monthly challenge can always be found in the menu bar, and runs from the 1st to last day of the month.

a2z scrapbooking store hero arts


The a2z scrapbooking store carries a wide variety of Hero Arts products! Get discounted new releases, sales, grab bags & more. Proceeds from our store benefit Celiac & Behcets disease foundations. Use my discount code Annie15 to get 15% off your purchase of $25 or more. If you’re looking for a Hero Arts product you don’t see in store, use the Request Custom Order button from with-in the shop.

  • Sugartree Stamps Party Animal Digital Stamp set
  • Spectrum Noir Markers - DP2 & DP3 for the cupcake topper, GT2 & GT3 for the cupcake liner
  • Recollections Heavy Weight cardstock in White, Light Pink, & Black
  • Craft Sensations - Linen Cardstock - Shimmer Deep Purple
  • DCWV - Good Eats Premium Stack - Sprinkle Pattern Paper 
  • MFT  Dies – Stitched Rectangle
  • paper pad
  • Memento Marker - Tuxedo Black
  • Tonic Studios Nuvo Crystal Drops - Red Berry, Simply White, Midnight Blue, Duck Egg Blue & Wisteria Purple
  • Ranger Liquid Pearls - Key Lime, Daffodil, Cantaloupe & Pumpkin
  • Zig Wink of Stella – Clear
  • Gelly Roll Gel Pens – White
  • Scotch Tape Runner
  • Scotch Foam Tape
  • Tonic Studios Nuvo Deluxe Adhesive

Thursday, July 26, 2018

Let's Play Ball with Rinea

Hello, Annie here with a cute baseball cap using the Rinea Patriotic Variety Pack - Crafter's 6"x 12". I used Starstruck Sapphire Blue, Starstruck Ruby Red and Starstruck Silver for this project.

This small cap is perfect for celebrating with your favorite team weather it's Major league or a Little league team. Since Rinea carries a variety of wonderful colors in there paper foil collection I am sure you can find the to match your favorite team!

I can't wait to see your small cap be sure to share with us on any social media platforms. 

Tuesday, July 24, 2018

Party Animal with A2ZScrapbooking


Hello Friends - I am  here with another fun card. Today, I am using the Sugartree  Stamps Party Animal Set. Having a child born in August along with a few friends - I thought the Lion parting was perfect for a few cards. Of course, I will be using all the fun stamps and sentiments in this set.


This is the card I created for you today. Simple and fun!

Party Animal Card

I colored the Lion and balloon image using my Spectrum Noir Markers. Then, fussy cut him out. I cut off the balloon strings and then hand drew some in. Next, I die cut the  square and 3 extra balloons from card stock. I die cut the sentiment using a rectangle die. I foam mount the sentiment and set it aside. I added highlights with a white gel pen to the balloons, once dry; I added some Wink of Stella for some shimmer. Set aside.

Now, I created my card base (A2 - 4-1/4 x 5-1/2), Cut the Crate Paper hats chevron pattern paper to 4 x 5-1/4" so that I could have a nice boarder around the card.  Adhered the pattern paper to the card base. Next, I placed the sentiment at the bottom of the card. Then, I adhered the Lion and balloons to the square die cut. Drew a few strings using a black gel pen making sure to match up the tail of the lion. I then placed 2 of the extra balloon die cuts at the top right - drew some strings. Placed the smallest balloon die cut on the square panel with the lion.  Foam adhered the square to the card base.
For some finishing touches I added 2 yellow confetti circle to the left bottom of the sentiment.

I hope you create your very own Party Animal card and celebrate with a Family member or a friend or two. I can't wait to see what you create!!
Annie

Tuesday, July 17, 2018

Feel The Rainbow


Today I am here with my first project and post for A2Z Scrapbooking I am so honored to be a part of this amazing Design Team.

For this post I created a simple card using the Hero Arts Silly Scapes Digital Stamp which can be found in the A2Z Scrapbooking Store. I wanted to create a fun and bright silly city - what's more fun than a bright rainbow!

20180628_212118


I started by printing the Silly Scape Digital Set onto white heavy weight cardstock  - which includes the Silly building and cloud background. Then, I ran the building through my Scan N Cut Machine. I trimmed the cloud background, along with my card base and a strip of grey cardstock.  Next, I colored the building with my Spectrum Noir Markers in rainbow order.

Then, for a total of 4 trees - I cut tree base using Lawn Fawn die and some Anna Griffin leaves (which I turned into trees) I also punched a small circle using a Fiskars punch for my tree top for soft  shape from brown and green cardstock. I used a Hello die from Your Next Stamp - I cut 4 of them from black cardstock. Next, I layered and adhered the trees (aka leaves), the hello. Set them aside to dry.

Now, I adhered the cloud print to the card base. Next, I used foam adhesive to raise the building a bit from the background. I then tucked the strip of grey cardstock just under the building for a sidewalk. Next, I tucked a few trees behind the buildings and layered two in front of the building using a bit of foam adhesive to make them even. Then, I adhered the hello on the top. For a finishing touch I used a bit of Wink of Stella in clear on the hello.
I hope you create your very own Silly Scape rainbow city. I can't wait to see what you create!!
Annie
Are you on social media? We are! Please join us on TwitterInstagram and Facebook?so you don’t miss any fun promotions or new challenge announcements!

Hero Arts Monthly Challenge
 
a2z scrapbooking july 2018 challenge
Please join us in this month’s “Birthday Bash” challenge for your chance at a free digital stamp AND, if you used Hero Arts or Sugartree Stamps, a $20 gift card to our a2z Scrapbooking Etsy store. Our current monthly challenge can always be found in the menu bar, and runs from the 1st to last day of the month.

a2z scrapbooking store hero arts
 
The a2z scrapbooking store carries a wide variety of Hero Arts products! Get discounted new releases, sales, grab bags & more. Proceeds from our store benefit Celiac & Behcets disease foundations. Use my discount code Annie15 to get 15% off your purchase of $25 or more. If you’re looking for a Hero Arts product you don’t see in store, use the Request Custom Order button from with-in the shop.


  • Hero Arts Silly Scapes Digital Stamp
  • Spectrum Noir Markers
  • Recollections Heavy Weight cardstock in White, Grey, Black, Green and Brown
  • Lawn Fawn - Stitched tree boarder
  • Anna Griffin - Mini 3D Flower Die (leaves only)
  • Fiskars Circle Punch-  Small
  • Zig Wink of Stella - Clear
  • Tonic Studio Nuvo Deluxe Adhesive 
  • 3M Foam Adhesive