Friday, March 15, 2019

Spring Cottage with Simply Crafty SVG

Hello Crafty Friends - I am here with a fun Spring project.

I turned the Love Shack SVG from Simply Crafty SVG into a cut Spring Cottage. Now, this little house is a gift box. So, you can place a small gift inside for a loved one or you can fill it with some sweets and place it on your coffee table or desk.

I created the little house as per the directions provided with the download from Simply Crafty SVG.
I love that Sandy provide both easy to follow PDF and Video for all the SVG projects on the site.

I simply changed my colors to Springtime colors and added a few extra embellishments like die cut grass, flowers, butterflies, bird, tiny cat & tree. I also added a few stamped images like the potted plants on the front porch and the bird fountain on the back of the house. I also added some curtain from pattern paper.


The sides of the Cottage


The back 

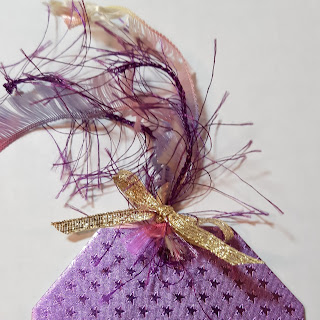
Some close up details of the roof, windows & Butterfly


I hope you create a Springtime Cottage of your own.

Be sure to join us over on the Facebook Group Simply Crafty SVGs Creators Group
If you create any of the Wonderful Project designed by Sandy from Simply Crafty SVG share them with us in the group and social media.

Tuesday, March 12, 2019

Never Give Up Card with White Rose Crafts LLC

Hello Crafty Friends - I am Guest Designing for White Rose Crafts LLC this month. It's an honor to be working with Kay and her team. 

Today, I am here with a quick and easy card 
using this month's kit called Blue Skies.

This kit is beautiful - it has shades of blue, rich gold, butterflies,
 uplifting quotes and a fantastic stamp by Kaisercrafts.

So let's get started on the card.

I started by trimming the floral paper to 4" x 5-1/4". I pulled a piece of Navy cardstock from my stash and trimmed that to 4-1/1"" x 5-1/2". Next, I die cut a circle from the rich gold specialty cardstock from the kit. Then, I trimmed the sentiment I wanted to use from one of the pattern papers from the kit.

Once, I had my papers, sentiment and other supplies gathered I created the card.

I matted the floral pattern paper onto the navy cardstock. Then, I used low profile foam adhesive on the back of the gold circle and adhered it the lower right of the card front.

Next, I turned my attention to the chipboard butterfly. I used Distress Oxide Ink in Squeezed Lemonade directly onto the butterfly. I lightly dried it between layers of ink with my heat tool. Next, I sprayed the New Distress Oxide Spray in Mermaid Lagoon. 


Once it was dry I flipped it over and added low profile foam adhesive onto the back of the butterfly. Then, place it onto the gold cardstock circle.

Next, I added the sentiment on top of the butterfly again with low profile foam adhesive. I was now ready to add some finishing touches.

I add a few sequins from the Sunny Skies Sparkle Blend that comes in the kit. I also added from the Sparkle Blend the little gold coils to the antenna. I adhered the card front to a top folding card base.  

Now the card is complete!

You can create a similar card with the contents
 of the March's Blue Skies Kit available now.

Supplies Used:
Ingio Skies Pattern Papers, Gold cardstock & Sequins

Thank you for stopping by the blog today!

If you would like to join in the fun for the White Rose Crafts March Sketch Challenge, and other fun activites and conversations make sure you join the 
White Rose Crafts Gallery group on Facebook!

Monday, March 11, 2019

Happy Easter Tag with Rinea Foil Paper

 Hello Crafty Friends -I am here with a fun Easter tag.

With some die cutting and a bit of stamping you can create some tags for those Easter Baskets, you are creating for your family.
Recollection Brand 110lb White Cardstock
EK Success Mini Flower Punch
Offray Ribbon - Gold Metallic
Ranger Liquid Pearls - Gold Pearl
Assorted Fibers 
Adhesive: Tape Runner & foam 

So let's get started
First, stamp and color the Easter eggs. I used 3 in total. As well as the word Happy - trim and set a side. Next, die cut the tag once from white cardstock (so I could have a place to write a quick note) and once from Rinea Starstruck Lavender Foil Paper

Then, die cut the word Easter 2x once from white cardstock and once from Rinea Glossy Gold Foil Paper. Next, Punch a few flowers (as many as you like) - This just gives the eggs a place to sit so they don't look like they are floating.

Next, adhere the two tags together. Repeat the process with the word Easter.


Now that the tag is ready to decorate - adhere the three Easter Egg to the tag. Place them towards the bottom of the tag. Popping up the center egg.

Next, adhere the flowers beneath the eggs. Layering them to create a lovely little nest for them.


Then, adhere the word Easter toward the top of the tag. Adhere the stamped word Happy to the tag - tucking slightly into the word Easter.

Next, cut your fibers and ribbon. Attach them to the tag. I add the fibers through the hole. Then, tied the ribbon around the fibers and made a bow.


Finally, add a bit of Liquid Pearls to the center of the flowers.


Your Tag is now complete. You can make as many as needed. The image can be changed to a more masculine design as well as the colors - Rinea carries a great variety of Foil Paper in an assortment of colors.

Thank you so much for stopping by the blog today. 

Saturday, March 9, 2019

Your My Lucky charm Card with Doodles Paper Playground

Hello Crafty Friends -- I am here with another fun featuring the Good Luck Charm Sparkle Blend from Doodles Paper Playground. 

I love this blend with its little shamrocks, lucky horseshoes and two tone hearts! 


A bold blend consisting of mostly bright greens, 
this blend is packed with shamrock confetti, 
offset nicely with a scattering of metallic gold and 
sliver sequins and confetti, and just a touch of white. 
A few large horseshoes finish off this fun, festive blend.


Here is the shaker card I created using this fantastic blend. 


Thank you for stopping by the blog today! 

Be sure to tag us Doodles Paper Playground on social media 
if you create a project with our Sparkle Blends.
 All of our Sparkle Blends can be purchased on the 

Tuesday, March 5, 2019

Retro Glam Tags with The Robin's Nest

Hello Crafty Friends - Annie here with some tags -
 that would compliment any Gift, card, scrapbook layout, travelers notebook or canvas.

They are easy to put together.


Both tags are basically put together in the same way. except for the Ephemera card and embellishments.  I die cut the tag from the Glitter Chipboard. I also die cut the reinforcer in a coordinating color from cardstock. I adhered the reinforcer to the tag. I then adhered the ephemera card using low profile foam tape.

For the feminine tag, I did ink the edge with a bit of Distress Oxide ink in Carved Pumpkin to bring out the orange tone a bit more.

I then, add the embellishment of the Dew Drops, flowers and fibers.

Quick and easy!

Feminine Tag


Pink Glitter Chipboard

Orange Crush Cards

Butterflies Dew Drops

Fall Gems Diamond Dew Drops

Black/White/Silver Dew Drops

Other Supplies used:
Hero Art Infinity Tag Dies
Prima Mini Mulberry Flowers
Distress Oxide Ink - Carved Pumpkin
Assorted Fibers
Jot Brand Low Profile Foam Adhesive
Aleene's Tacky Glue


Masculine Tag


Teal Glitter Chipboard


 Rusty Rose Cards

Fall Gems Diamond Dew Drops

Precious Boy Diamond Dew Drops

Other Supplies used:
Hero Art Infinity Tag Dies
Assorted Fibers
Jot Brand Low Profile Foam Adhesive
Aleene's Tacky Glue

Have a Great Crafty Day!!
Stop by and shop for your favorite Dew Drops and More
 at Robin's Nest Store

Saturday, March 2, 2019

Spring Card with Doodles Paper Playground

Hello Crafty Friends - I am here with a cute spring card for you featuring Spring Fling and
 Flower Power Sparkle Blends.

With Easter just around the corner, 
pastels are all the rage in the crafting world, 
and this blend delivers! 
With a beautiful base of pastel pink, lavender, green,
 light gold & blue, metallic cup sequins 
and a generous amount of tiny pastel heart confetti, 
but we also added a touch of whimsy with pastel 
colored butterflies and 
beautiful faceted crystals. 

For a floral fanatic, this blend is perfect! 
We skipped the usual cupped sequins in favor of nothing but 
flowers in this bright, happy blend!
 Flower styles range from simple daisies to 
tropical fimo slices and holographic blooms.

I also use March's Sketch from White Rose Crafts LLC. which is part of this month challenge in the Facebook Group Gallery


Here is my card 

Supplies Used:
Simple Stories Pattern Paper
Recollections Brand Cardstock: White, Light Yellow & Kraft
Arteza Real Brush Watercolor Markers:
Royal Blue, Bright Blue, Lemon Yellow, Orange,
Neon Pink, Seaweed Green, Light Green & Chocolate

Thank you for stopping by the blog today! 

Be sure to tag us Doodles Paper Playground on social media 
if you create a project with our Sparkle Blends.
 All of our Sparkle Blends can be purchased on the 

Wednesday, February 27, 2019

Love you More Card with A2Z Scrapbooking

Hello Crafty Friends - I am here with a CAS card.

This month we're using a Mood Board to inspire us
No photo description available.

I am using the

20190226_213202

I simply printed the digital download and cut the dragonfly I wanted to work with from the rest. Colored it in with some Arteza Real Brush Markers for a soft watercolor effect.  Then, Fussy cut it. Next, I die cut the word LOVE twice - once from plain white cardstock one once from Rinea Ruby Glossy Foil Paper. Stack and glued the layers to create a chipboard word. I stamped the sentiment You More on white cardstock and cut it into a thin strip. I adhered all the elements on to card front panel which measures 4" X 5-1/4" I made from tone on tone pink pattern paper and medium gray cardstock for a nice mat. I then stamped a few hearts for a dragonfly trail. Finished it all off with some small gray and pink sequins and a bit of Wink of Stella on the wings.

20190226_213505
Thank you for stopping by today.
You can find me at Little Wings Create.
Hero Arts Monthly Challenge


No photo description available.

Please join us in this month’s “Mood Board” challenge for your chance at a free digital stamp set AND, if you used Hero Arts or Sugartree Stamps, a $20 gift card to our etsy store. Our current monthly challenge can always be found in the menu bar, and runs from the 1st to last day of the month.  Please join us on TwitterInstagram and Facebook so you don’t miss any fun promotions or new challenge announcements!

The a2z scrapbooking store carries a wide variety of Hero Arts products as well as a nice selection of digital stamps! Get discounted new releases, sales, grab bags & more. Proceeds from our store benefit Celiac & Behcets disease foundations. Use my discount code Annie15 to get 15% off your purchase of $25 or more. If you’re looking for a Hero Arts product you don’t see in store, use the Request Custom Order button from with-in the shop.


 Supplies Used