Thursday, April 11, 2019

Mother's Day Mini Gift Tote with Rinea

Hello Crafty Friends -  Annie here with a cute Mother's Day Mini Tote 
 perfect for a small gift for Mom. 
Let's get started!

Materials Used:
Other Items:
Simply Crafty SVG File: Round Handle Bag (freebie)
Hero Arts CL498 - Celebrate Stamp Set
StazOn Jet Black Ink
Cardstock: Brown
Manual Die Cutting Machine
Adhesive: Aleene's Tacky Glue & Low Temp - Hot glue & Glue Tool

Directions
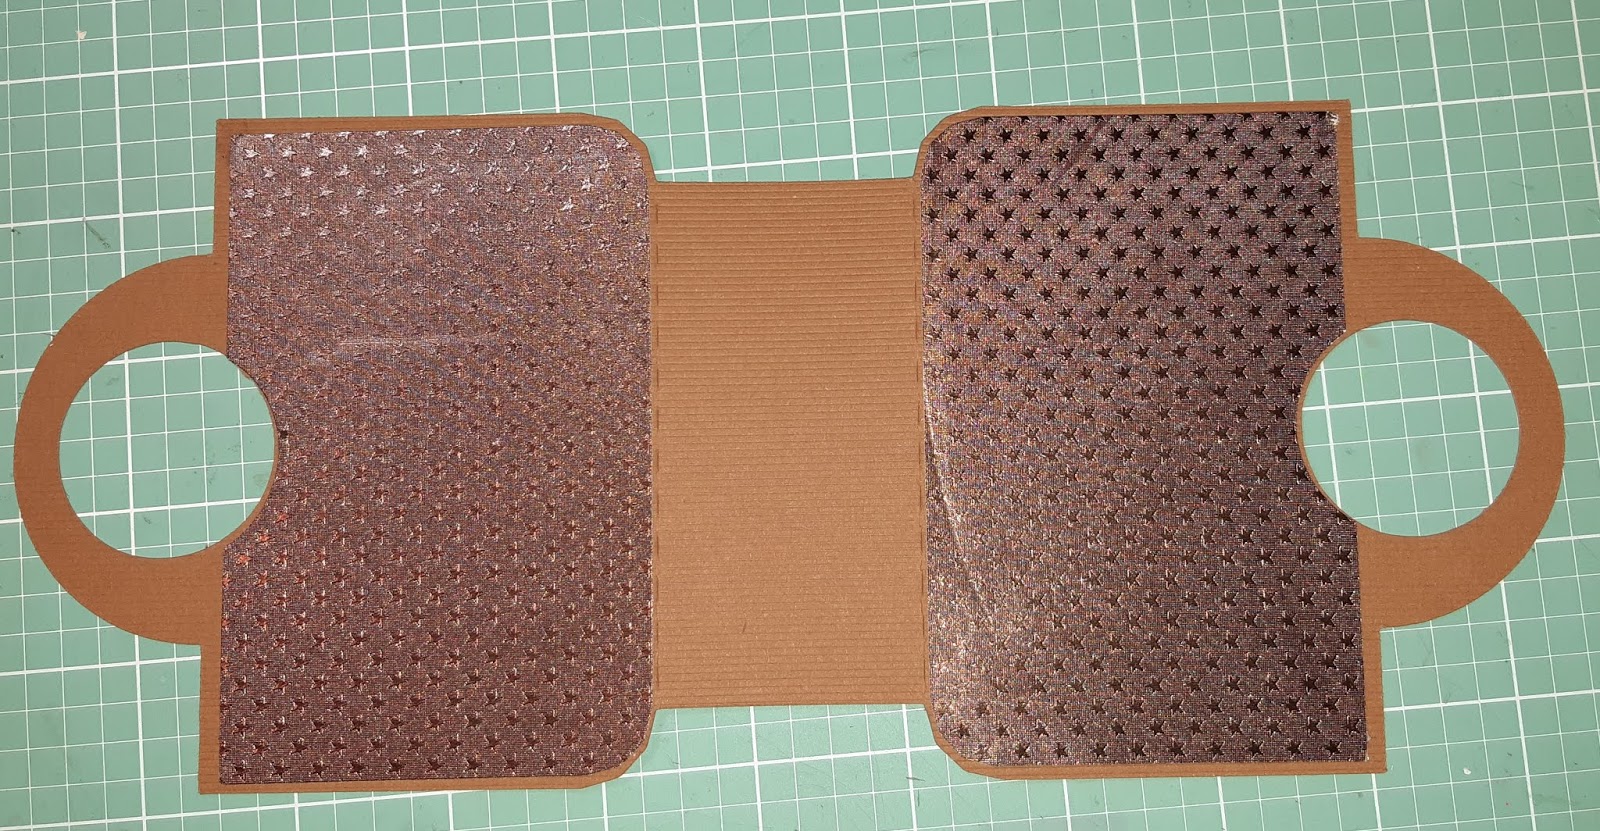
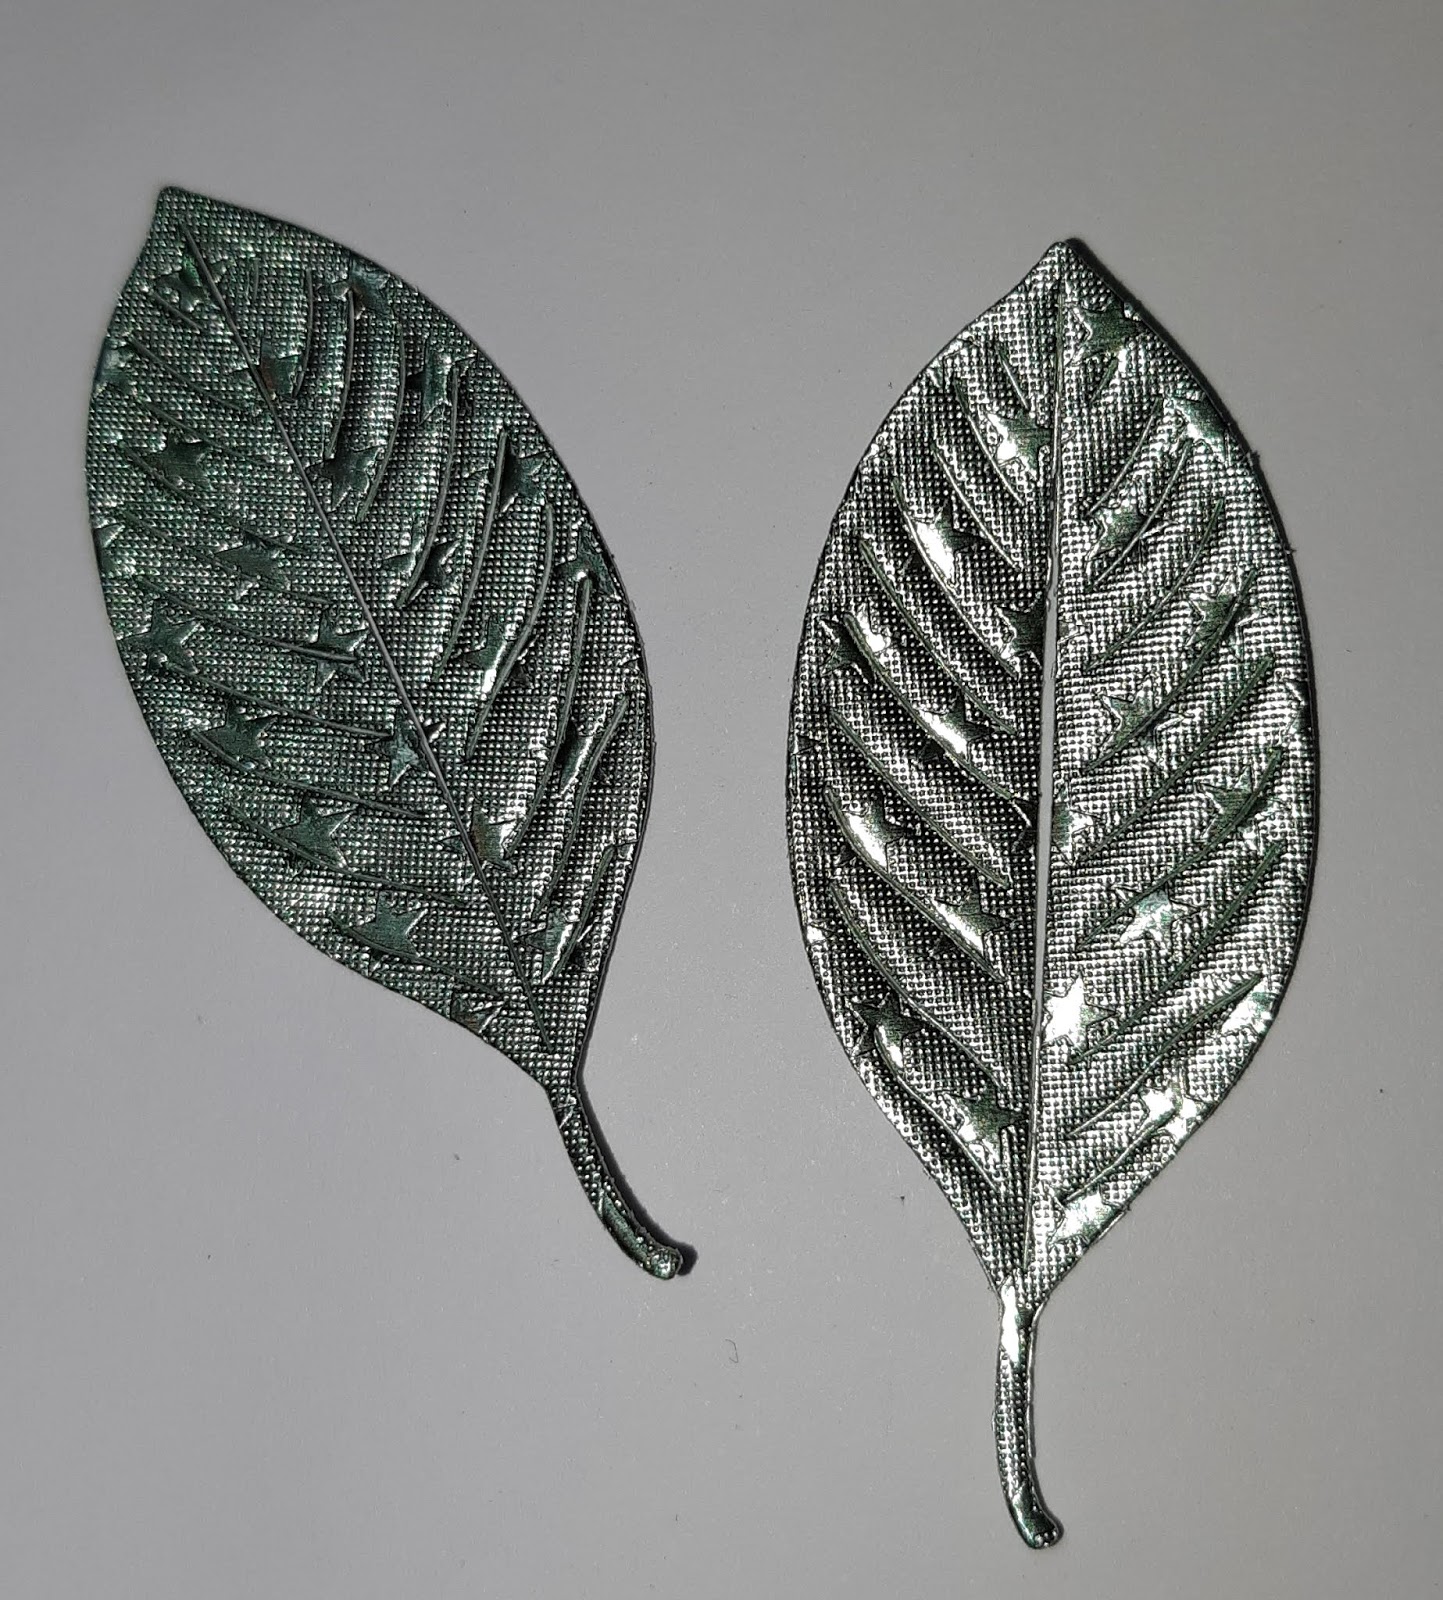
I started by downloading and cutting the free SVG file. I used cardstock for the base of the tote. I then followed the simple instructions to put the tote together (you will receive both a PDF and a link to a YT video on how to create the tote). As for the cover on the tote I used Mocha/Mocha Starstruck. I also die cut 2 Rolled Starbases from the #1 die - in Fushia/Fushia Starstruck & Blush/Blush Starstruck. I also die cut a few leaves from Jade/Jade Starstruck.


Now that I have all the components cut and ready - I can start making the tote.

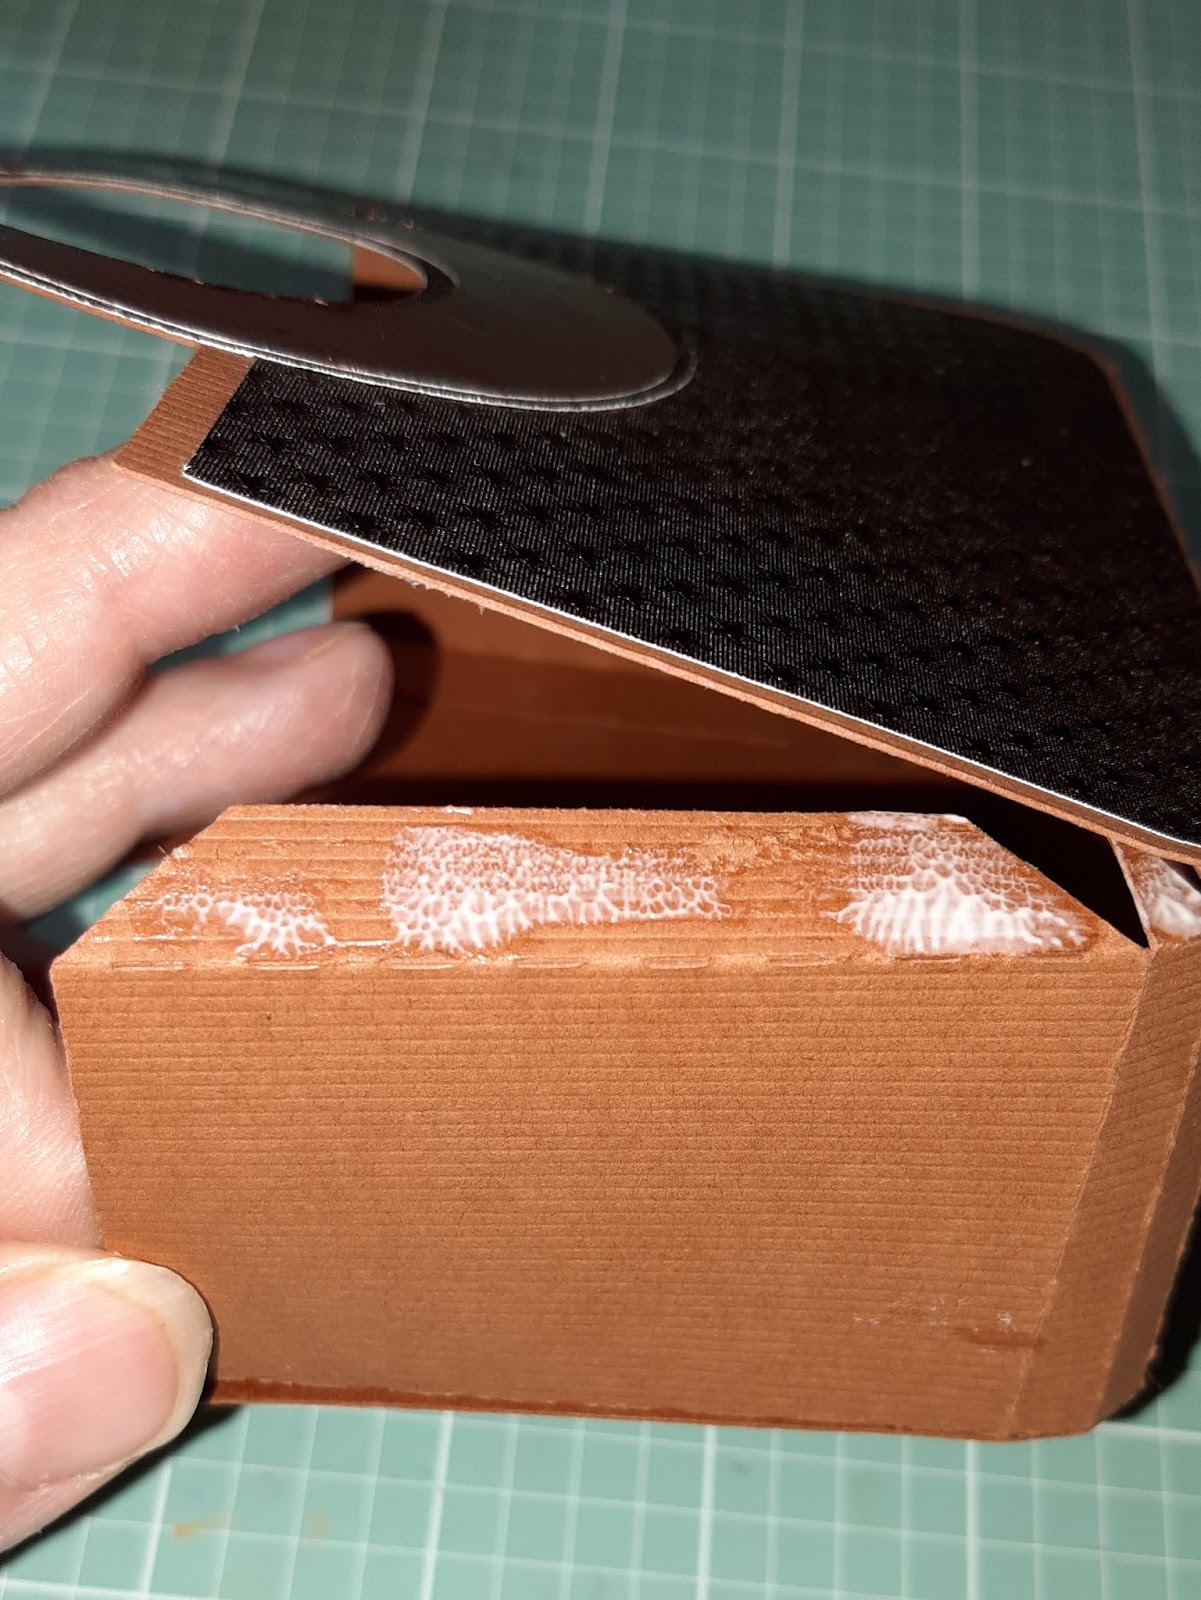
I start by adhering the Mocha/Mocha Starstruck cut panel onto the base of the tote. Then, I adhere the handles of the tote as per the directions. 

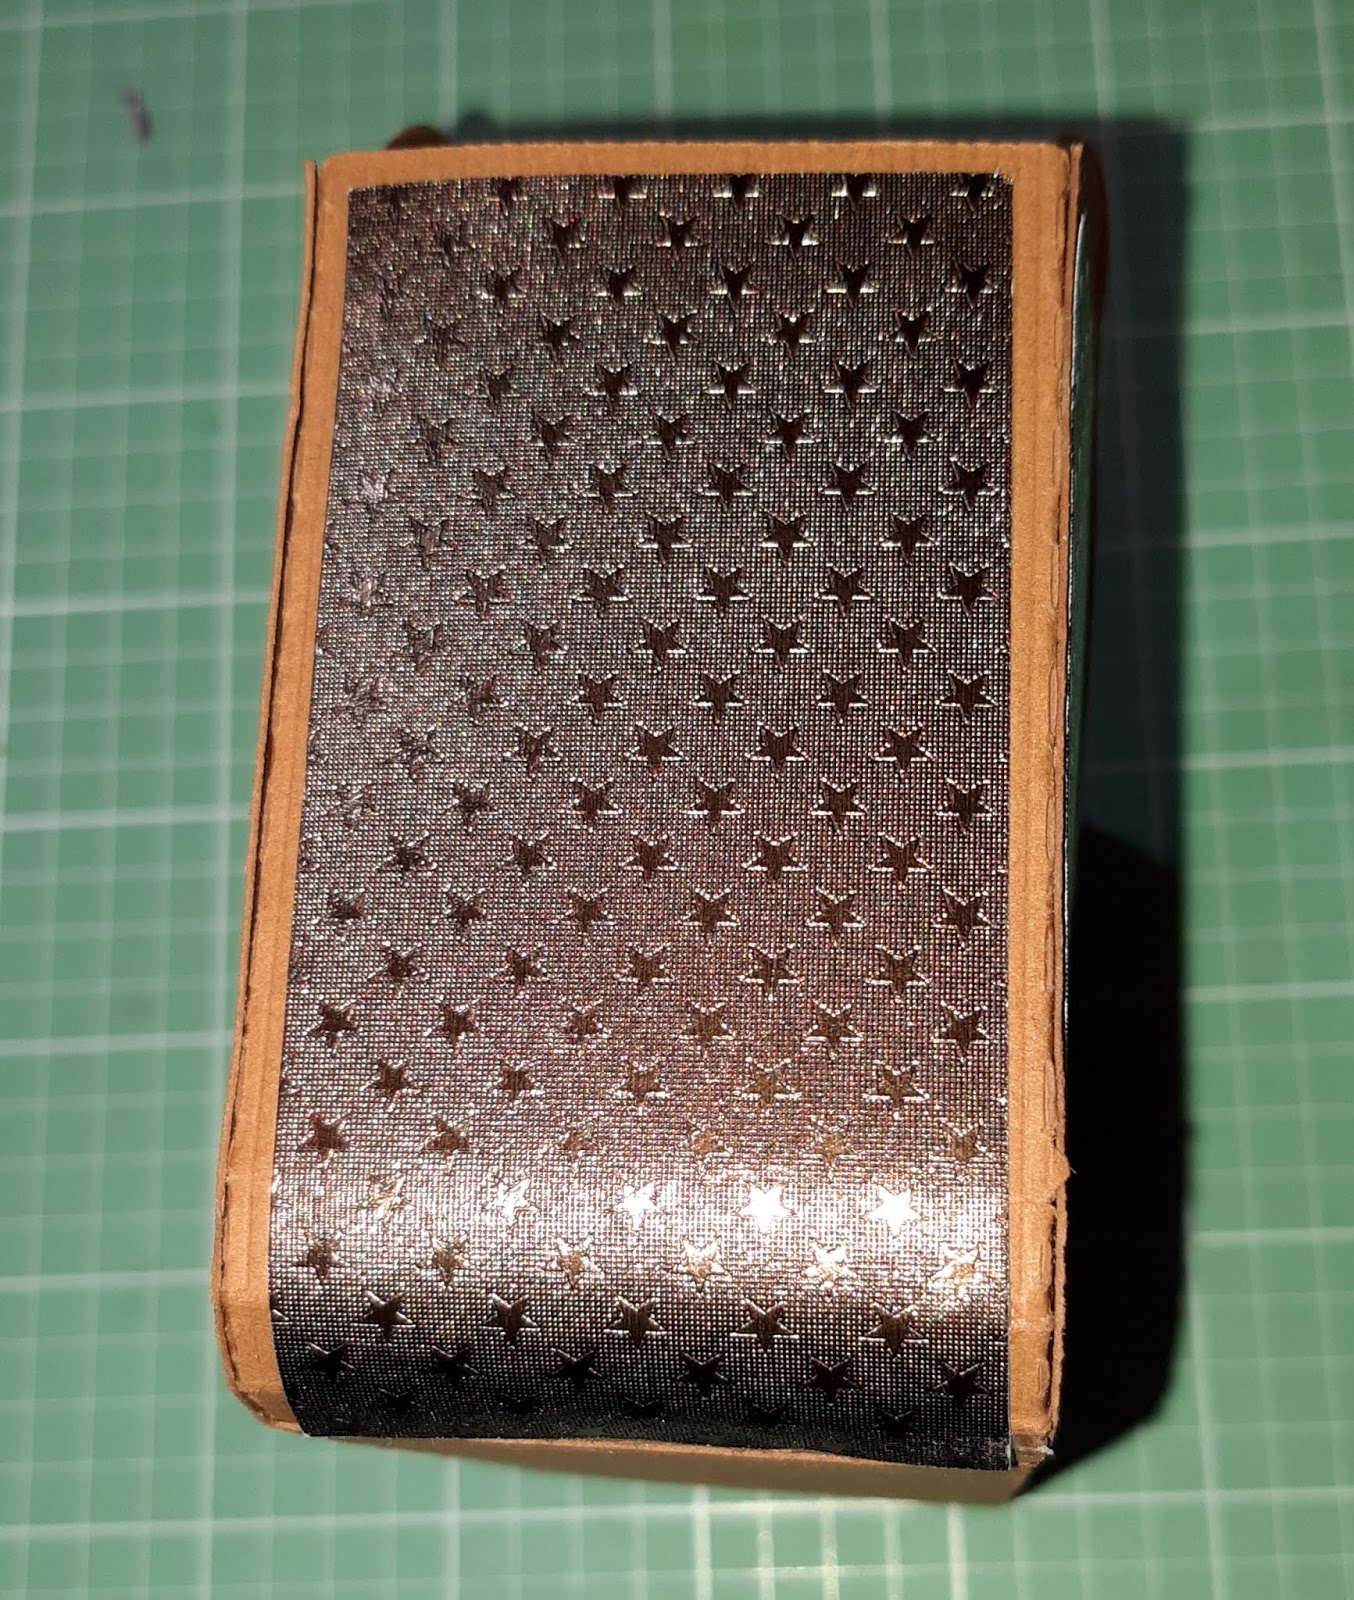
Next, I glue the side panels of the tote to the front and back. Then, I adhere the cover panel. I set the tote to the side to dry completely.


I then focus on creating the flower for the mini tote.

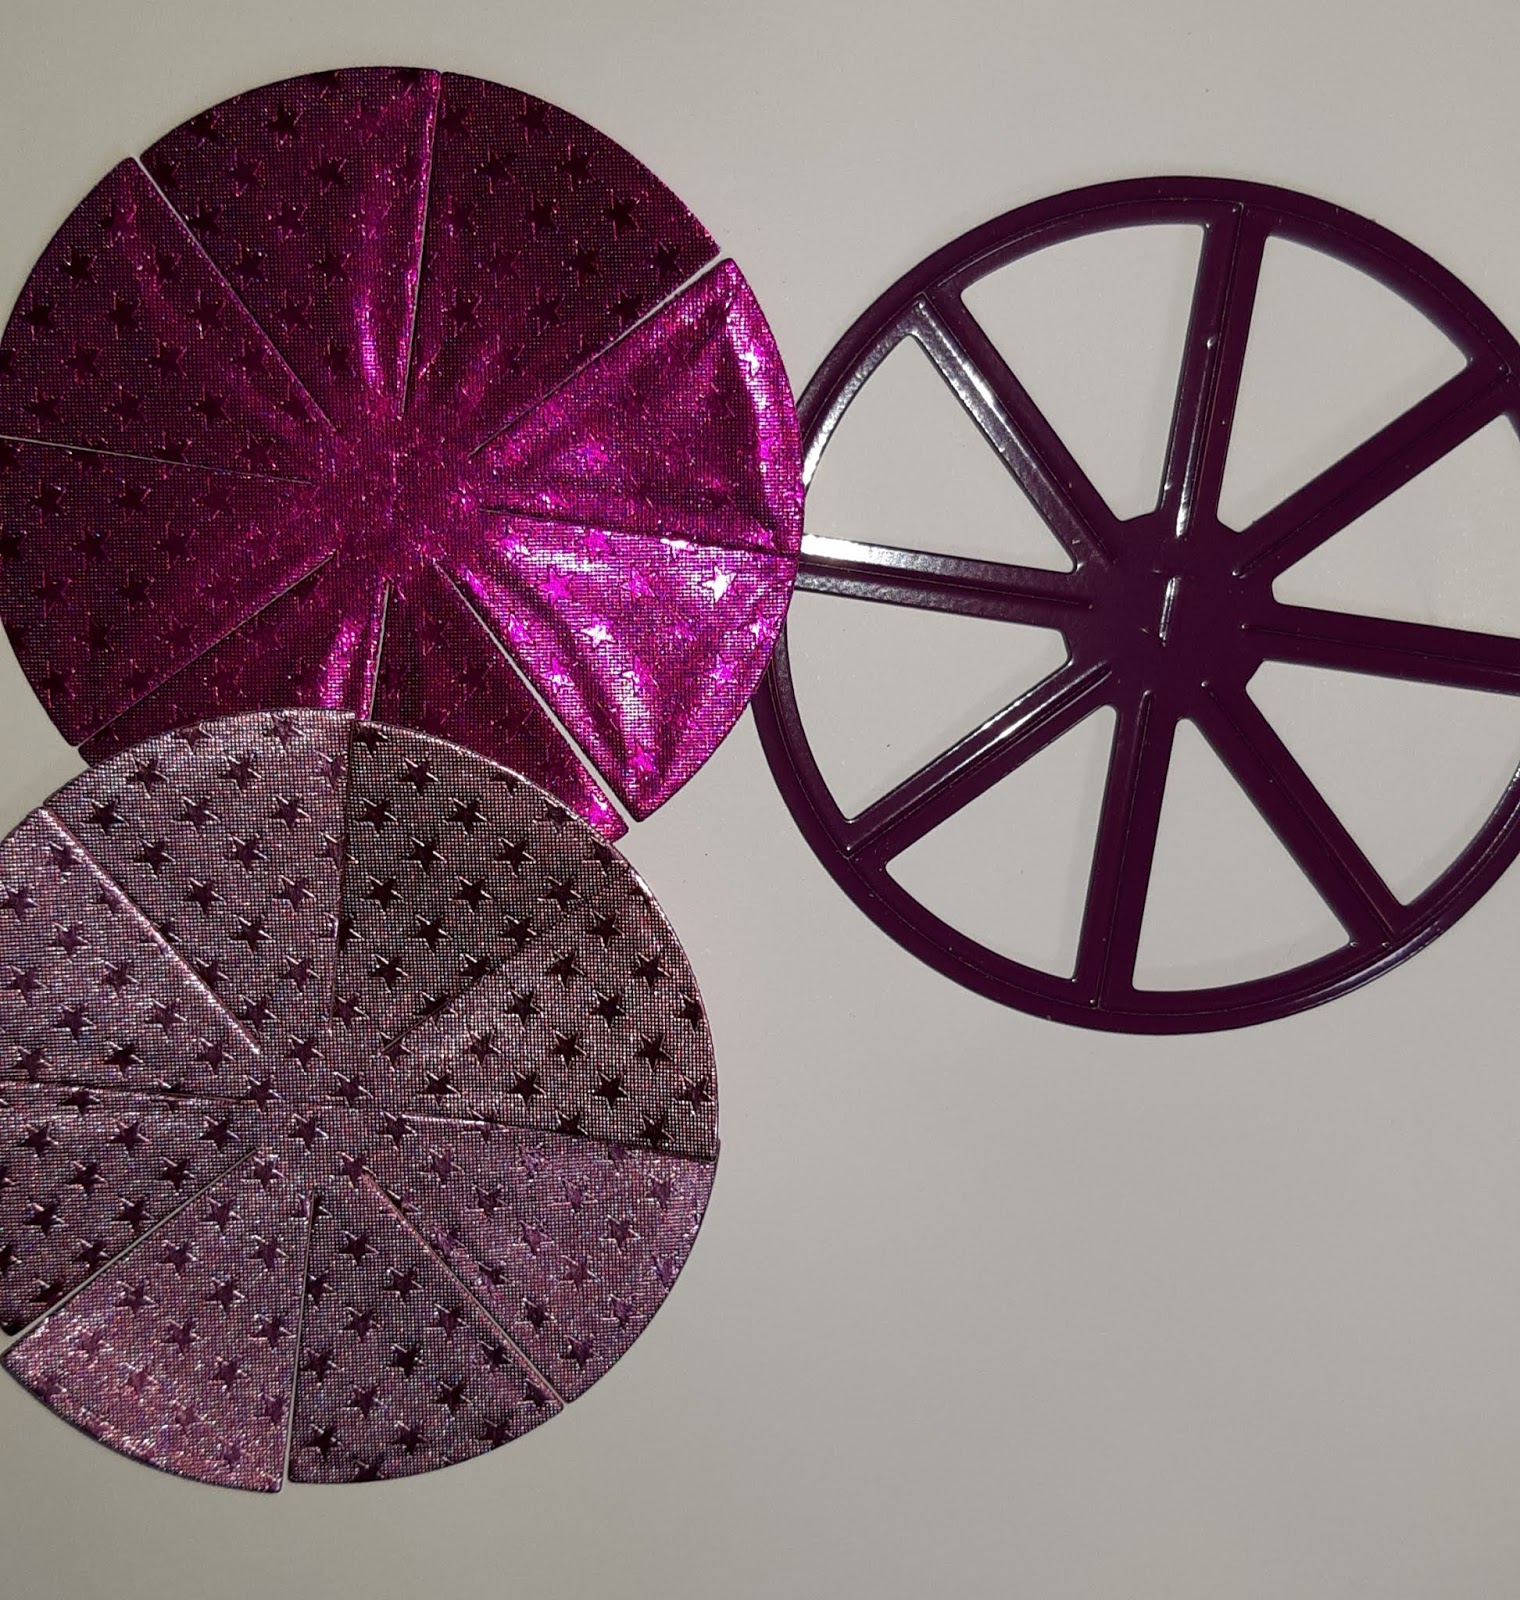
I start by trimming apart the die cut pieces as shown. I trim 3 sections from the Blush/Blush Starstruck and 1 from the Fushia/Fushia Starstruck.

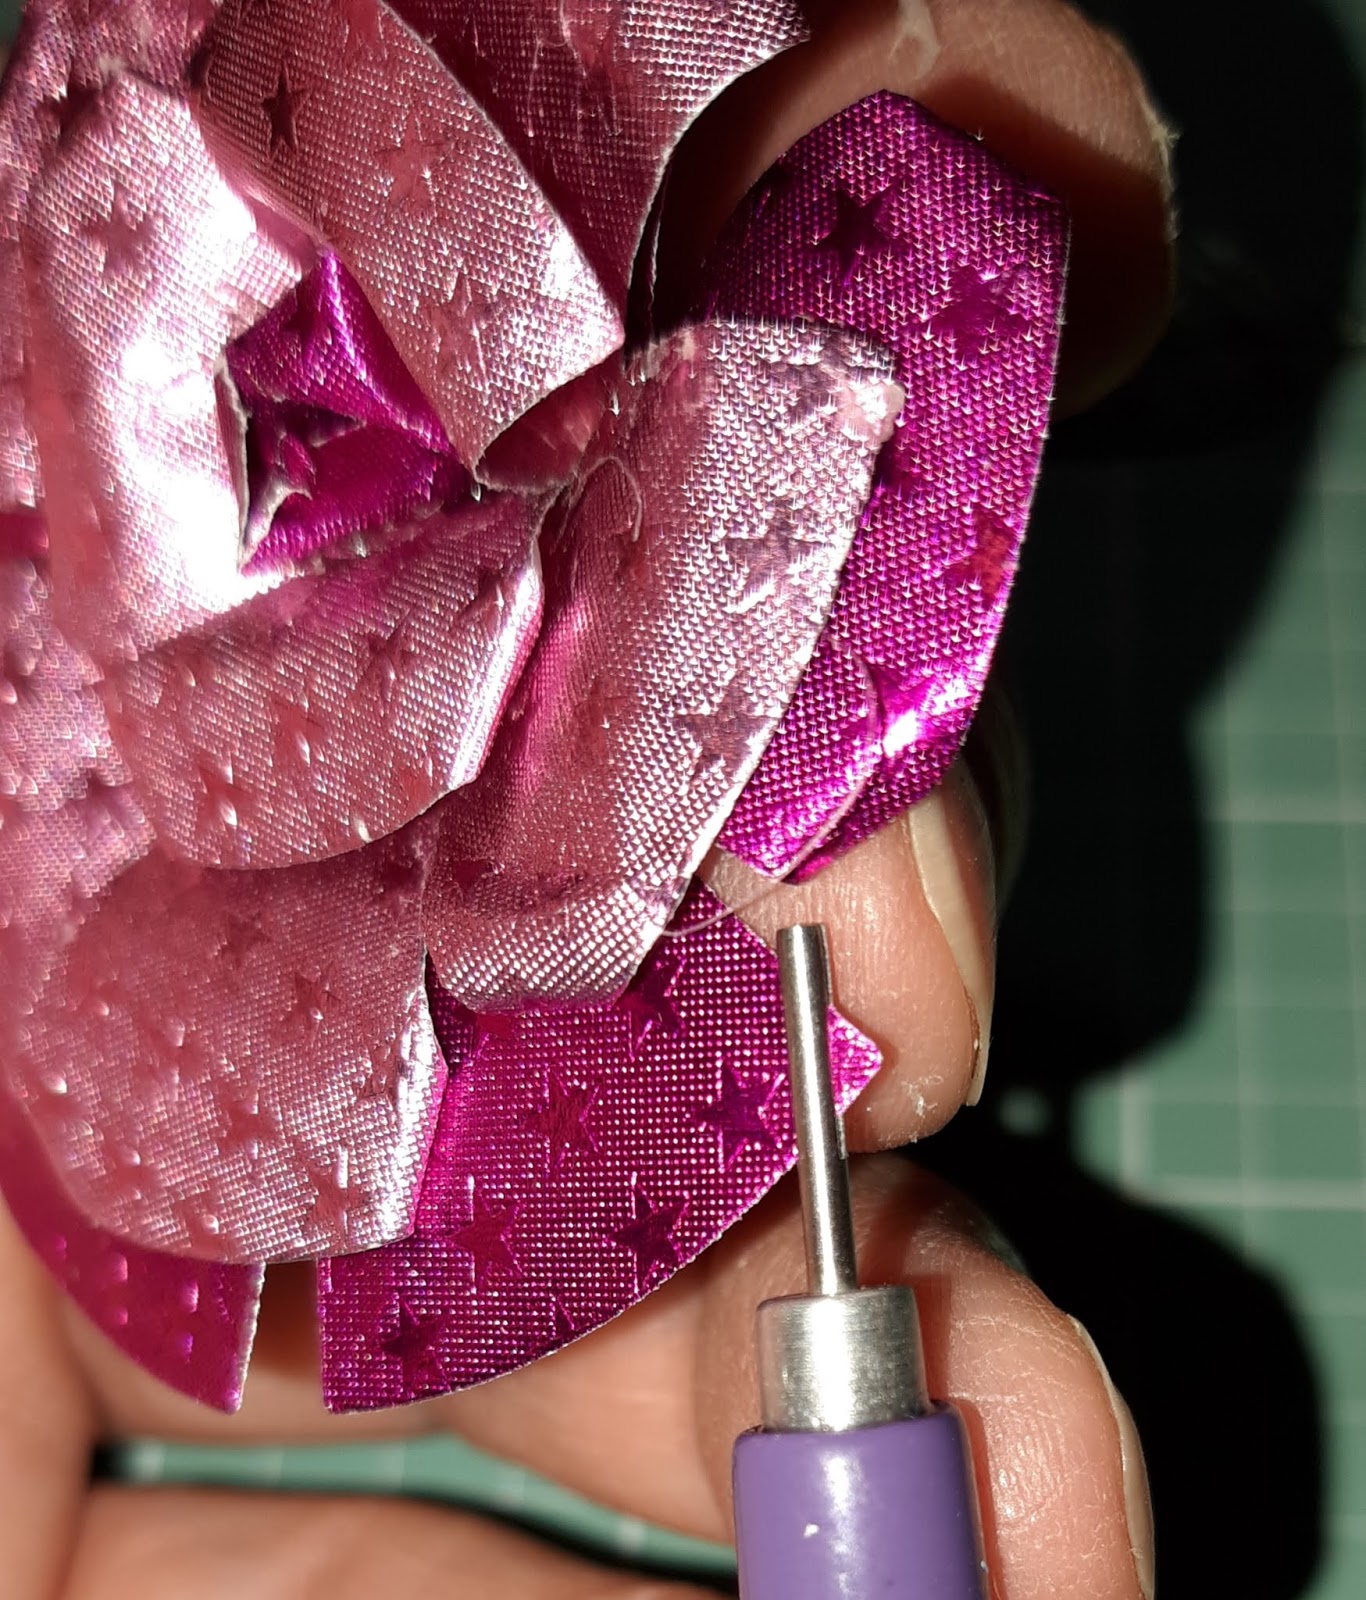
 I start by adhering the center petal together. I used the handle of my quilling tool - but you can use a paint brush handle. I used liquid glue here but I quick moved to the low temp glue & glue tool

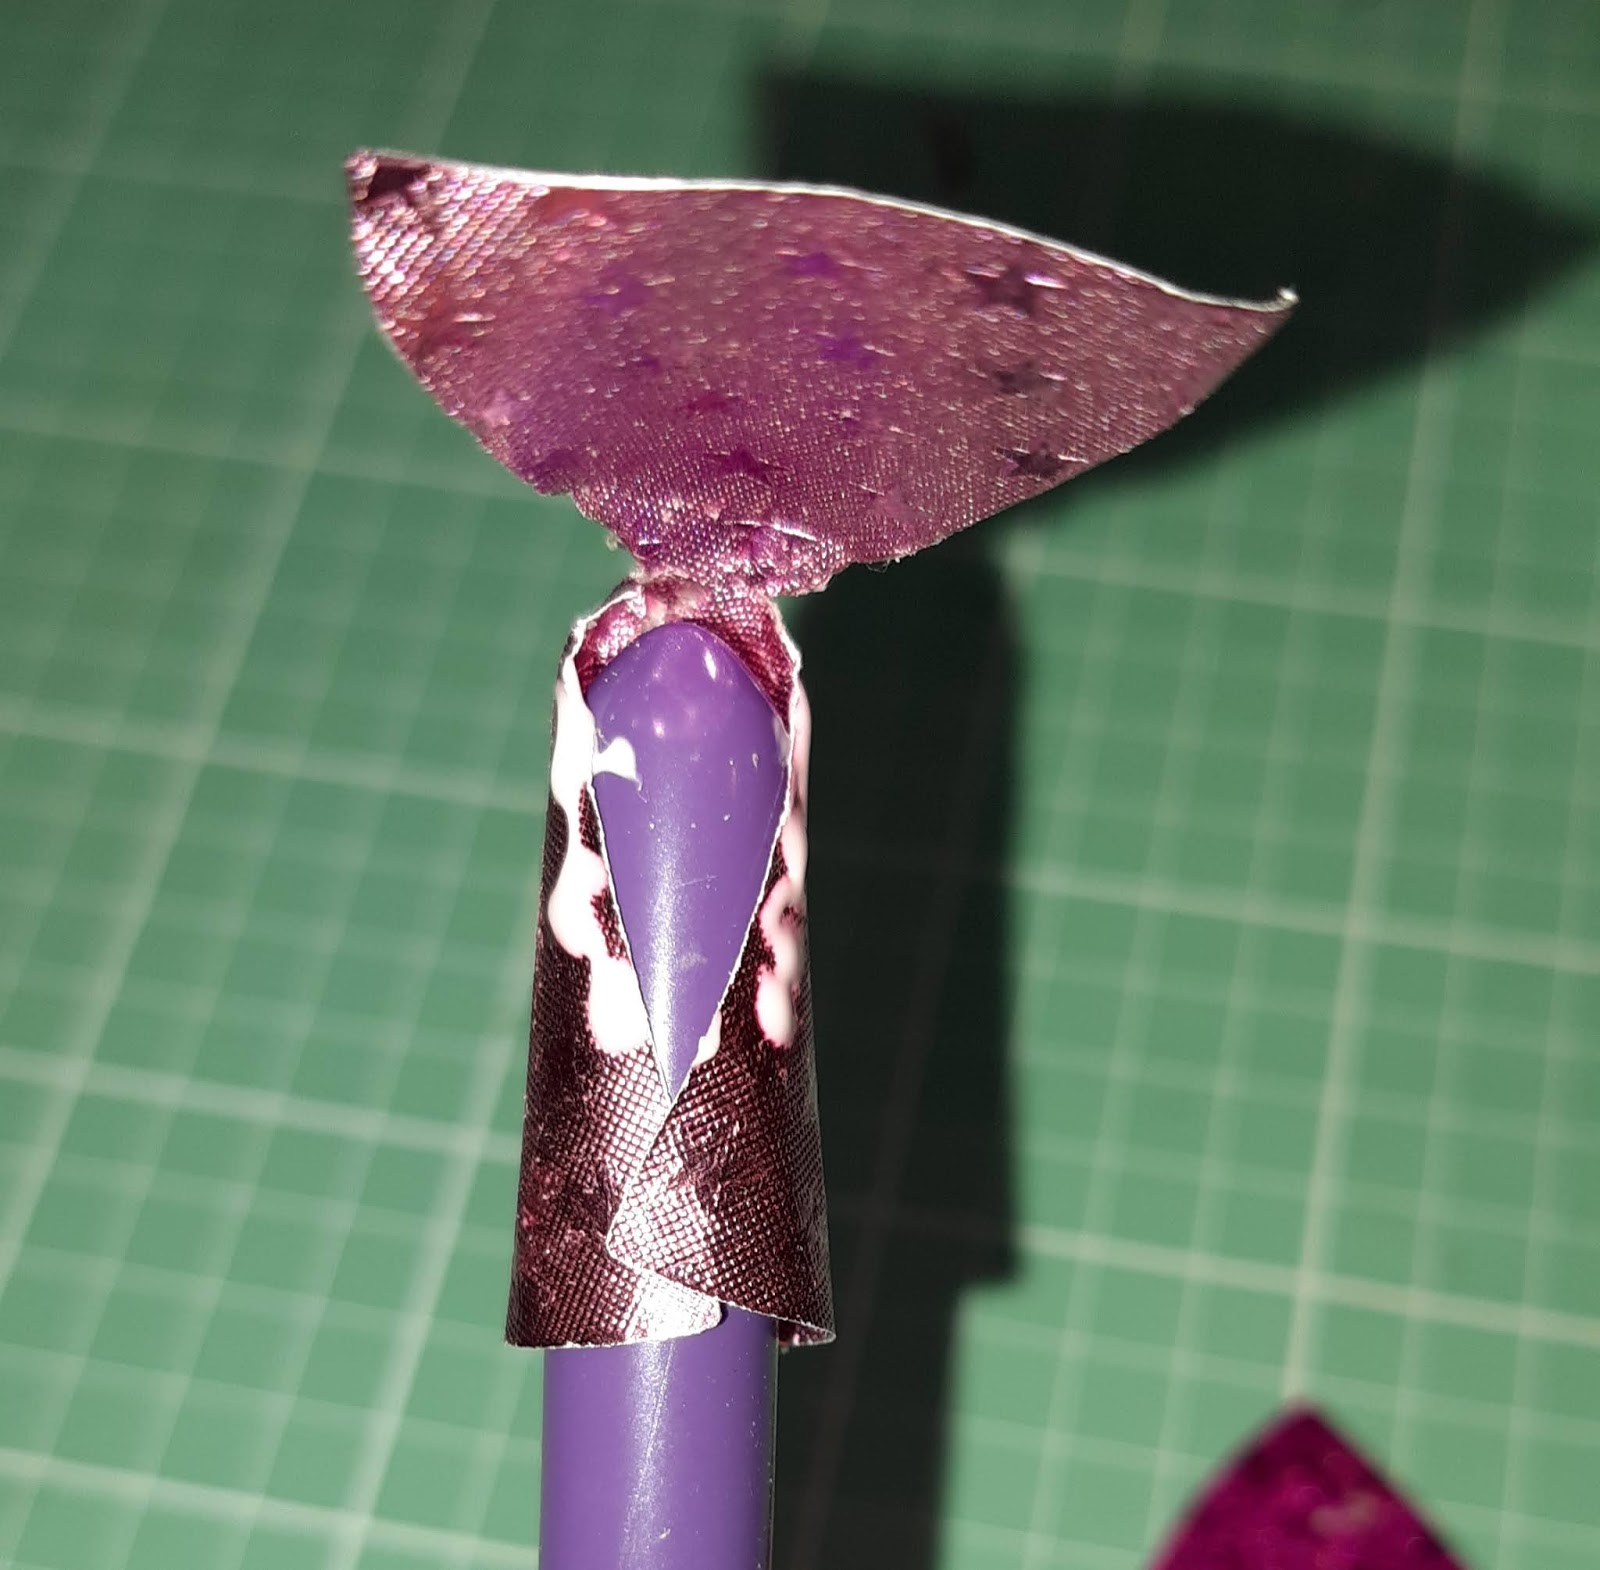
The center is created with the small piece from the Fushia Starstruck. I simply rolled it and glue into place - in the middle of the 3 petals I just made from the Blush Starstruck.


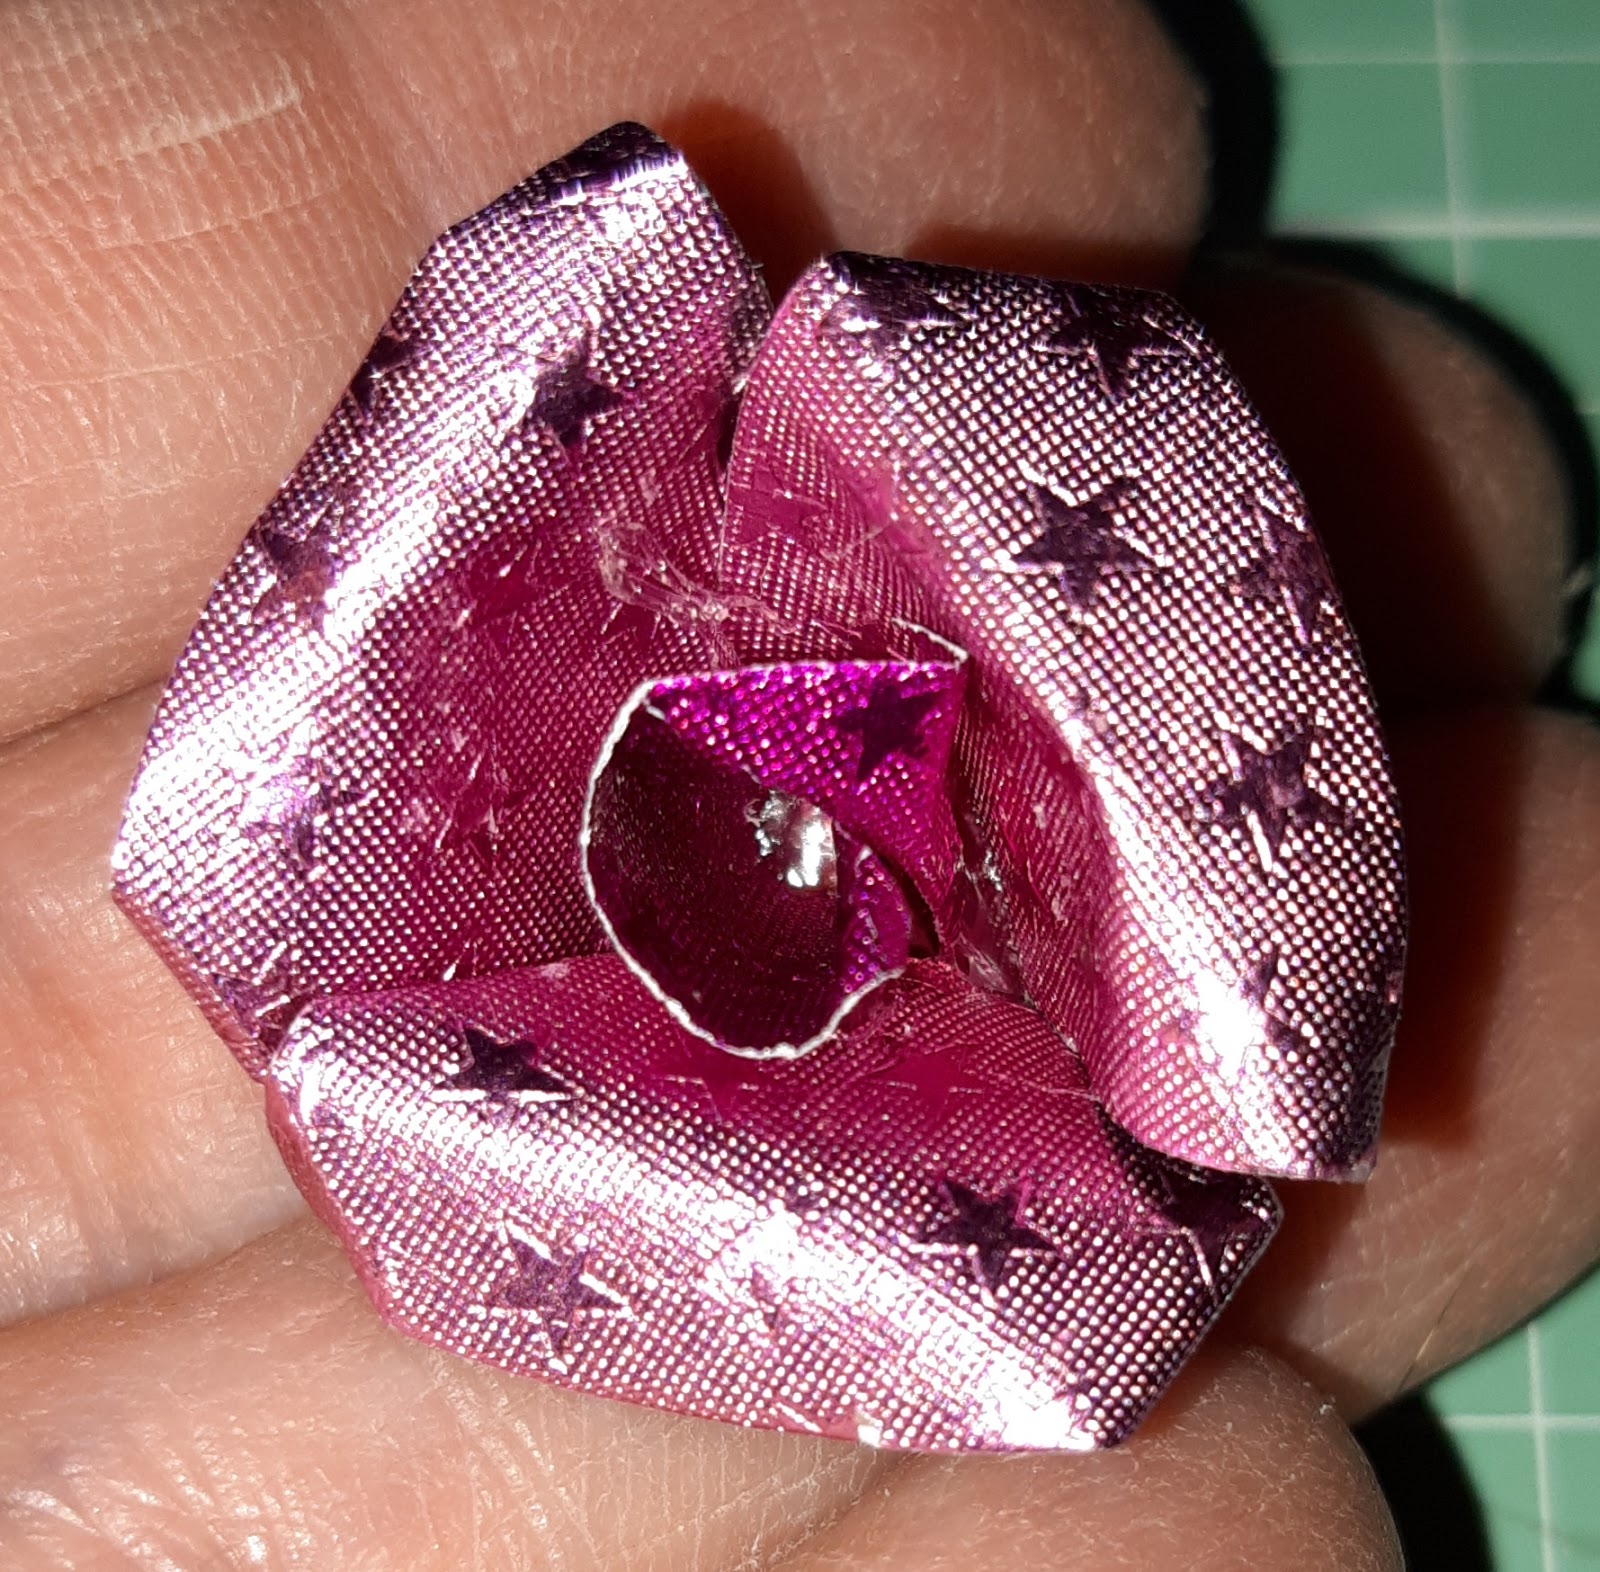
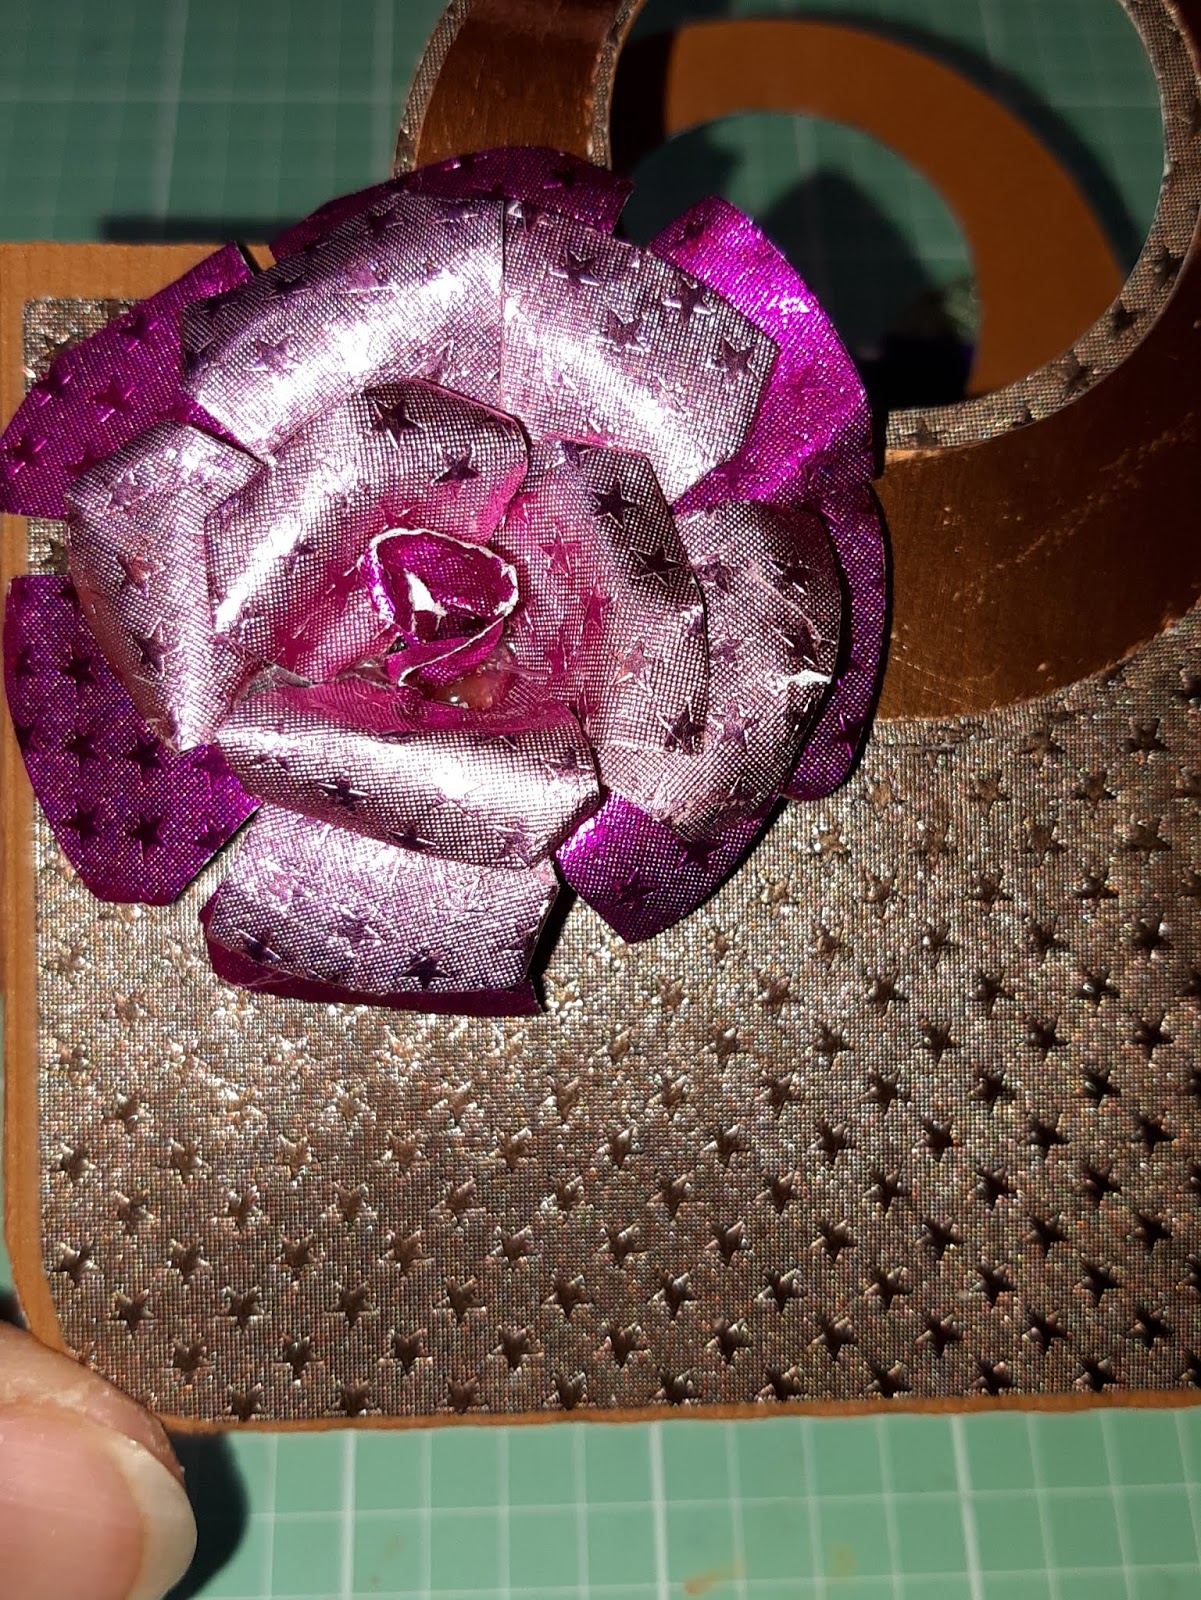
Next, I repeated the process on the other piece of the Blush Starstruck Petals. Rolling and gluing into place. Layering as I go. Finally I add the last layer which is the Fushia Starstruck Petals.


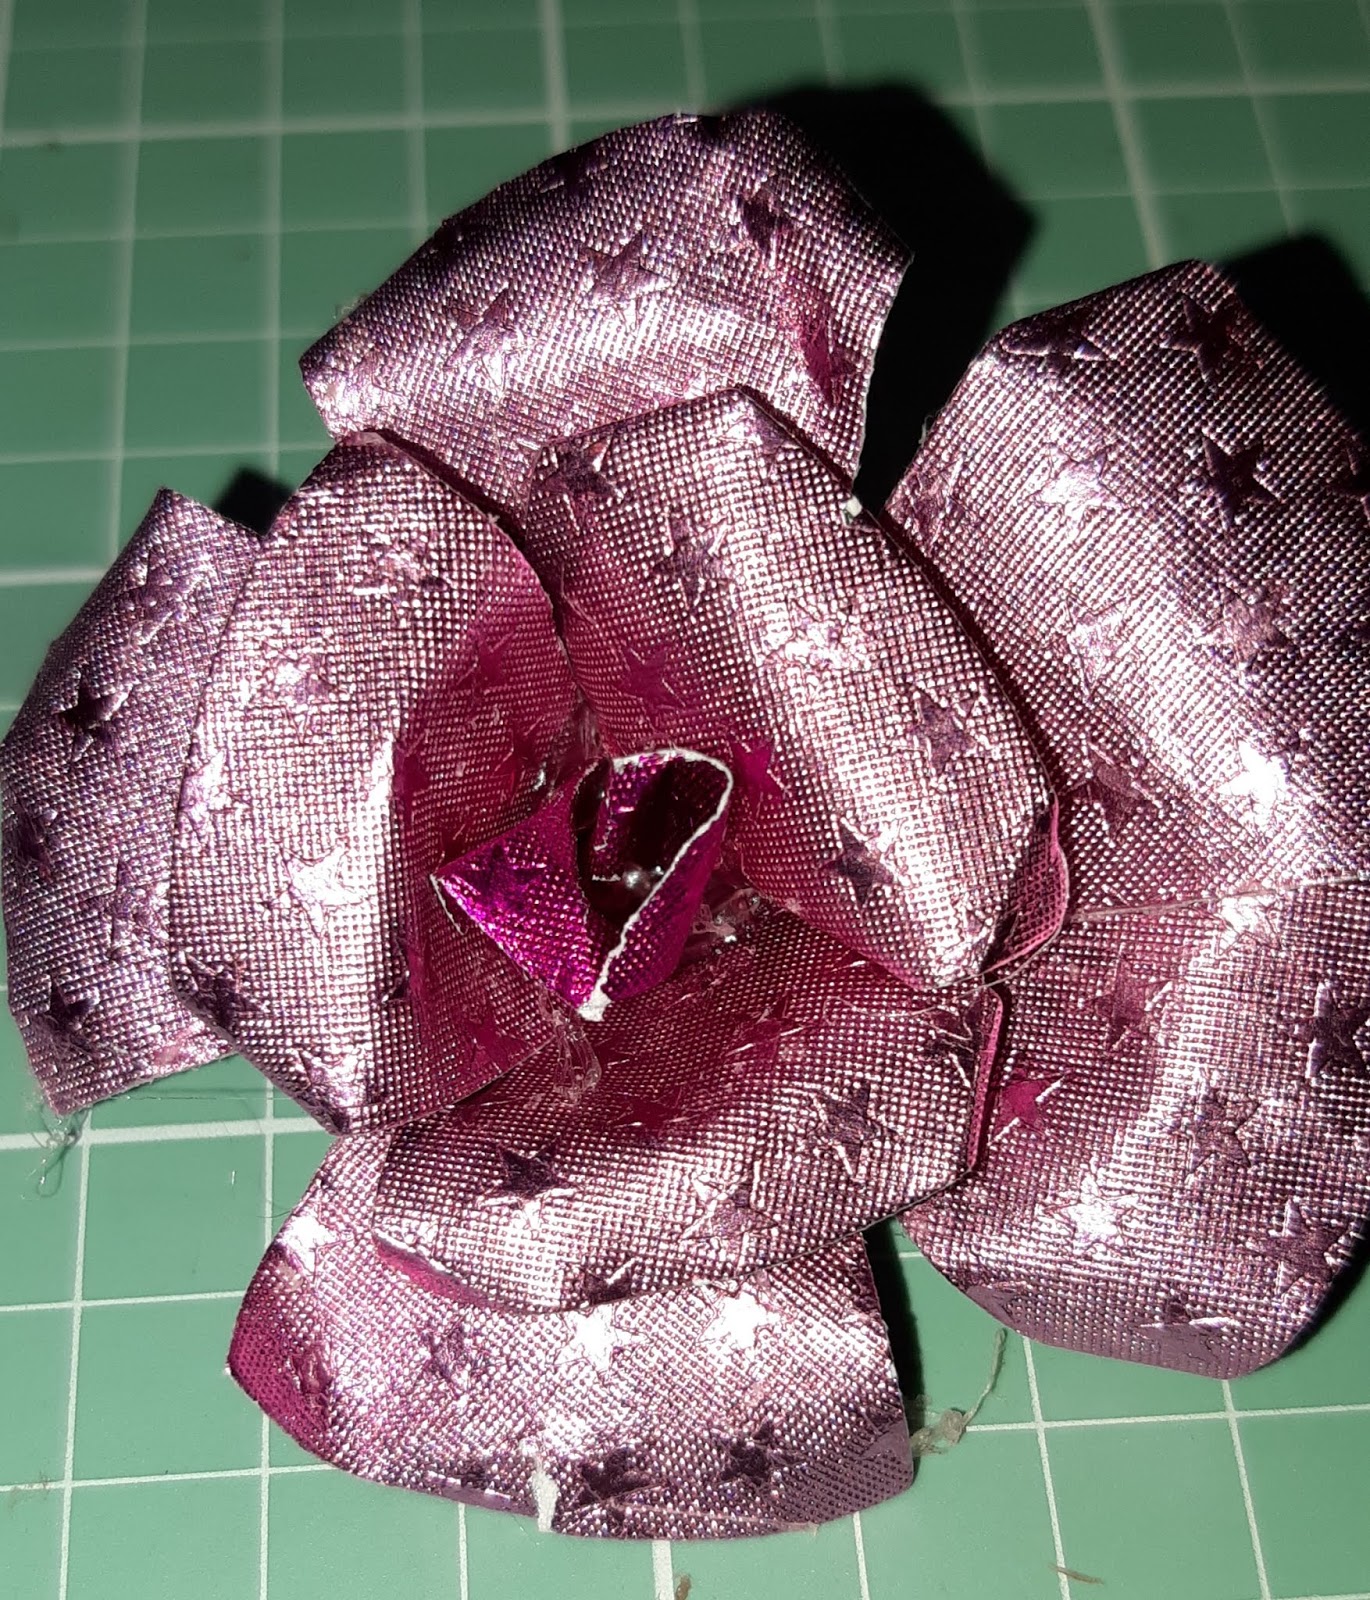
Now, the flower is complete. I add a bit of low temp glue to the back of it and place it onto the front of the mini tote.


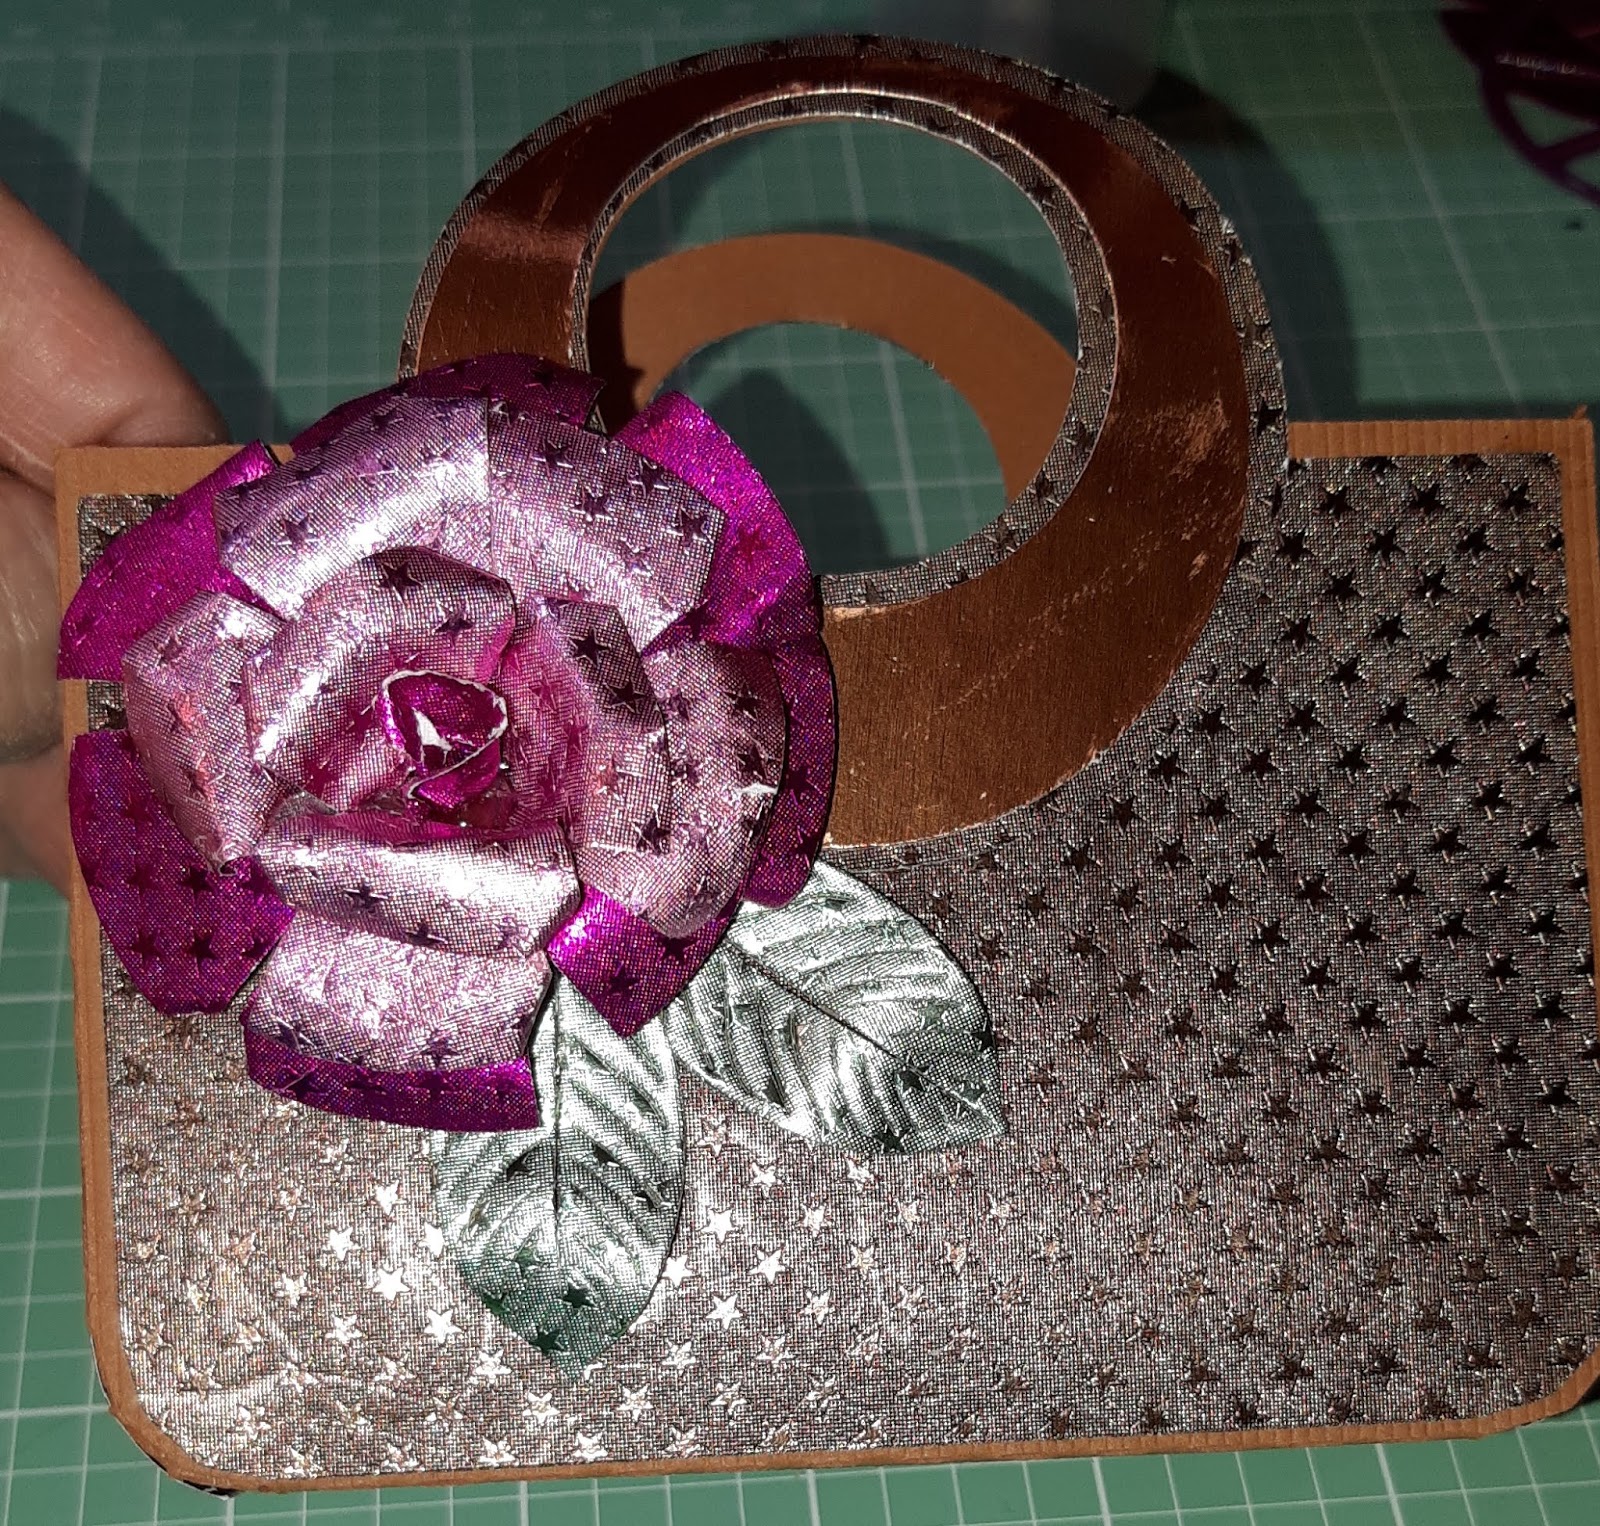
Next, I adhere the leave just tucked under the flower.

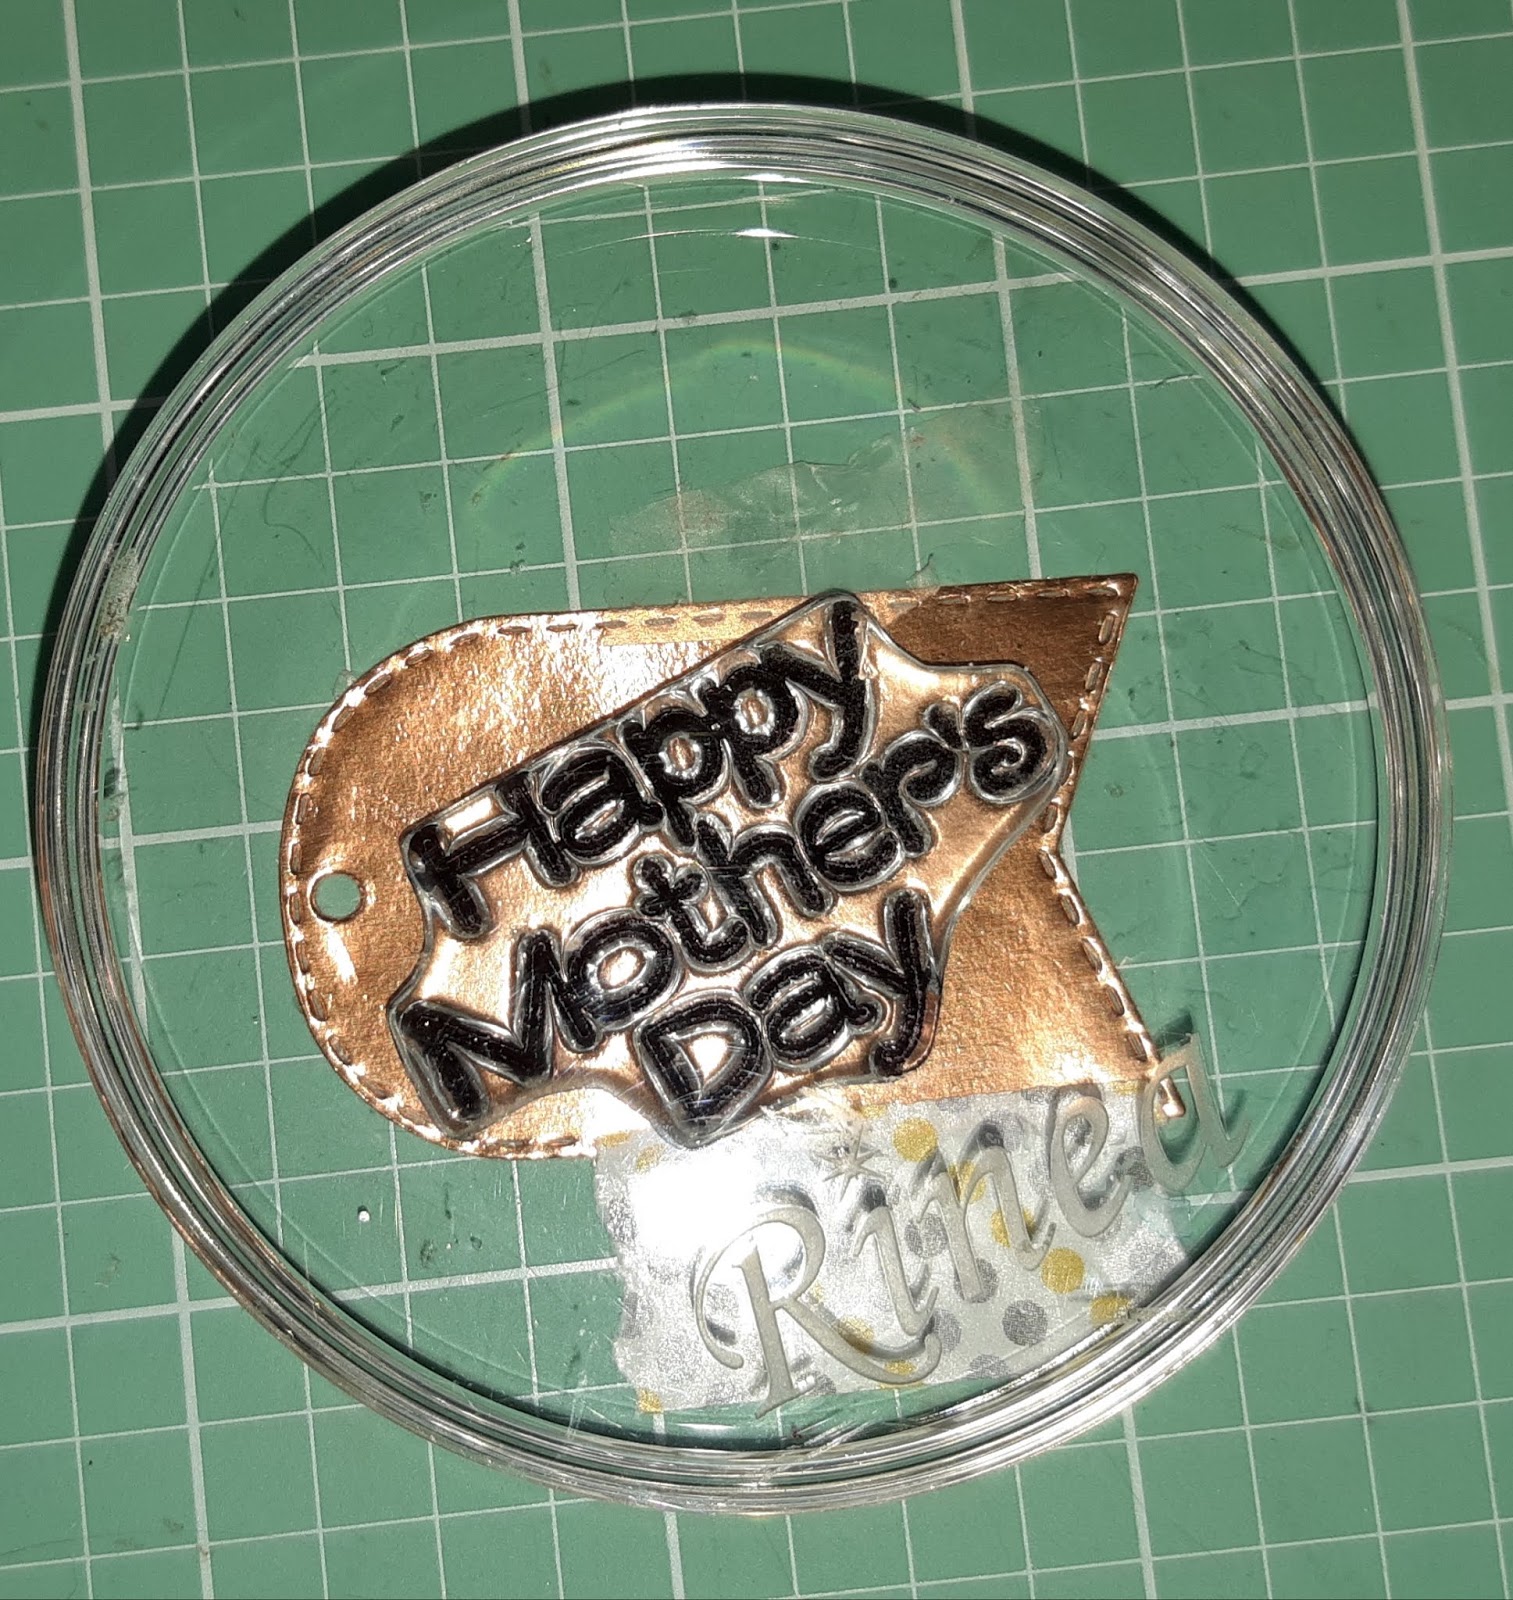
Now, for a quick tag - I die cut a tag from Marigold/Gold Glossy Foil paper. I then stamp my sentiment onto it the tag using StazOn jet Black Ink.


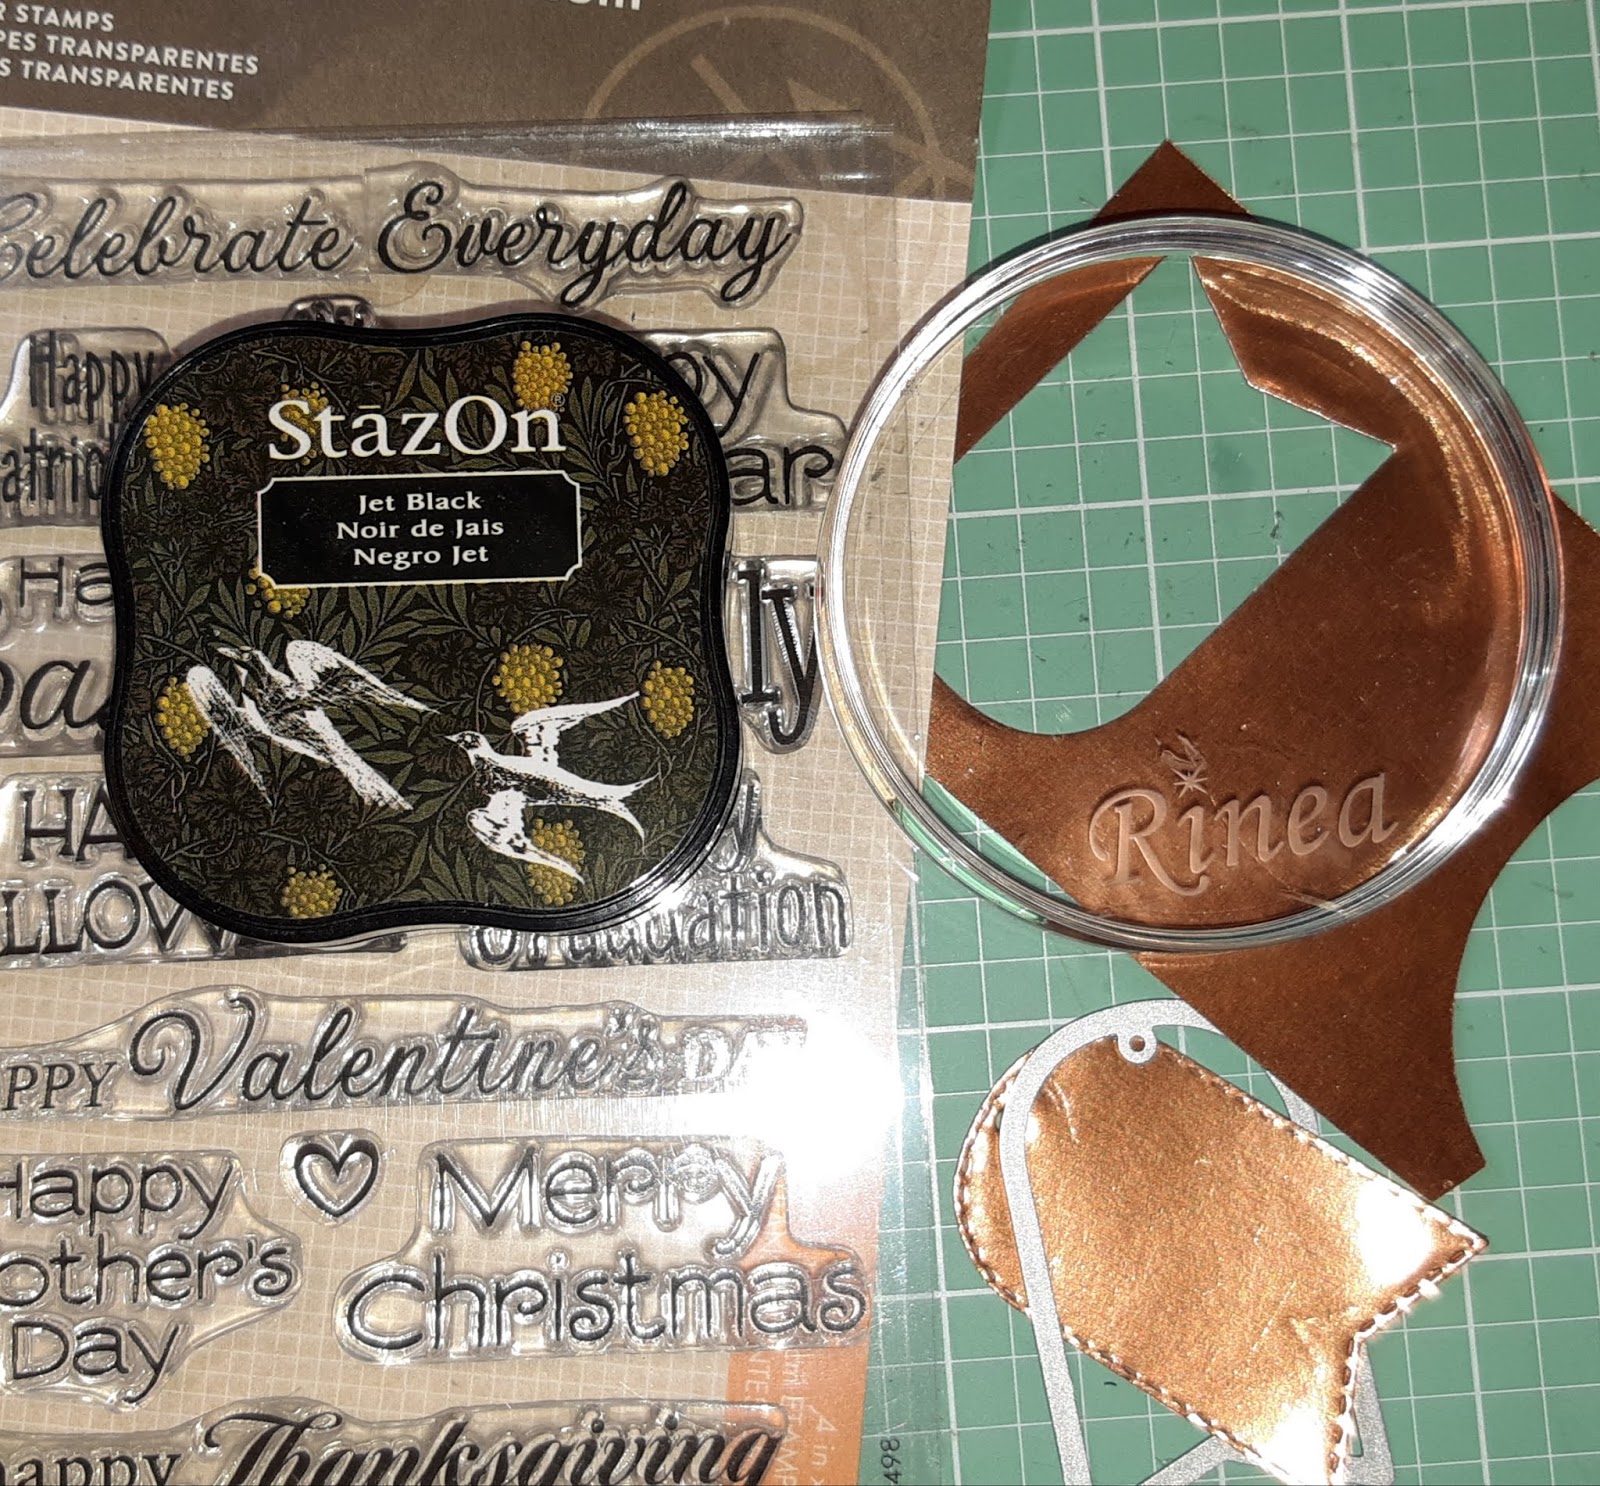
I then add some adhesive to the back of the tag and tuck under the flower and leaves. 
Now, the Mother's Day Mini Tote is complete and ready to be filled with the gift of your choosing.

Thank you for stopping by the blog today!

Wednesday, April 10, 2019

2 Cards - 1 Sketch with White Rose Crafts LLC

Hello Crafty Friends - I am here with my take on April's Sketch.

As you know each month White Rose Crafts LLC has a sketch challenge. I decided to create 2 cards based on the sketch. I create one card on the feminine side and one on the masculine side.

Here are April's sketch and a link to the challenge.

Let's get started by gathering the supplies for both cards. I used mostly March's Blue Skies Kit for both cards. I used the new in the shop Specialty Pattern Paper - Craft Creations - White with Holographic foil. I only added 2 dies, two shades of Blue cardstock from my stash and the card bases.

Card One: Happiness is a Journey not a Destination
(Feminine version)

Please note that both cards are created in the same way.

First, I cut all the components to the card. I trimmed 3 butterflies from one of the pattern papers. I also die cut from both cardstock and specialty paper a postage stamp mat. 

Next, I first inked all the edges of the pattern papers. Then, I adhered the pattern paper to the blue cardstock front panel. I repeated adhering the pattern paper to the coordinating cardstock pieces. As for the die cut pieces - I trimmed away the decorative edge on the pattern paper so that I would have the blue cardstock edge.

Then, I layered the smaller first and then the longer as per the sketch.

Next, I adhered the die cut stamps, the top and bottom are flat onto the card front panel. the middle one I added a bit of low profile foam tape.

Then, I adhered the sentiment - also with foam tape.

Now, for some butterflies. I added some foam tape to the wings of the butterflies for some dimension.

Next, I added some finishing touches. I added 3 Sparkle Blends - Sunny Skies from the kit. Just above the sentiment. I also added a bit of Wink of Stella on the word HAPPINESS. Now, the card is complete.


Card 2: Hello (Masculine version)


Please note that both cards are created in the same way.

First, I cut all the components to the card. I also die cut from both cardstock and specialty paper 3 Stitched Hexagon shapes. I also used all the circle buttons from March's Blue Skies Kit 

Next,  I first inked all the edges of the pattern papers. Then, I adhered the pattern paper to the blue cardstock front panel. I repeated adhering the pattern paper to the coordinating cardstock pieces. As for the die cut pieces - I trimmed away the decorative edge on the Craft Creations - White with Holographic foil so that I would have the blue cardstock edge.

Then, I layered the smaller first and then the longer as per the sketch.


Next, I adhered the die cut hexagons, the top and bottom are flat onto the card front panel. the middle one I added a bit of low profile foam tape.

Then, I adhered the sentiment - also with foam tape. Next, I adhered 3 buttons on the top and bottom hexagon. I made sure to overlap the sentiment on the middle hexagon. 

Next, I added some finishing touches. I added 3 Sparkle Blends - Sunny Skies from the kit. Just above the sentiment. I also added a bit of Wink of Stella on the word HELLO. 


Now, the card is complete. 

Supplies Used for Both Cards:


With so many beautiful stamps, papers, Specialty papers & Inks in the shop 
I know you are bound to create something wonderful!

Thank you for stopping by the blog today!

If you would like to join in the fun for the White Rose Crafts March Sketch Challenge, and other fun activities and conversations make sure you join the 
White Rose Crafts Gallery group on Facebook!   

Saturday, April 6, 2019

Ocean Card with Doodles Paper Playground

Hello Crafty Friends - I am here with a fun ocean inspired card. 

I didn't include a sentiment on this card  - because I am not sure when I will be sending it out. 
I like to have just a few blank cards in my stash that I can pop a sentiment later on as needed or if I even need one.

For this card, I used two Sparkle Blends: Ocean View & March- Aquamarine- Birthstone Collection.


This vivid combination of cup sequins, round confetti, faceted crystals and 
microbeads in cobalt, aqua, teal and just a hint of light blue 
is just the look we were going for.
 We added a sprinkling of dolphin-shaped confetti to complete the effect.

No photo description available.

This beautiful, high shine blend channels the clear blue waters
of the Caribbean with teal, aqua and sky blue tones throughout. 
You’ll fine tons of glitter, holo, iridescent and 
metallic elements over a base of matte blues. 


Supplies Used:
Sparkle Blends: Ocean View 

Other Supplies Used:
Stamp: Creative Visions Stamps: Medium Whale
Cardstock: Recollections Brand 110lb: White
Pattern Paper: Paper Studio

Thank you for stopping by the blog today! 

Be sure to tag us Doodles Paper Playground on social media 
if you create a project with our Sparkle Blends.
 All of our Sparkle Blends can be purchased on the 
be sure to use the discount code
 Annie 10(there's a space between my name and the number).

Monday, April 1, 2019

You Crack Me Up Card with A Perfect Time to Craft

Hello Crafty Friends - I am here with a cute Easter card using a digital stamp set from 

We at A Perfect Time To Craft have a New challenge for you to join.
Challenge # 4, 1st April through to 27th April, 2019

Sparkle N Sprinkle is this month's Sponsor.


And now, back to this month's challenge!

This is always an Open Challenge and always "Anything Goes”. You're welcome to add 3 entries per challenge and you may enter any crafting project with any theme.
For full details on our rules and on how to enter, please visit our rules page.

Our prizes consist of…

1st Prize: 3 sponsor images, a certificate and a badge.

2nd Prize: 1 sponsor image, a certificate and a badge.

3rd Prize:1 sponsor image, a certificate and a badge.

DT Favourites: a certificate and a badge.

Spotlight Winners: a certificate and a badge.


Our sponsor for this month's challenge is Sparkle 'n' Sprinkle
You can join Sparkle 'n' Sprinkle's Facebook Group HERE
You can find Sparkle 'n' Sprinkle's Challenge Blog HERE
Sparkle 'n' Sprinkle’s Instagram can be found HERE

Sparkle 'n' Sprinkle have generously supplied these images for this challenge.