Sunday, January 26, 2020

Valentine's Day Heart Self Closing Bag and Mini Card with Rinea

Hello Crafty Friends - I am here with a fun Valentine's Day project
 featuring Rinea Love Foiled Paper Variety Pack
along with a cut file from Simply Crafty SVG

Materials Used
Xyron Creative Station Lite Adhesive
Xyron Mega Runner Adhesive
Brother Scan n Cut Machine
Maker's Movement Notes of Love Stamp Set
Imagine Crafts/Tsukeniko Memento Dew Drop Ink: Rose Bud
Recollection Brand 65lb Cardstock: Pink and White

Let's get started!

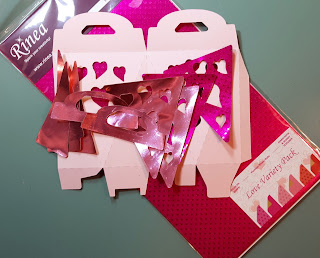
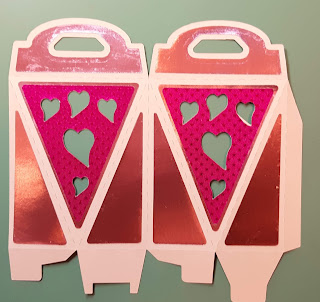
I gathered all the materials. I die cut the tote bag using my Brother Scan n Cut. 

Tote Bag

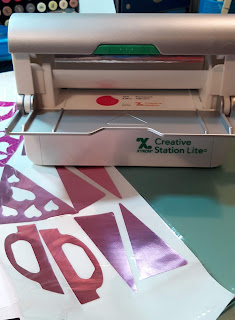
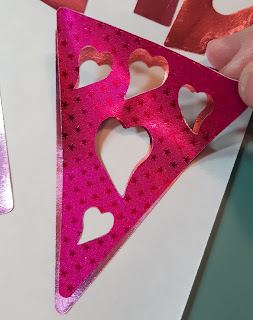
I ran all the pieces that I cut from the Rinea Starstruck Fuchsia/Fuchsia Foil Paper,
Rinea Starstruck Blush/Blush Foil PaperRinea Glossy Blush/Gold Foil Paper through the 
Xyron Creative Station Lite. 


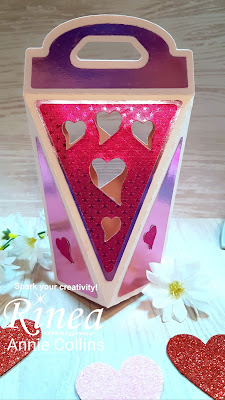
Next, I layered the Rinea Starstruck Fuchsia/Fuchsia Foil Paper triangle with heart cut out onto
 the Rinea Glossy Blush/Gold Foil Paper triangle with heart cut out.
   
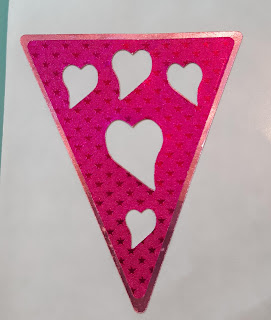
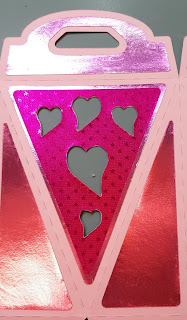
Then, I layered the triangles onto the tote bag.
 

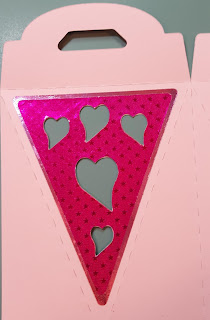
Next, I added the handle layers and side panels of Rinea Glossy Blush/Gold Foil Paper to the tote bag. 
 

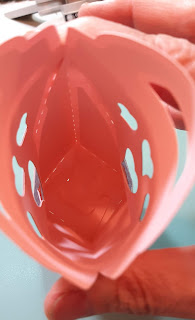
Then, I ran some Xyron Mega Runner on the side tab of the tote and pressed the two sides together.
  

Next, I closed the bottom of the tote. Start with the forked tab push it down. Next, the two side tabs, followed by the cone-shaped tab. No need to adhere these tabs.  
  
This part is optional.
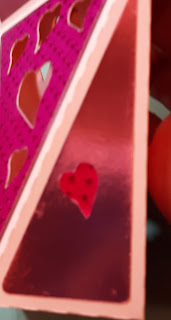
I saved a few of the hearts that cut out from the front panels. 
I decorated the side panels with one heart.
 
 
 To open the tote all you do is squeeze the ends.
 

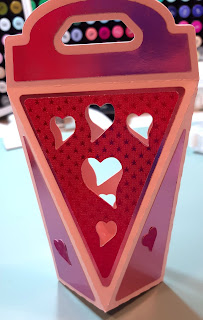
Your Valentine's Day Tote Bag is Complete!


Mini Card

I cut a piece of 65lb white cardstock into a 3"x3" square. 
I then scored it in the middle and folded it. This will be the card base.
 

Next, I added a die-cut panel of Rinea Starstruck Blush/Blush Foil Paper to the card base. 

Then, I layered a Rinea Starstruck Fuchsia/Fuchsia Foil Paper heart onto a Pink cardstock heart. I added some low profile foam adhesive to the back of the heart and press it onto the  die-cut panel of Rinea Starstruck Blush/Blush Foil Paper
  

Next, I stamped the sentiment onto the card.
I used Maker's Movement Note of Love stamp set and
Imagine Crafts/Tsukeniko Memento Dew Drop ink in Rose Bud.
  

Now, the mini card is complete!

You can fill your tote bag with candy, cookies or a small gift. 
You can attach the card with adhesive or a clip.

Thank you for stopping by the blog today. I hope you found some inspiration!

Saturday, January 25, 2020

Toucan Do It with Doodles Paper Playground

Hello Crafty Friends - I am here with a fun tropical card. 

Yes, that's right tropical - I ready to get back to the warm weather. 

I made this fun shaker card using a variety of Doodles Paper Playgrounds Sparkle Blends.


Materials Used:
Recollection Brand Stamps: Tropical Life
Sakura Gelly Roll Pens: White and Black
Tsukeniko Memento Ink: Tuxedo Black
Tsukeniko Versafine Ink: Onyx Black
Recollections Brand 110lb Cardstock: White
Recollections Brand 65lb Cardstock: Medium Pink
Jot Brand Foil Cardstock: Gold
Maker's Movement: Versa Circle Dies
Recollections Brand: Mini Label Die
Spectrum Noir Alcohol Markers:
Bird: IG4, IG5, IG6, IG7, AB3, BO2, CT4, CG3, MG2, and HB3
Leaves: CG3, LG4, and LG5
Flowers: MG2, BO1, and CT4

Thank you for stopping by the blog today. I hope you found some inspiration!

Be sure to tag us Doodles Paper Playground on social media -
if you create a project with our Sparkle Blends. 

There is also a new Facebook group where you can share 
creations you have made with Sparkle Blends!
Come check it out, share some inspiration!

Wednesday, January 22, 2020

You're Just My Type with White Rose Crafts

Hello Crafty Friends - I am here with an interactive card featuring 
the New Lawn Fawn You're Just My Type Stamp Set and Dies


Let's get started!
Gather all the materials - Lawn Fawn Stamp, dies and 6x6 pattern papers

I stamped and colored the images: the desk, mouse, lamp, typewriter, message and I made a little chair from the xoxo heart. I die cut all the components. I die-cut a slot into the typewriter for the message to pop up through.

I die cut the semi-circle at the top of the pattern paper and the slot for the pull tab. I repeated this onto heavyweight white cardstock. I also die cut the pattern paper with a stitched rectangle. I also added a thin piece of white cardstock over the gray pattern paper to create the illusion of a baseboard. 
 

Next, die-cut the pull tab, I folded the inward, then outward. So, it looks like the middle photo. I added a strip of pattern paper to the pull tab so that it would match the card.
  

Then, I slid it into the slot on the card panel. I added some double-sided adhesive to the tab.

Next, I added the message to the tab. I then slid the typewriter into place with the message going through the slot I die cut in the typewriter. I added some foam adhesive and pressed down. I added some foam adhesive to the desk and lamp. I place them onto the card front panel. 
 

I slid the message into the typewriter making sure none of it can be seen only, the top of the message paper. I draw a light pencil line and trim off the extra pull tab.
 I then adhere the gray pull tab arrow to the pulley.
 
Next, I attache the card front panel to a black card base. 

For finishing touches, I add a few sequins.
 

Now, the card is complete!
 

Materials Used:
You're Just My Type Clear Stamps - Lawn Fawn
You're Just My Type Lawn Cuts Dies - Lawn Fawn
Lawn Fawn - Let's Toast Pull Tab Add-On Dies
Lawn Fawn SPRING FLING 6x6 Inch Petite Paper Pack LF1876 Preview Image
See the source image
VersaFine Clair Ink Pad - Nocturne

KaiserCrafts 12mm Double-sided Adhesive

Sakura Gelly Roll Pen: White & Black
Recollection Brand 110lb Cardstock: Black &White
Accent 80lb Smooth Cardstock: White
Copic Markers: Typewriter B00 & B01
Lamp: G21 
Chair & Desk: C1 & C2
Heart: R59
Spectrum Noir Markers:
Mouse: MB1 & MB 
Lamp: CG1 & CT4
Desk: IG3 & IG4
Chair: IG3 & IG4

Thank you for stopping by the blog today. I hope you found some inspiration!

Be sure to tag us White Rose Crafts LLC on social media 
if you create a project with products or kits purchased on the 

Saturday, January 18, 2020

Sending You Pugs and Kisses with Doodles Paper Playground

Hello Crafty Friends - I am here with a fun shaker card using 
Doodles Paper Playground Sparkle Blends.

I chose three Sparkle Blends for this shaker.

Here's the card I created.
Materials Used:
Clearly Besotted Stamp: Bah-Hum-Pug!
Lawn Fawn: Spring Fling Pattern Paper (yellow x-stitch & Floral)
Lawn Fawn: Stitched Hillside Border
MFT Die: Banner
Sizzix Die: Heart
Sakura Gelly Roll Pens: White, Black & Gold
Tsekineko Memento Ink: Tuxedo Black 
Spectrum Noir Markers: CT4, TB2, TB3, 
IG4, IG5, IG7, TN1, TN3 & MB2
Recollections Brand: Puffy Heart Stickers Gold
Recollections Brand 65lbs Cardstock:  Light Blue & Teal
Recollections Brand 110lbs Cardstock: white and card base
Foam Adhesive
Imagine Crafts Tear It Tape
Acetate

Thank you for stopping by the blog today. I hope you found some inspiration!

Be sure to tag us Doodles Paper Playground on social media -
if you create a project with our Sparkle Blends. 

There is also a new Facebook group where you can share 
creations you have made with Sparkle Blends!
Come check it out, share some inspiration!