Friday, December 11, 2020

Christmas Bulb Treat Holder with Rinea

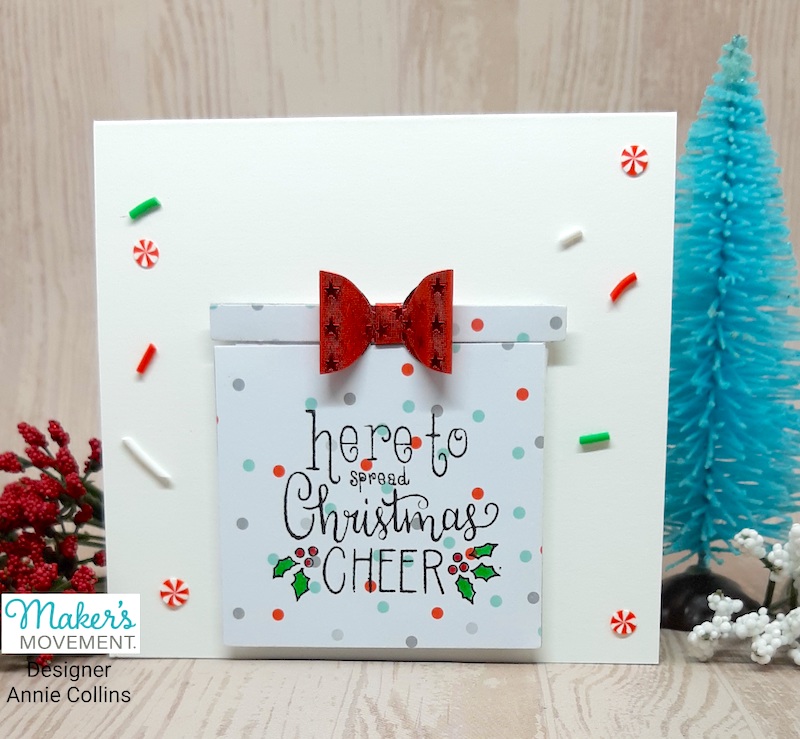
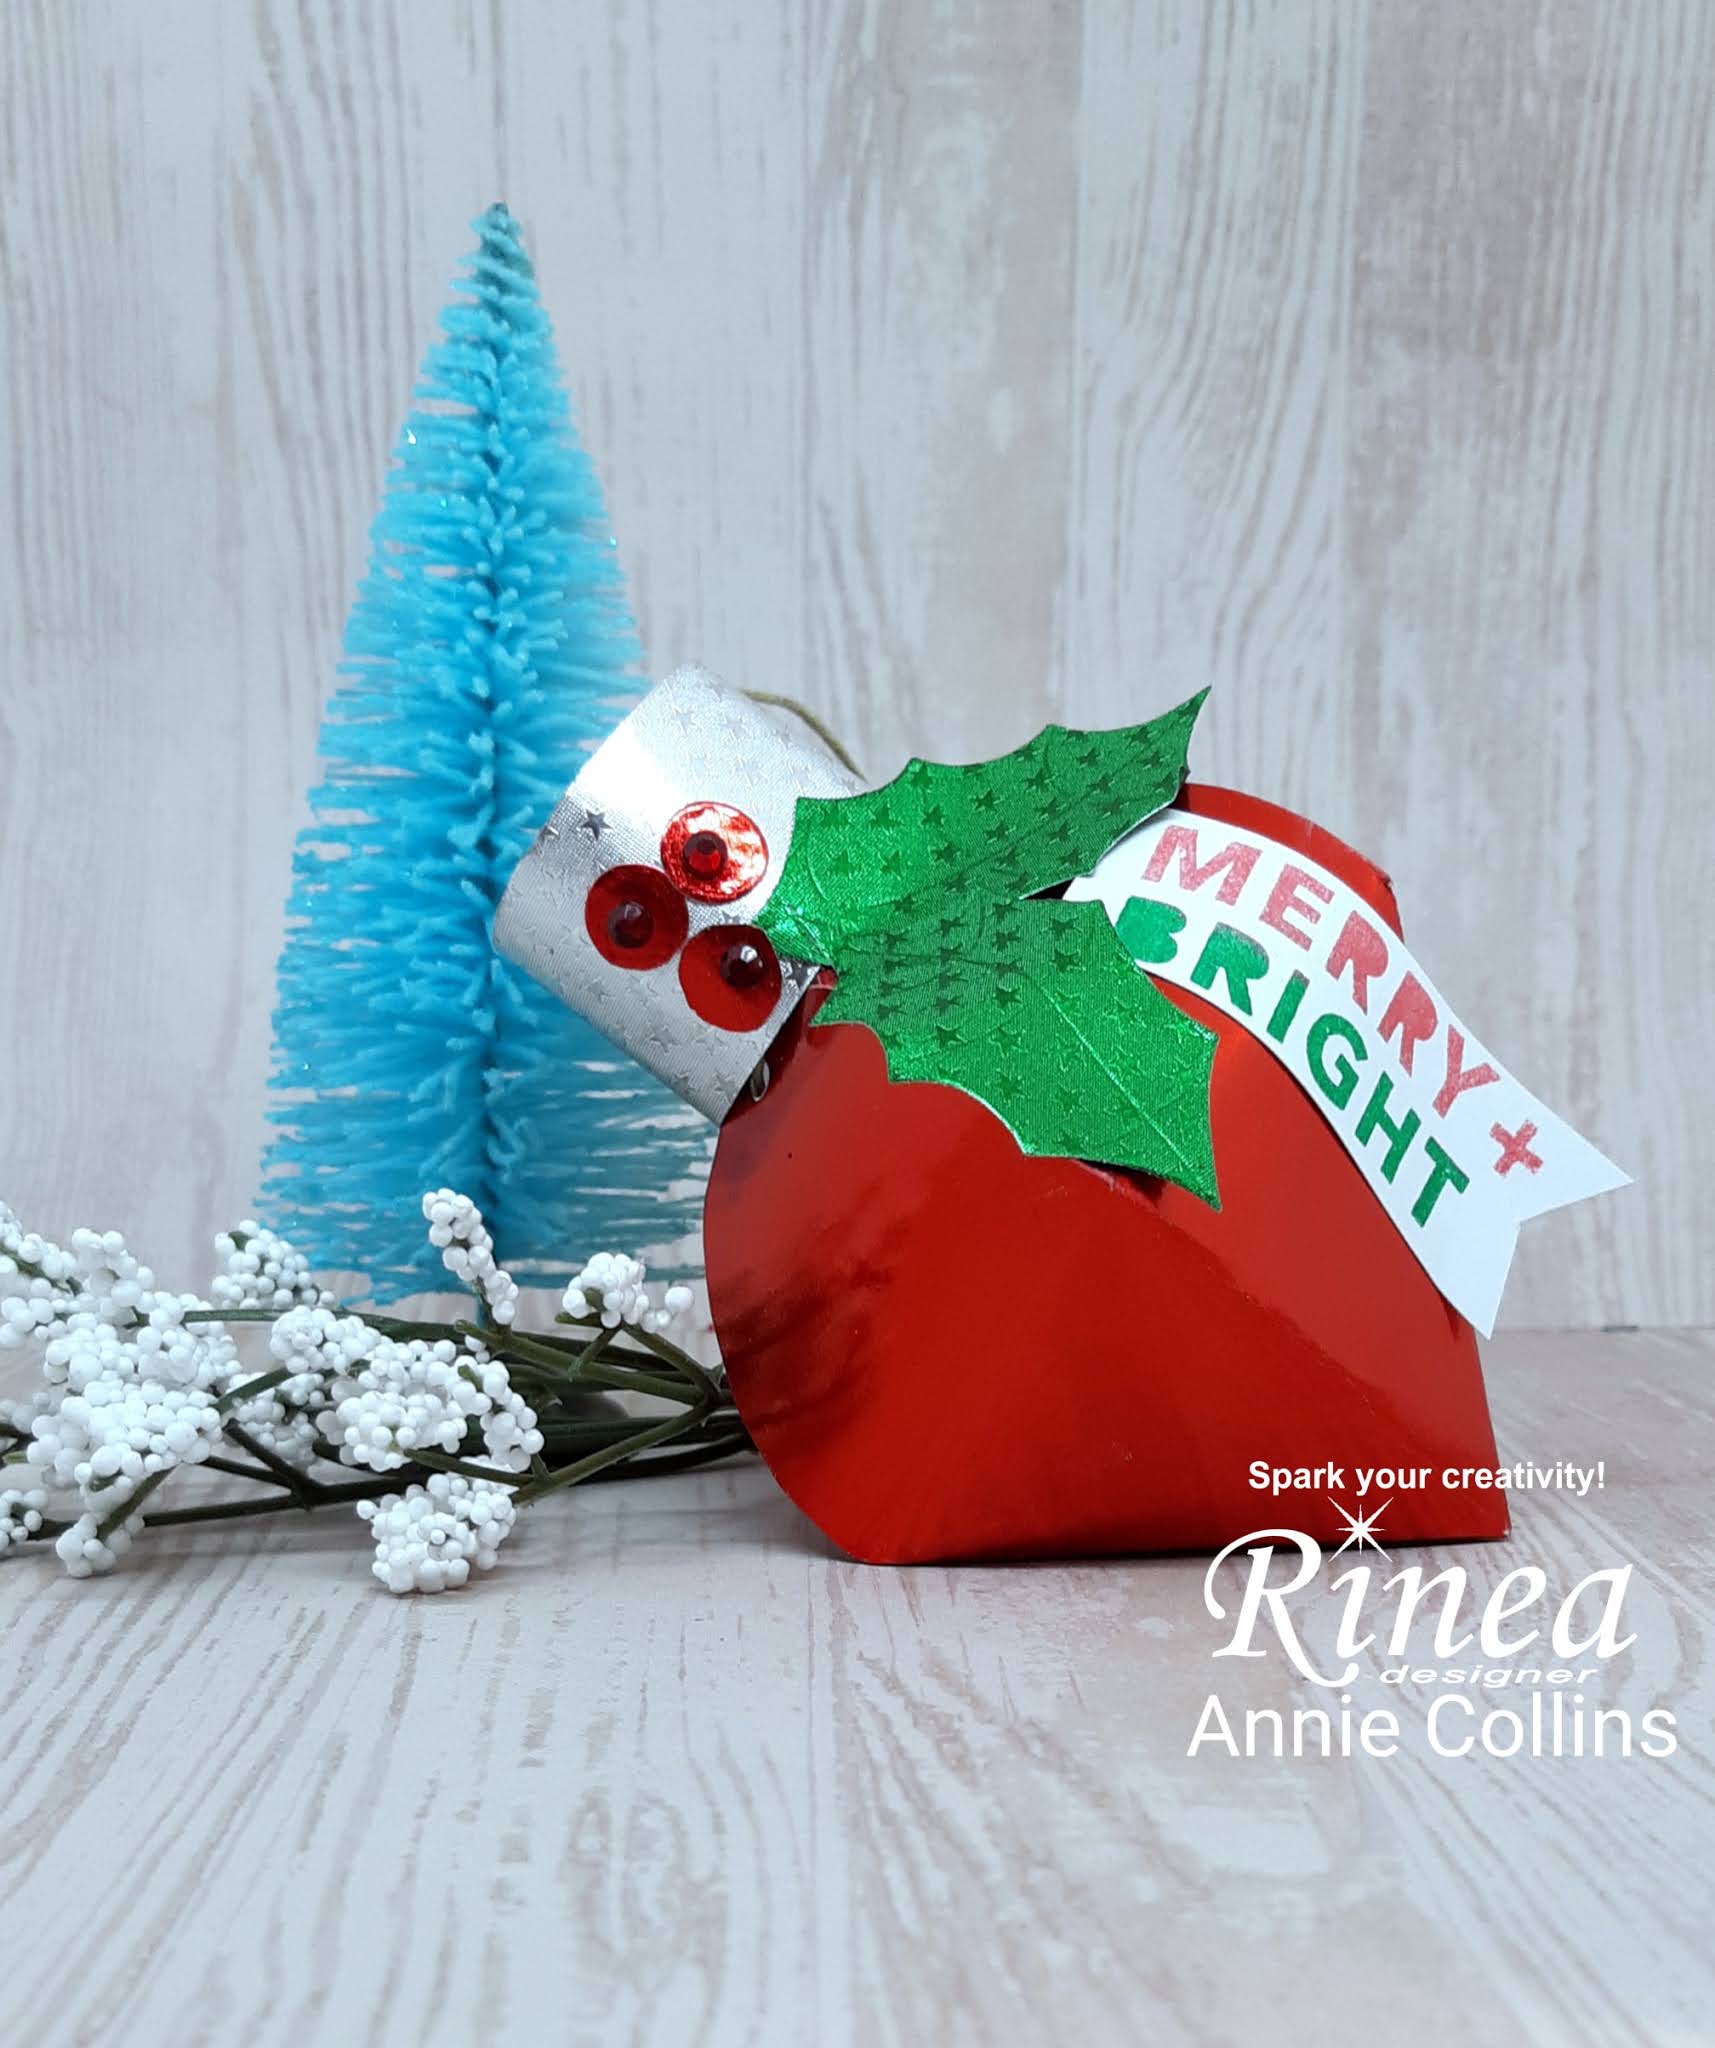
Hello Crafty Friends - Annie here with a fun and easy project for you to try. This is Christmas Bulb treat holder. You can make one or several of this quick and easy.

Supplies Used

Rinea Foil Paper: Glossy Ruby/Gold

Rinea Foil Paper: Starstruck Silver/Silver

Rinea Foil Paper: Starstruck Emerald/Emerald

Rinea Clear Round Stamping Block

Template (See below)

Xyron Creative Station Lite

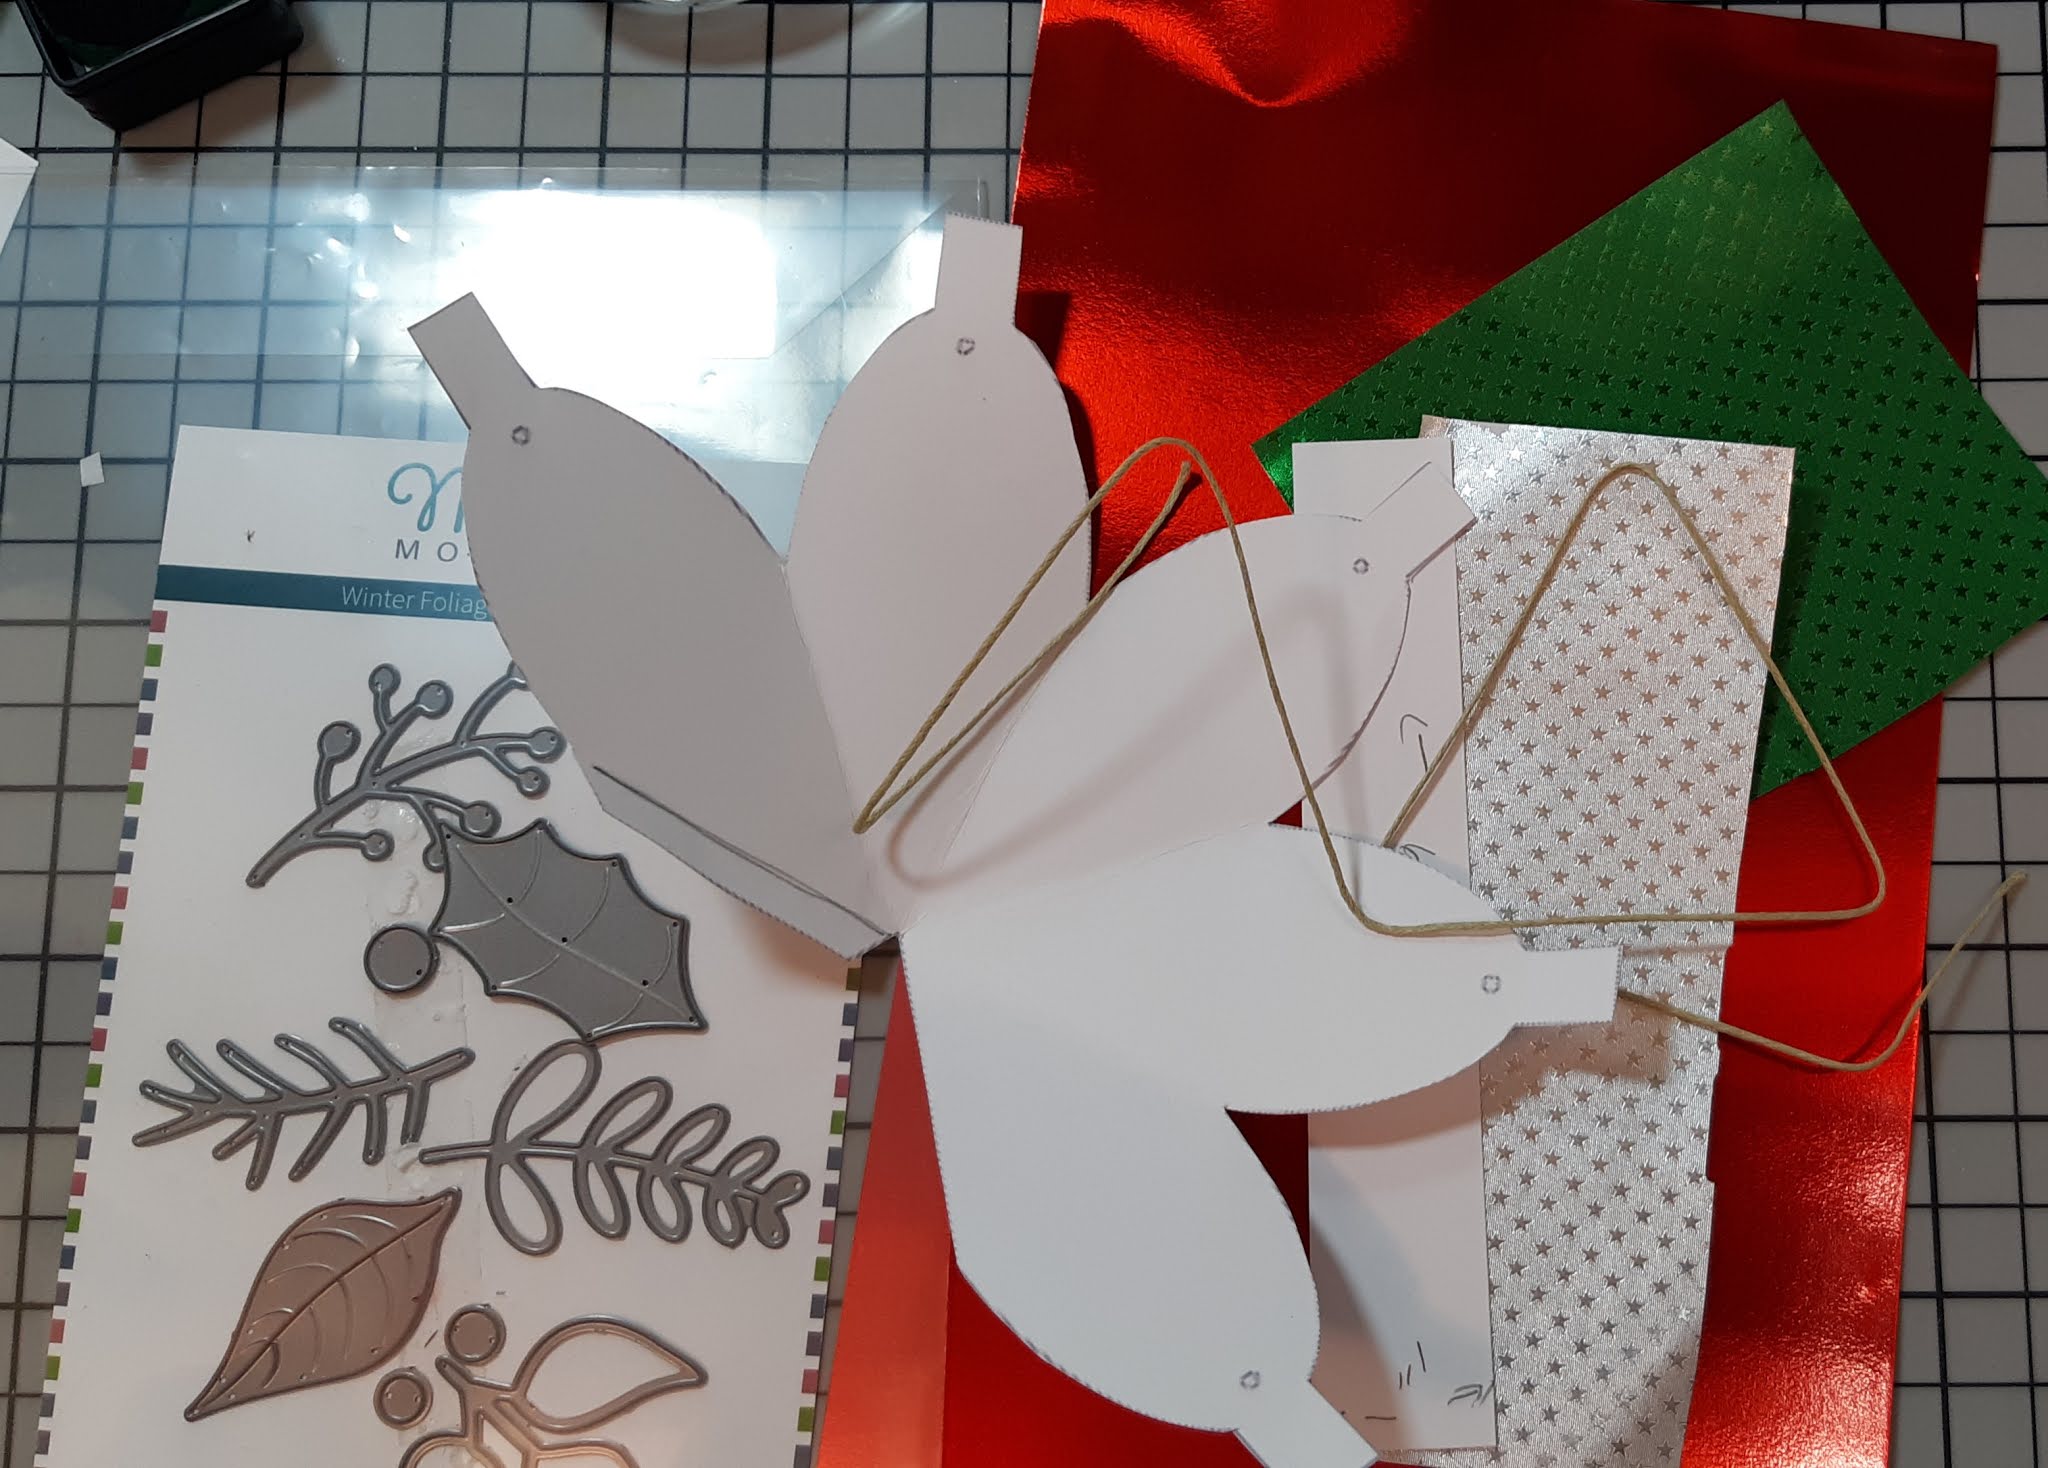
Maker's Movement: Winter Foliage Die Set

VersaMagic Ink: Red Magic

Memento Ink: London Fog

Brilliance Ink: Gamma Green

Imagine Crafts: Tear It Tape 

Ms. Sparkle & Co. Stamp Set: Holly Jolly

Ms. Sparkle & Co. Gems: Ruby

Thread of your choice

2" X 2" Piece of White Cardstock


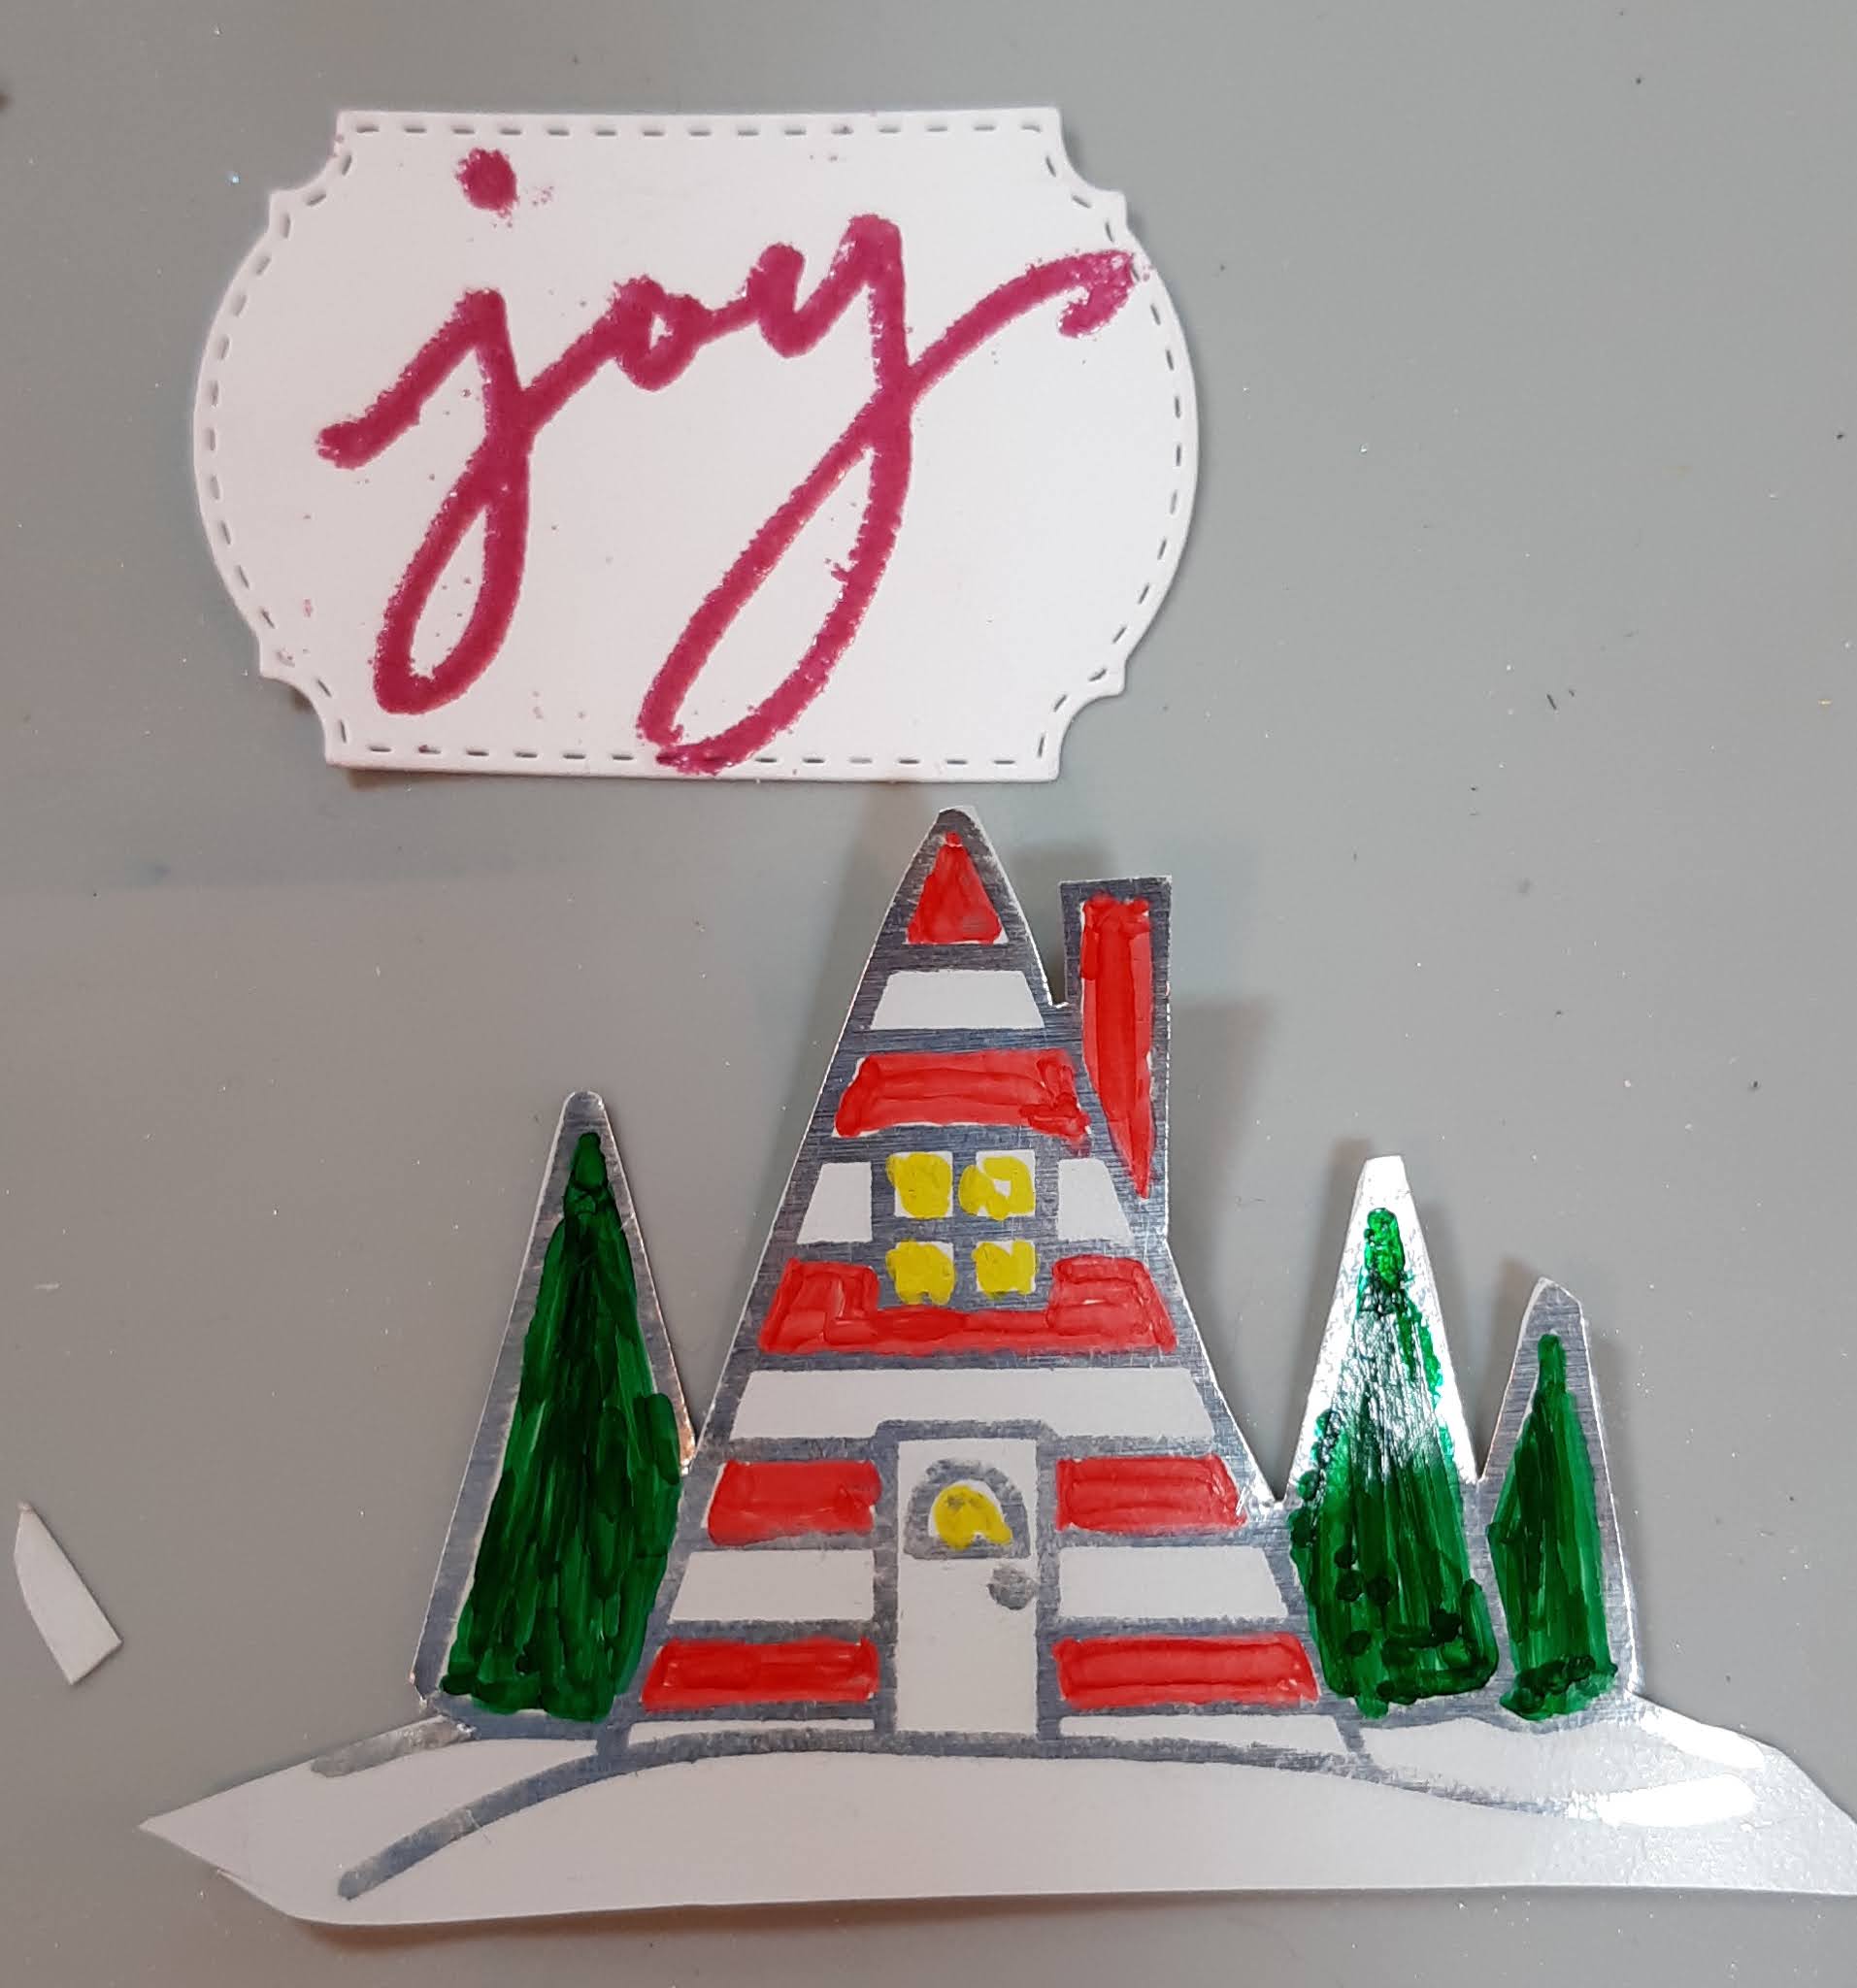
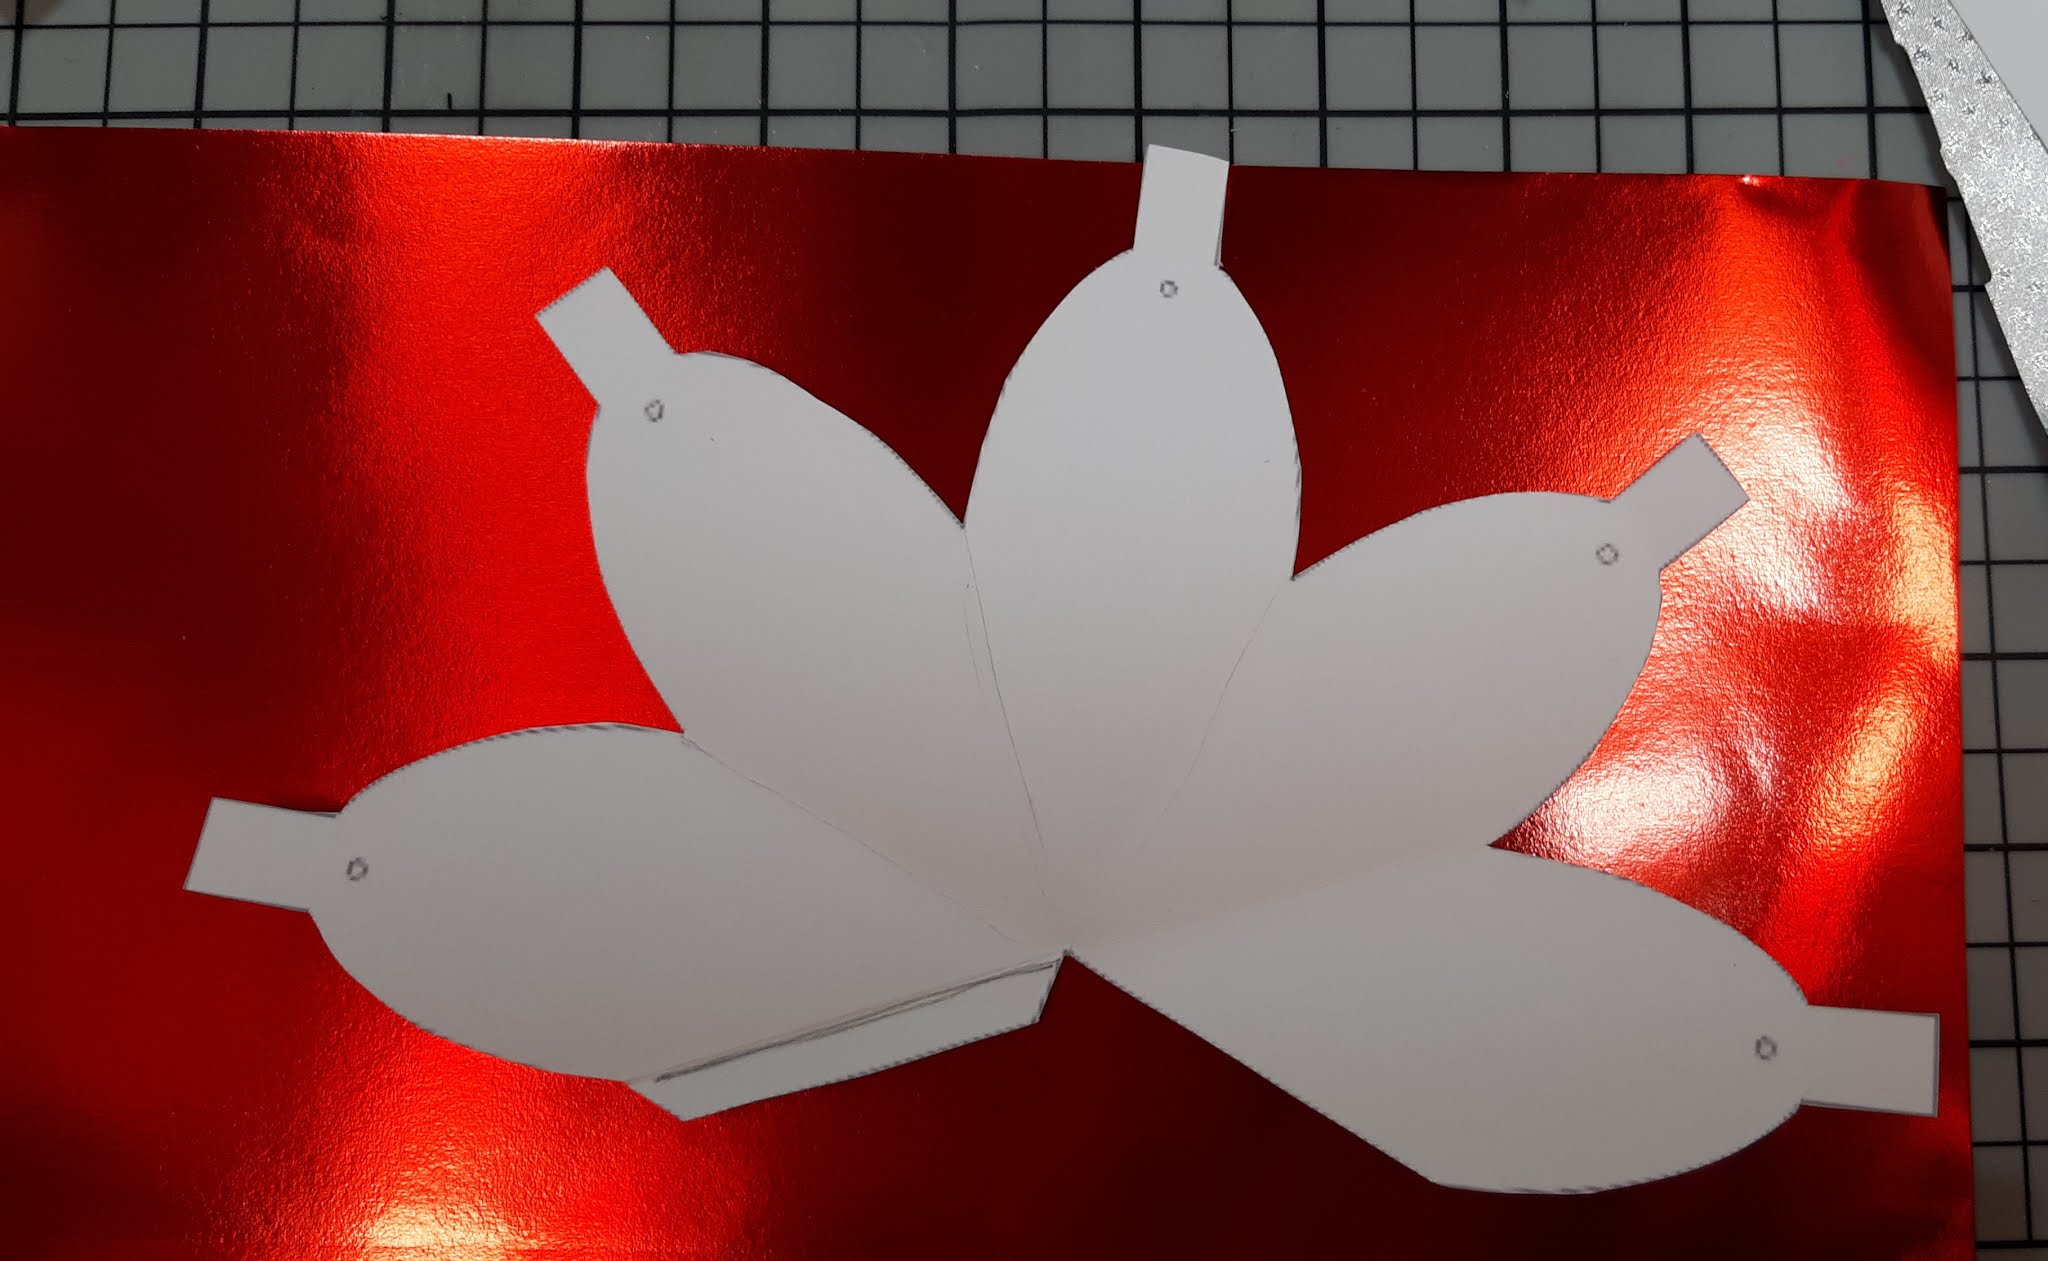
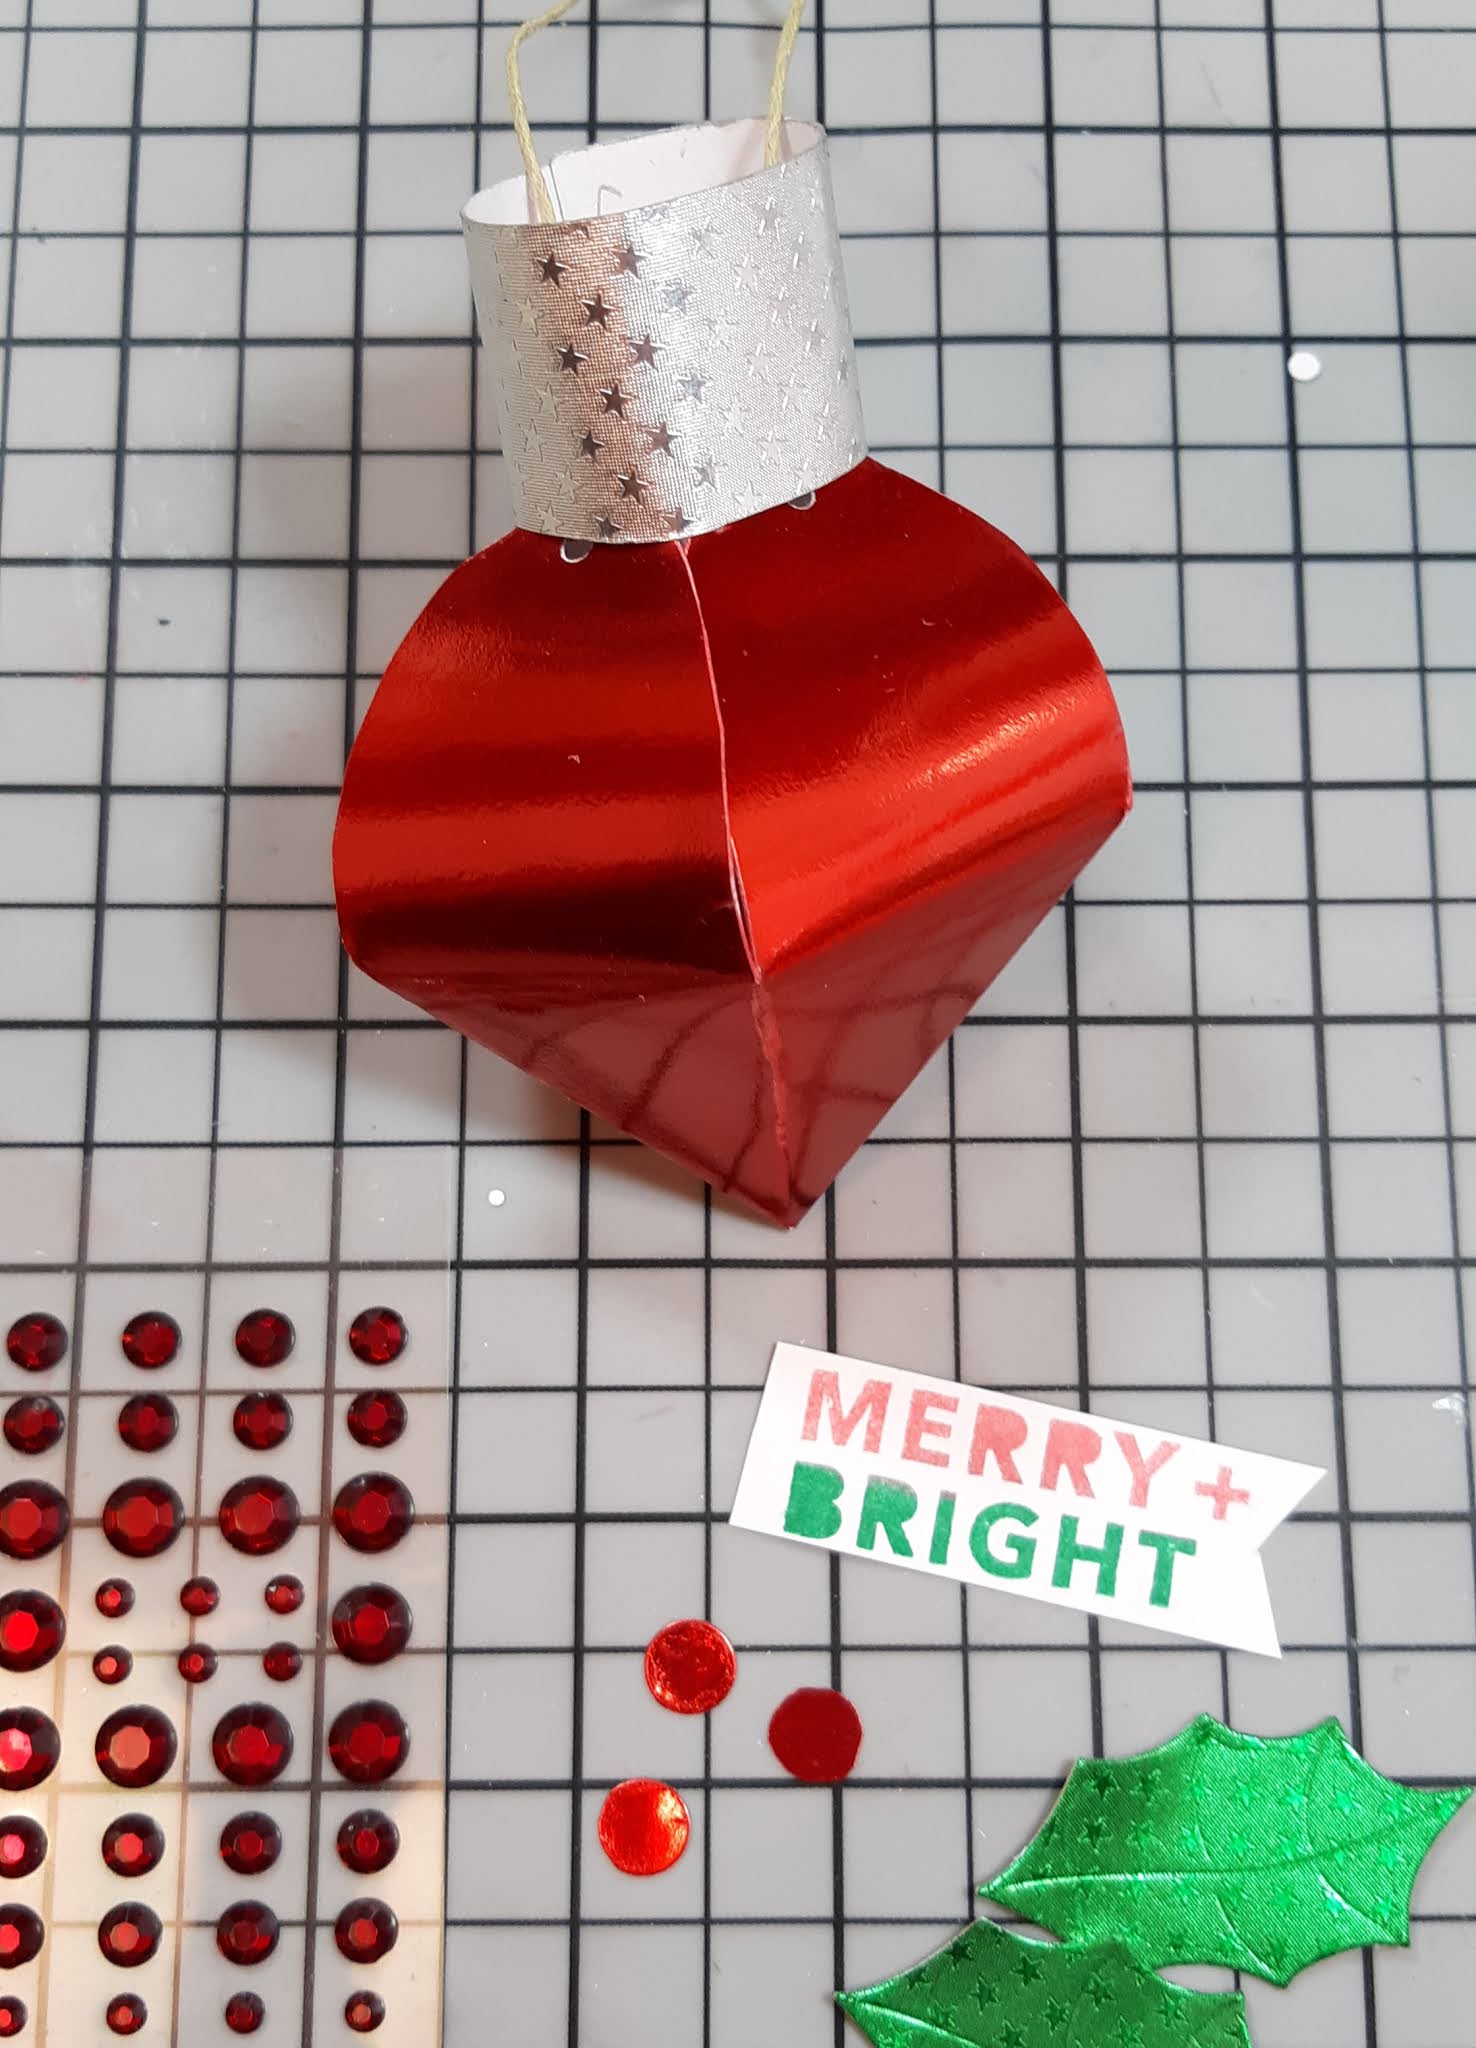
First, I gathered all the materials. I cut the template out and die cut the holly and berries.


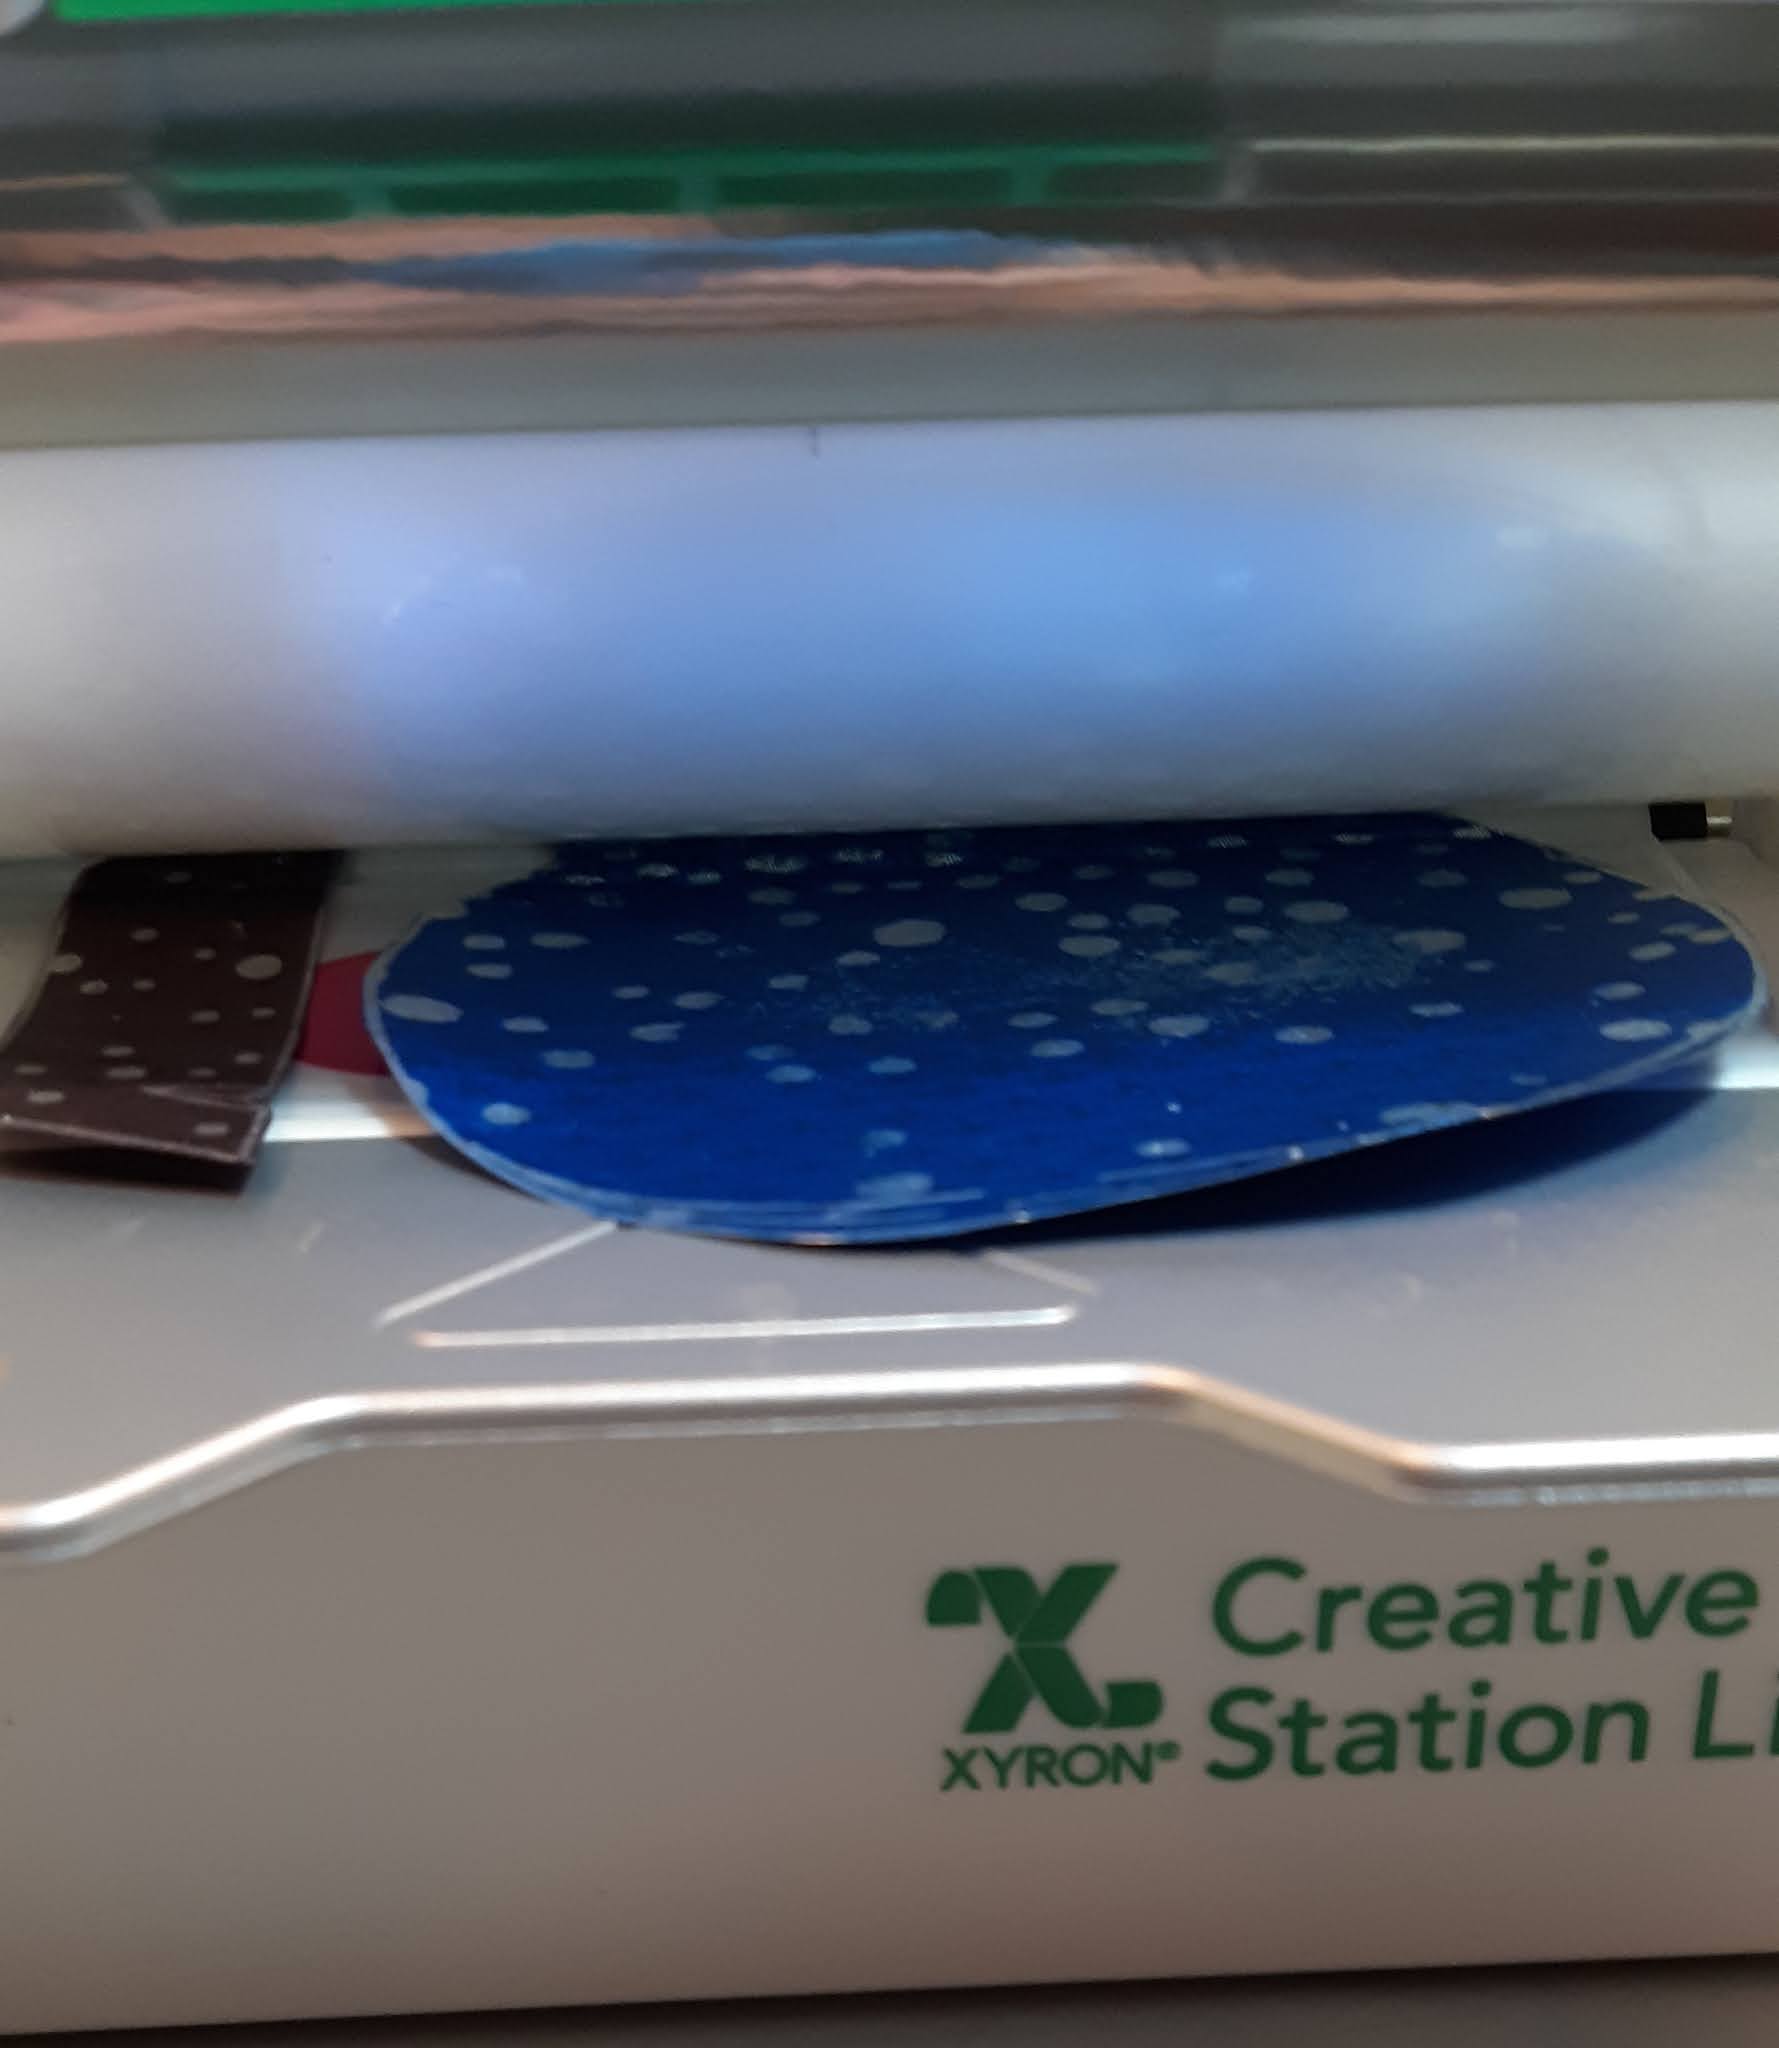
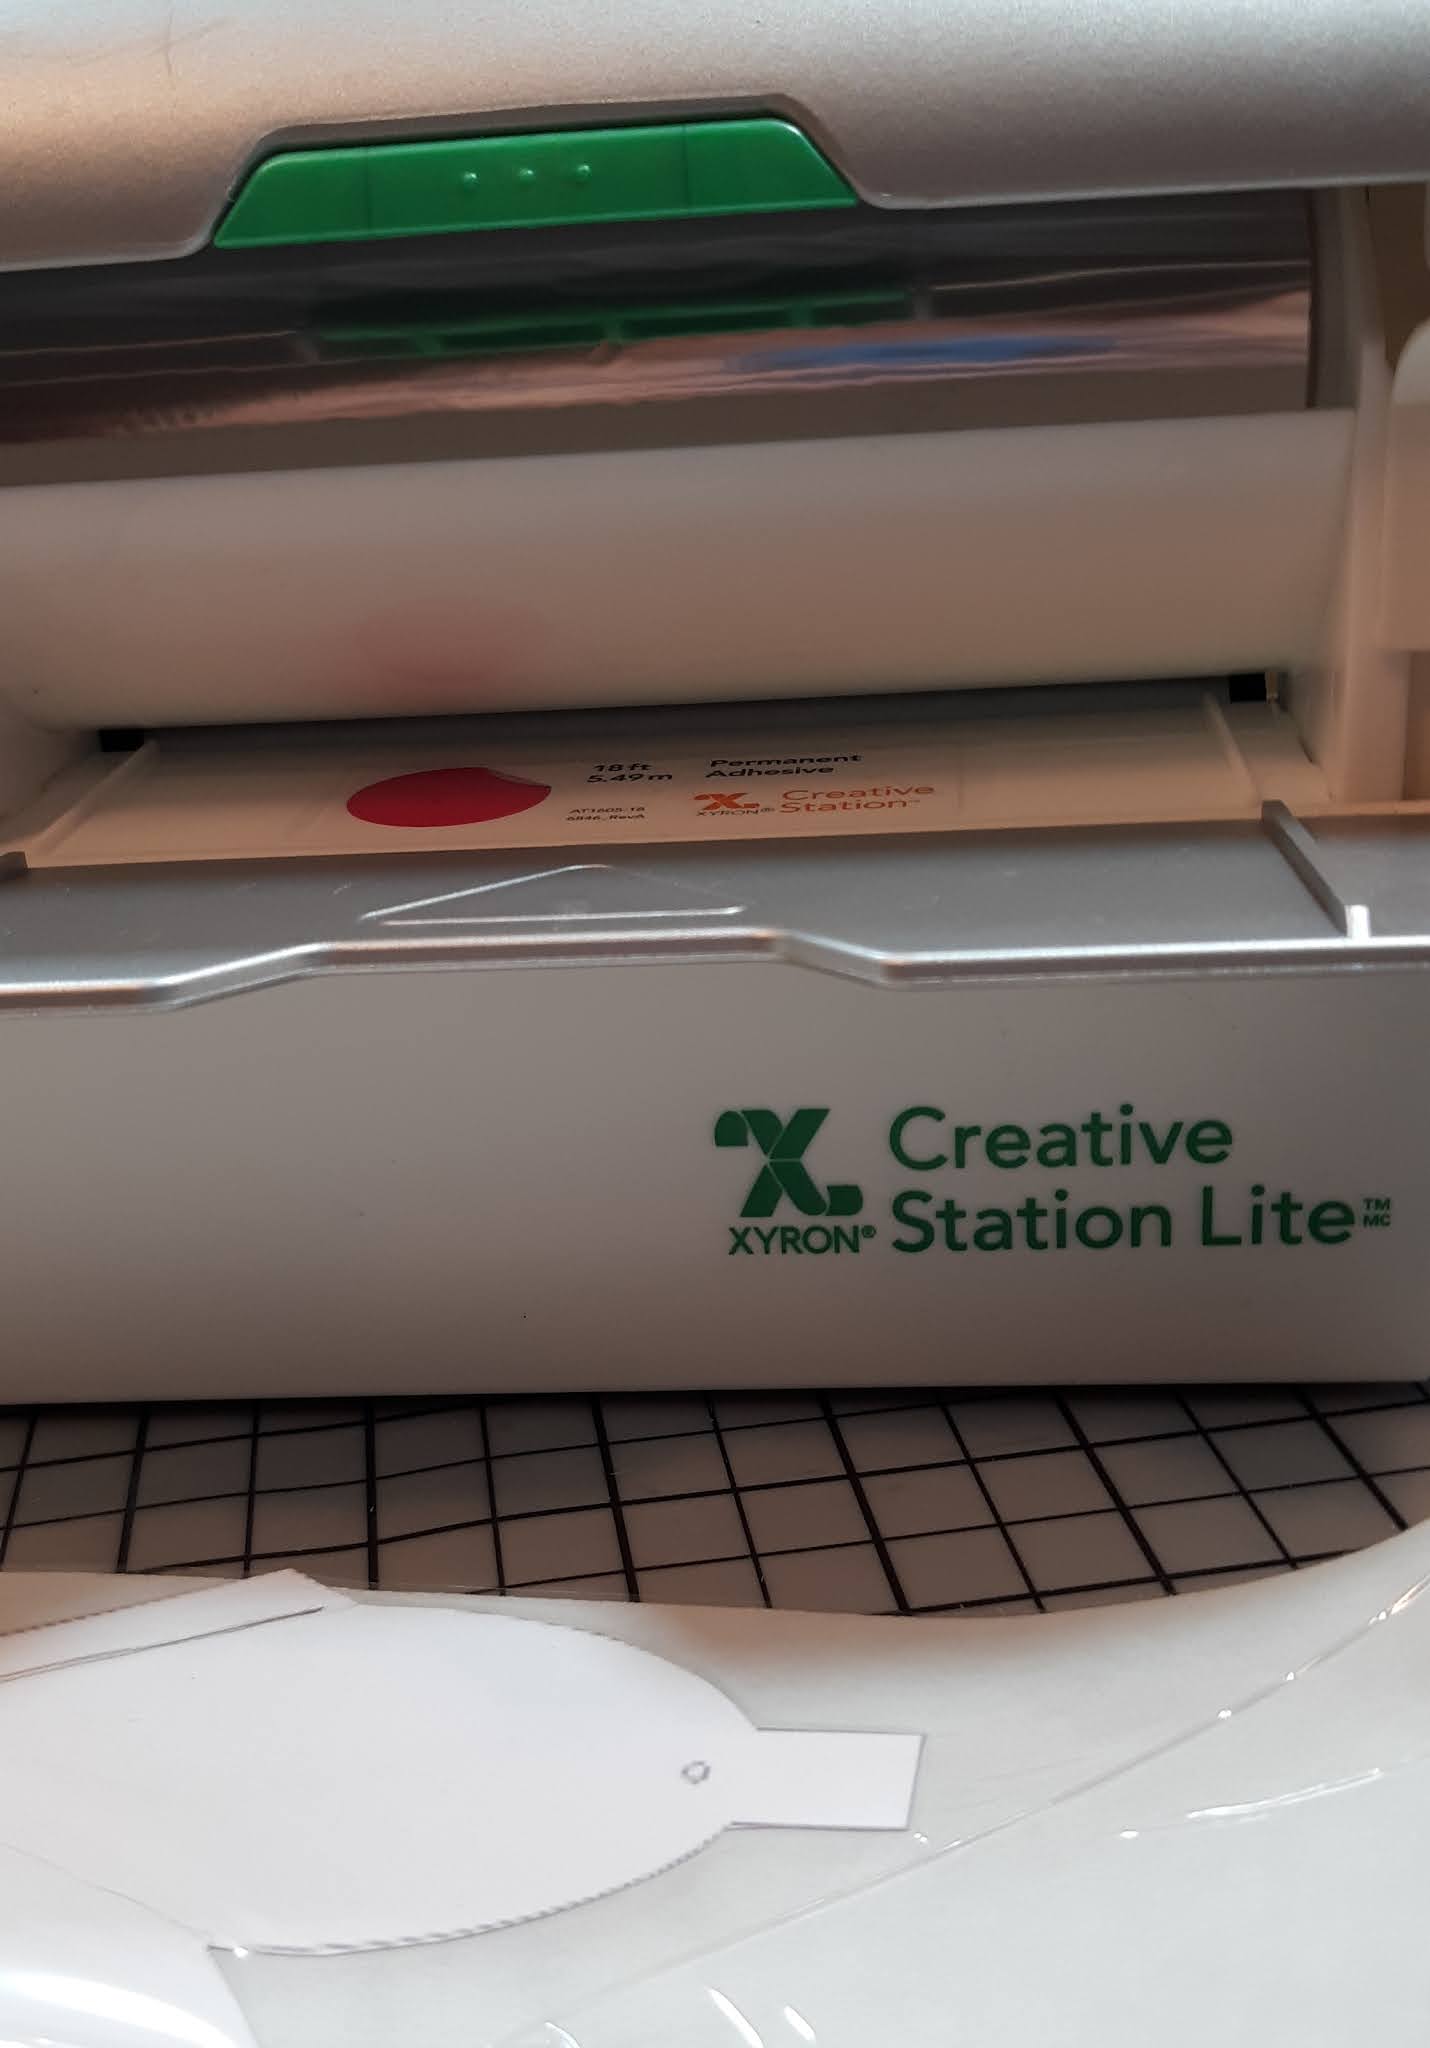
I adhered the template using the Xyron Creative Station Lite to the back of the
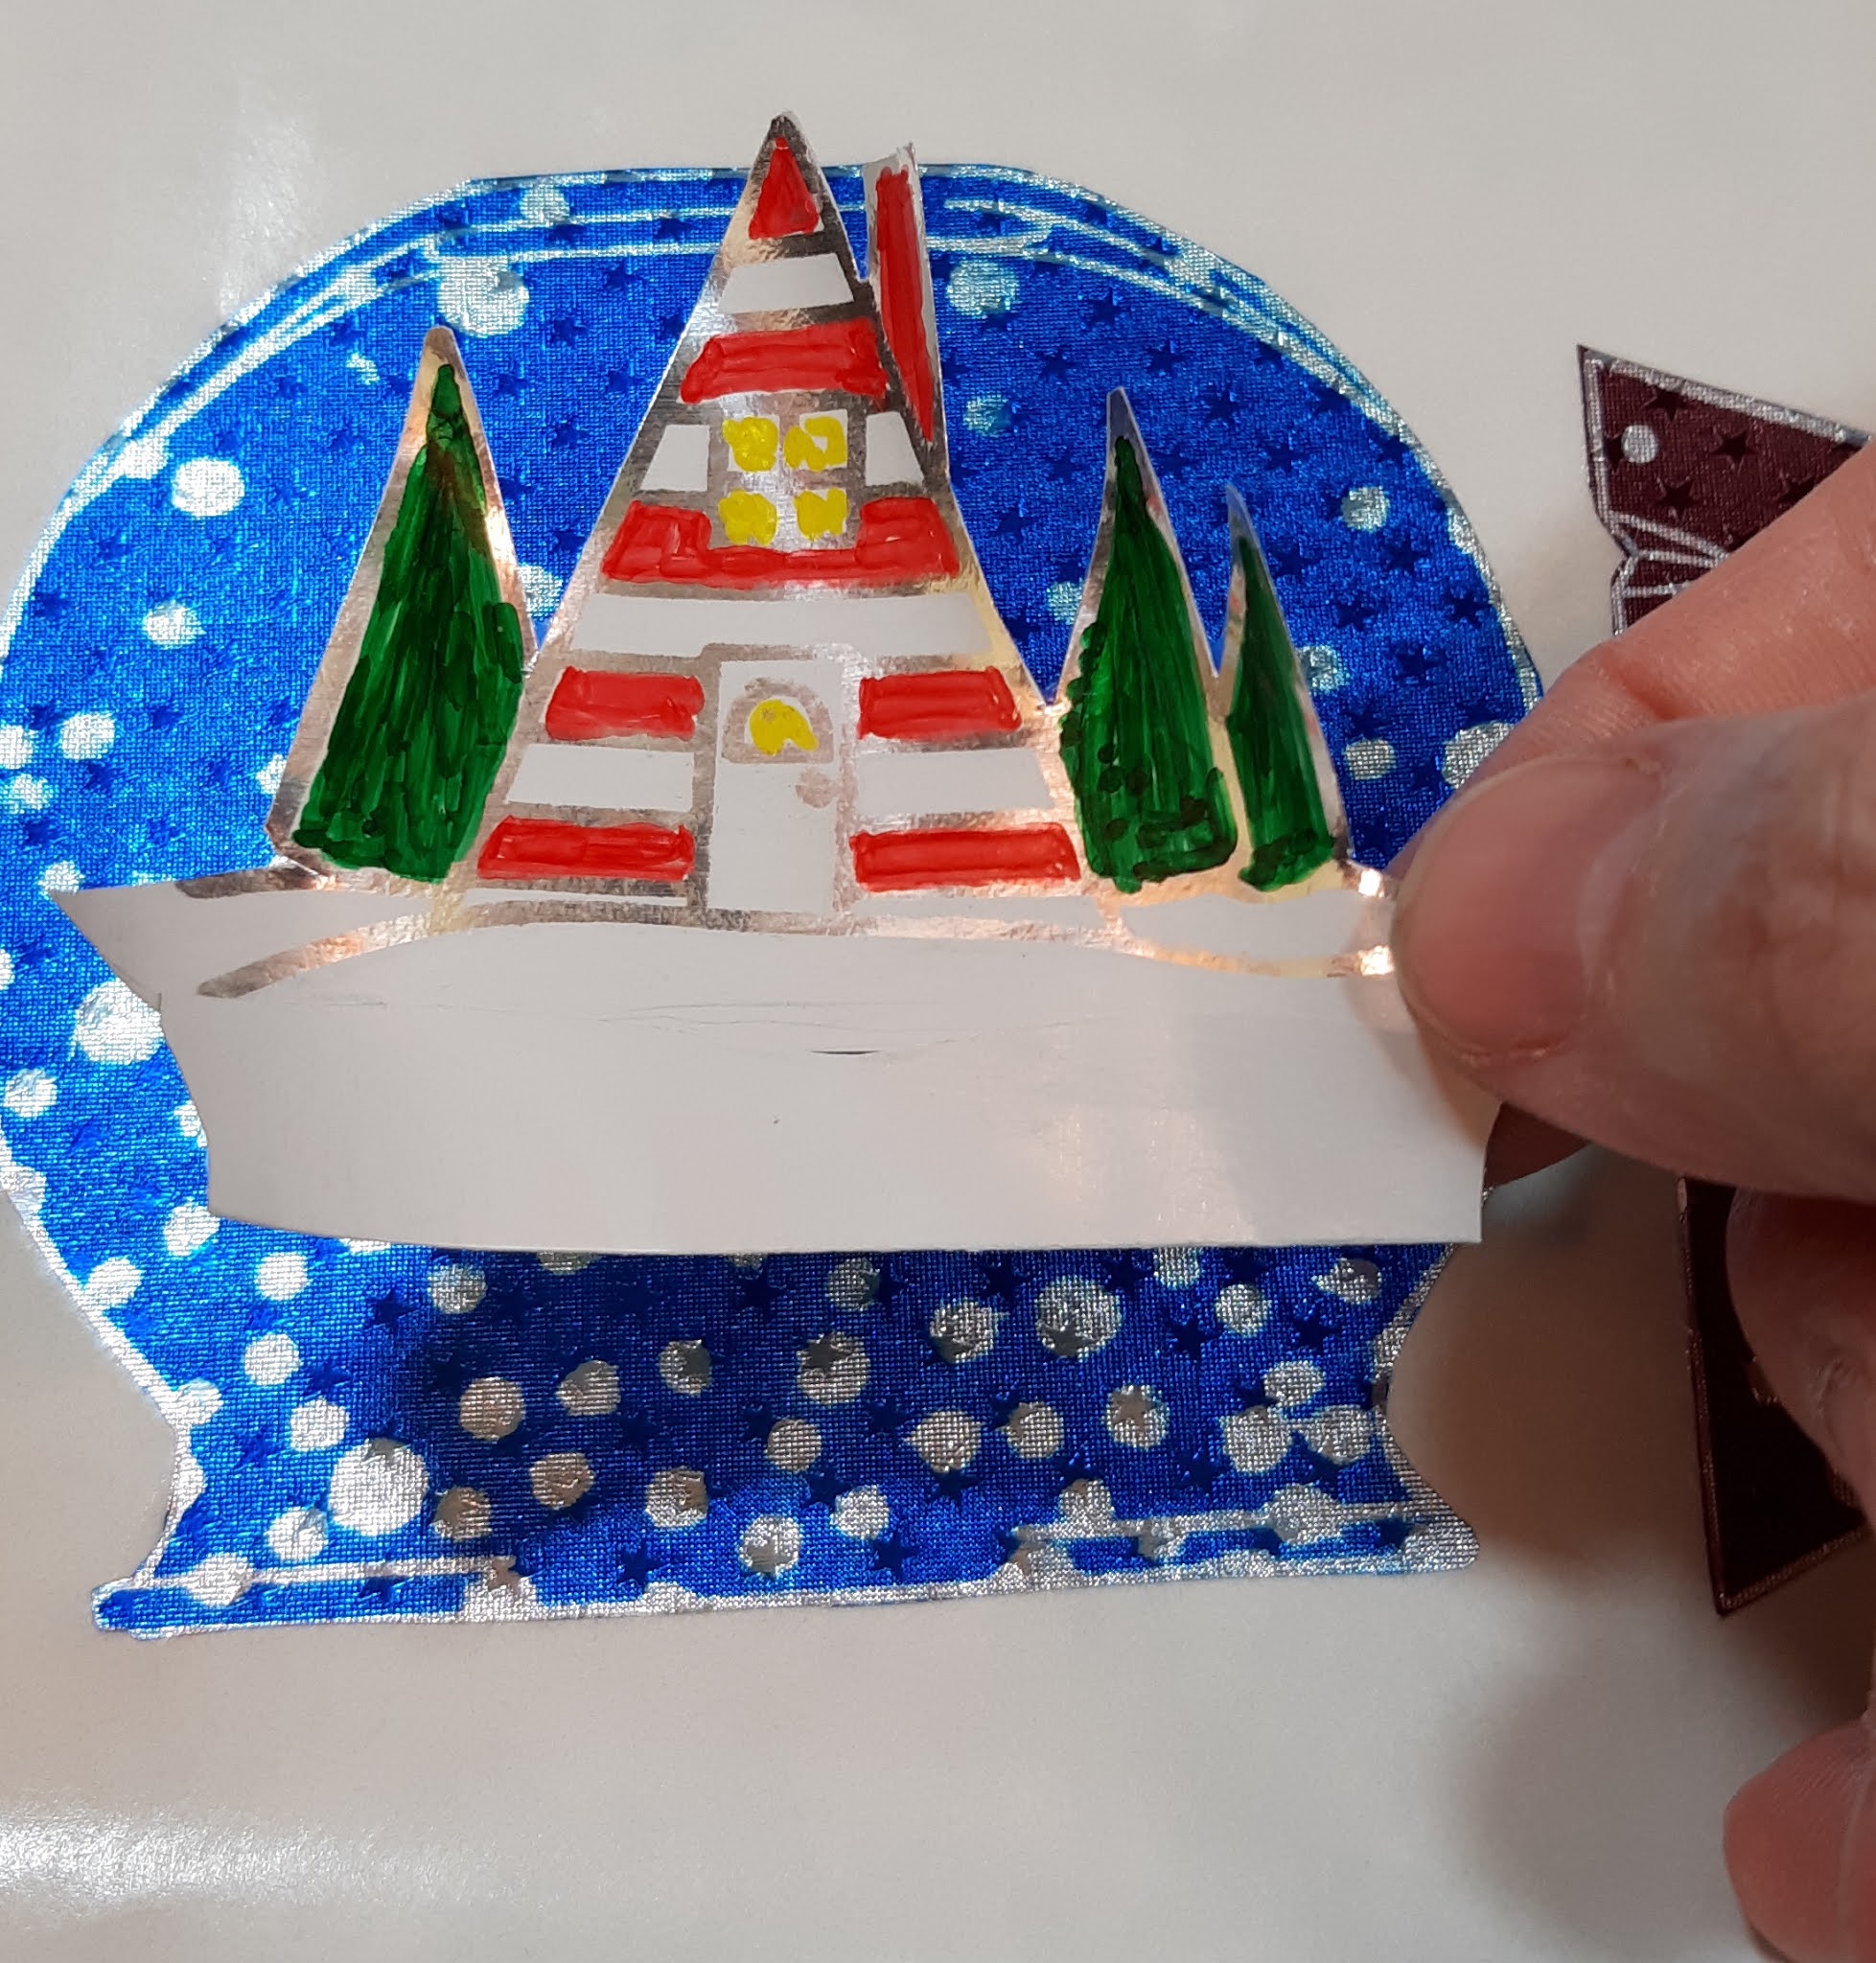
 Rinea Foil Paper: Glossy Ruby/Gold and I trimmed it out. I also adhered the topper template to the back the Rinea Foil Paper: Starstruck Silver/Silver and trimmed it.

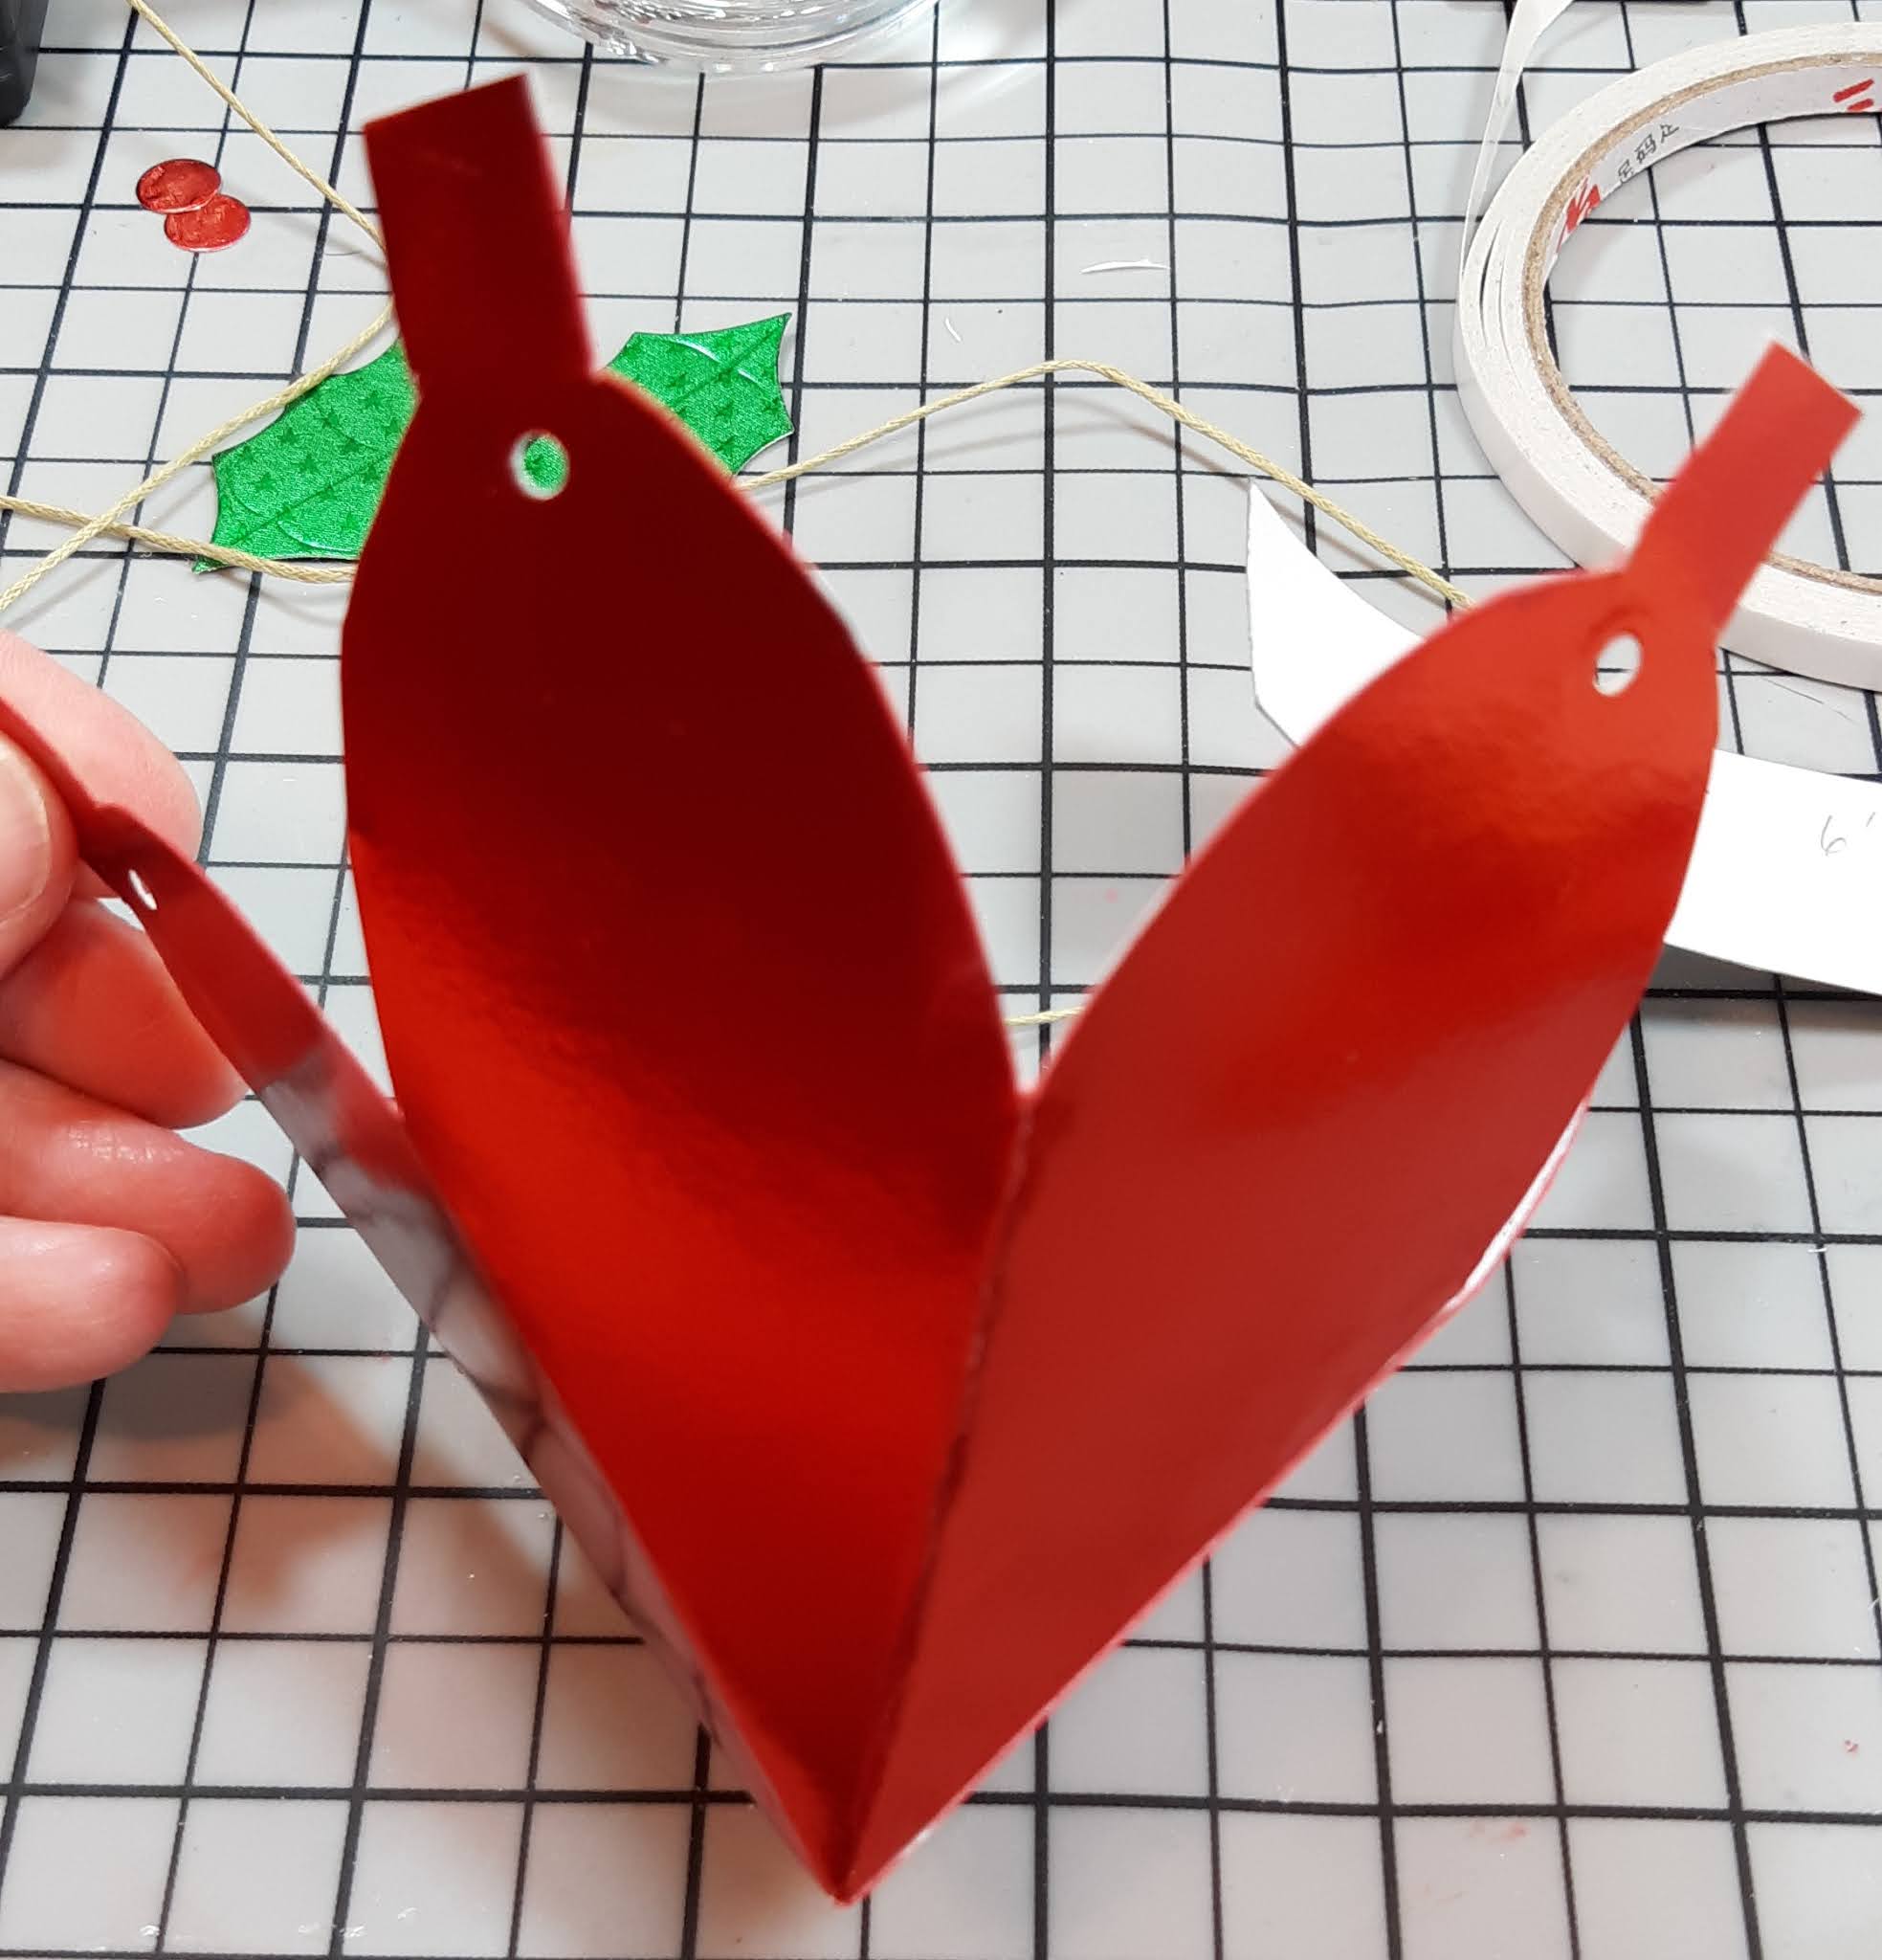
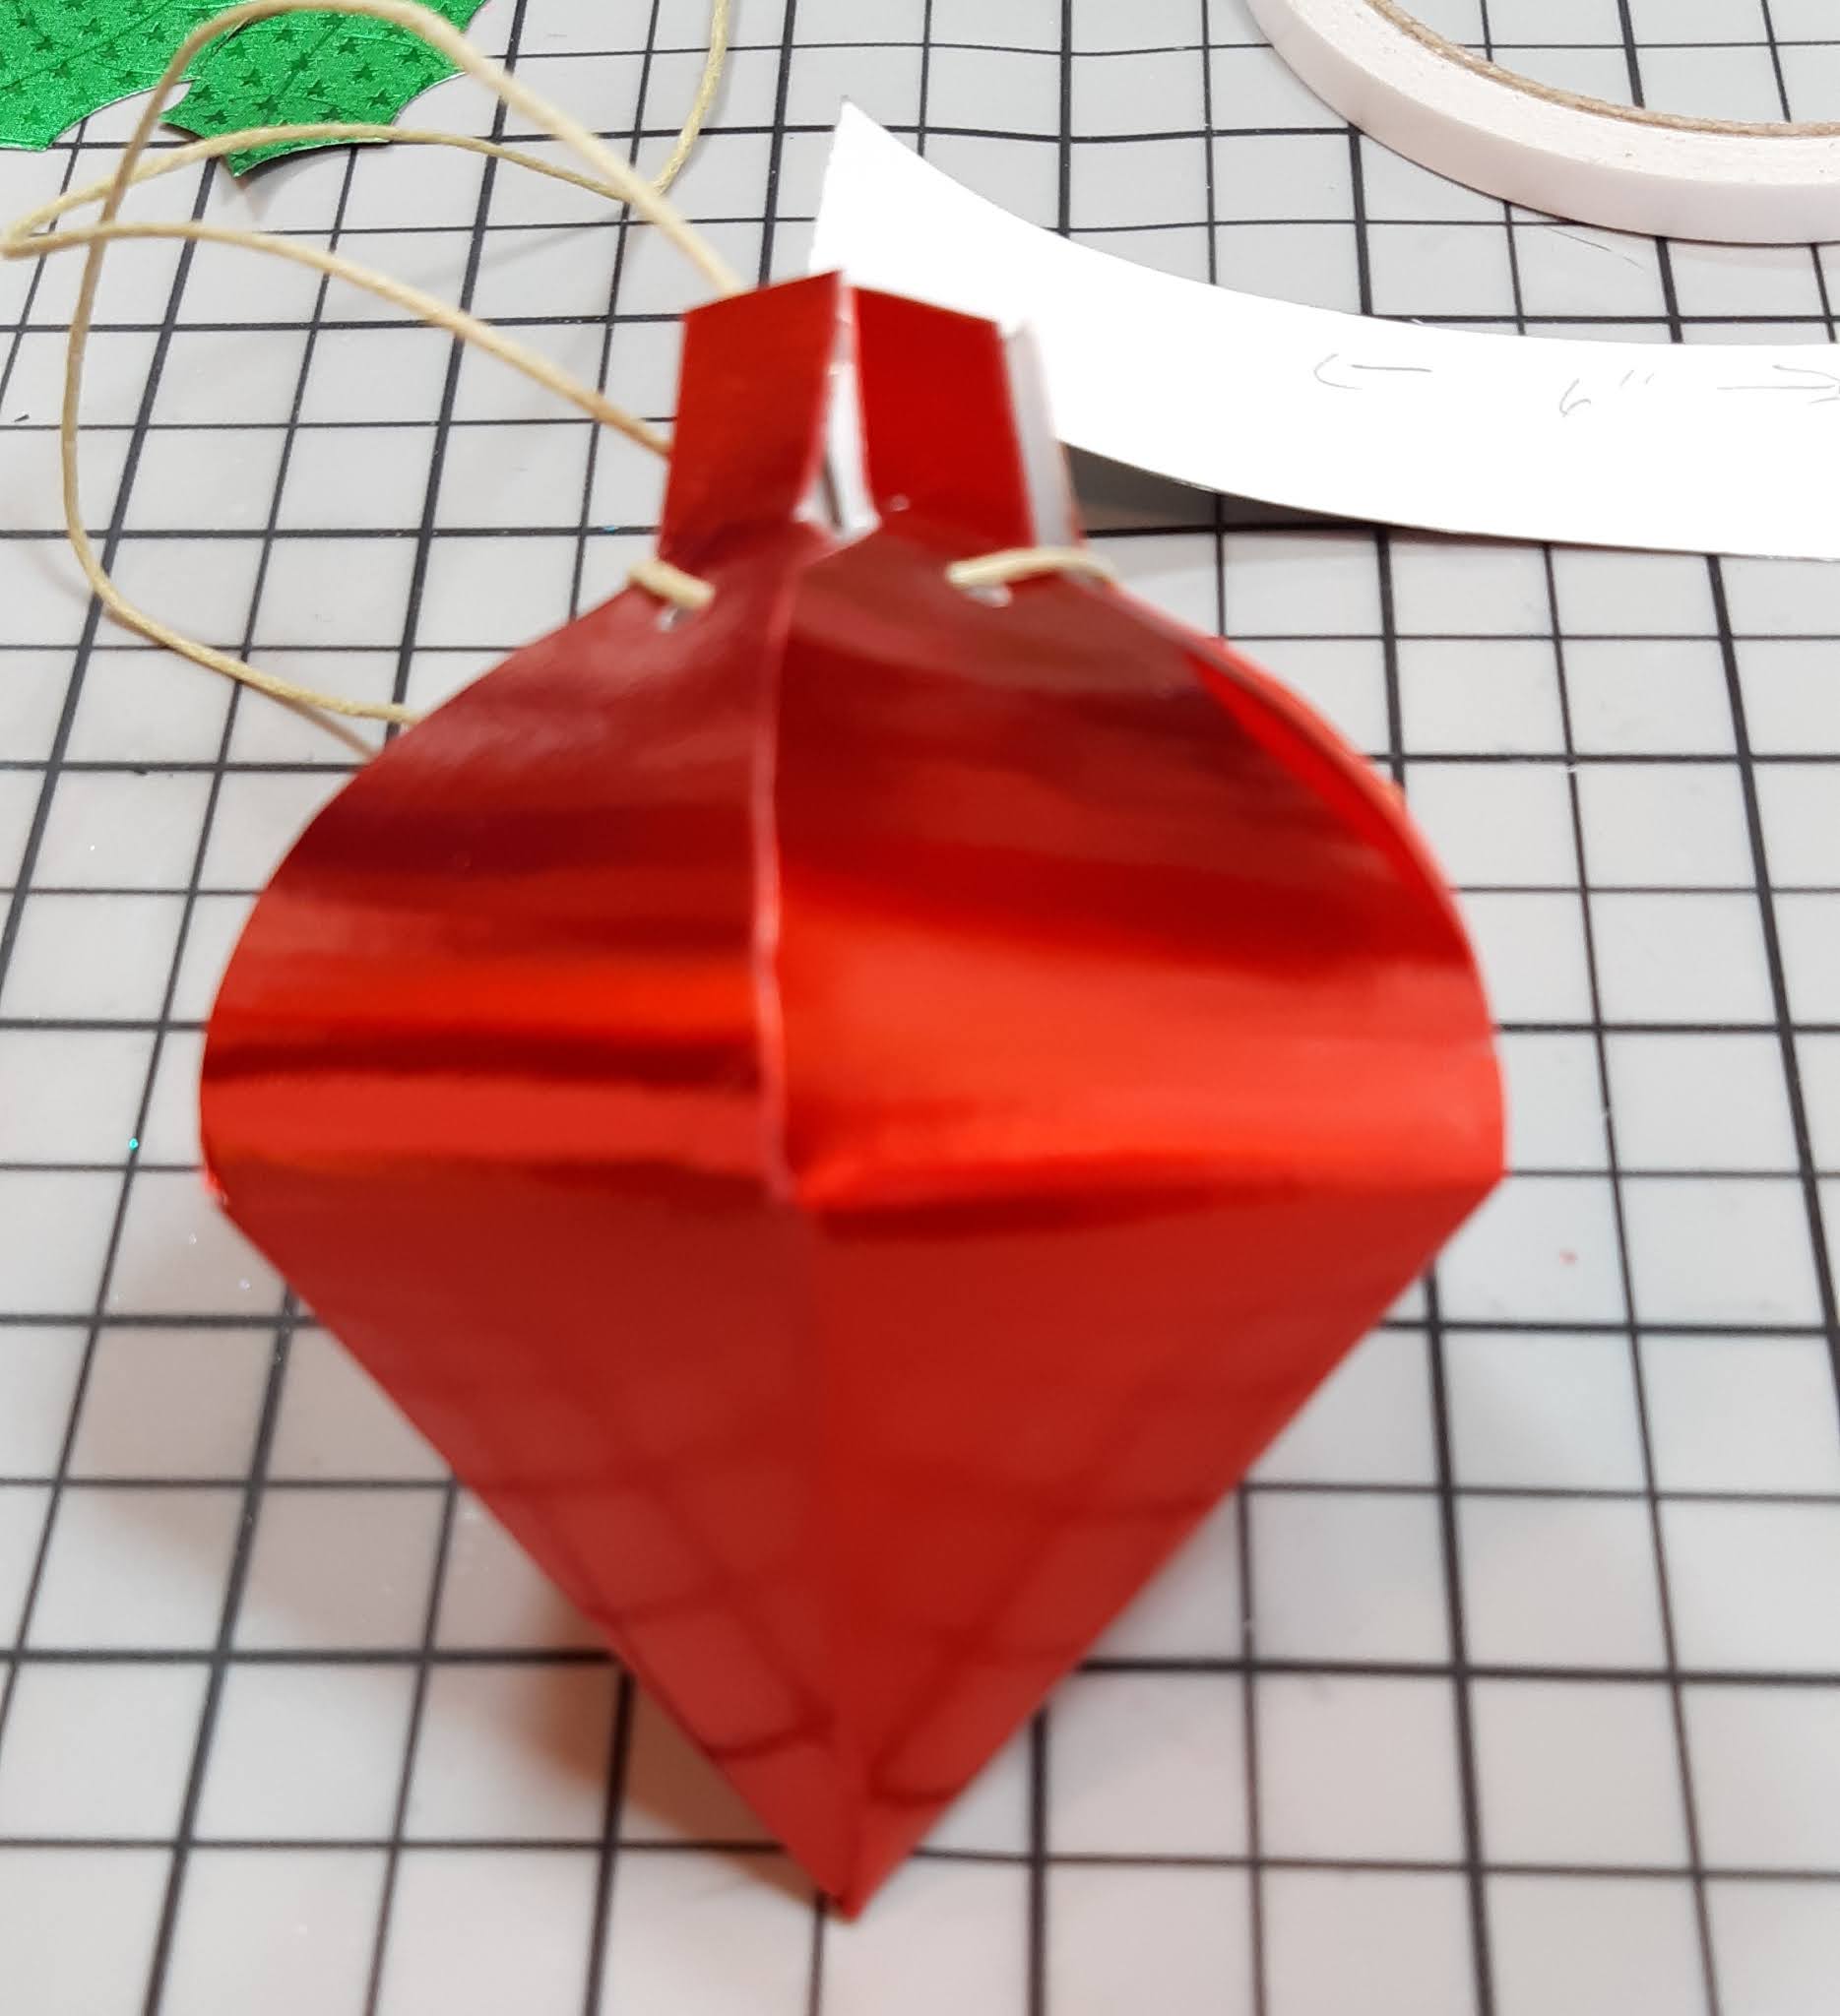
I gently scored the sections and punched a hole in the marked section. I then placed a pieced with of Tear It Tape on the tab of the of the base of the bulb.

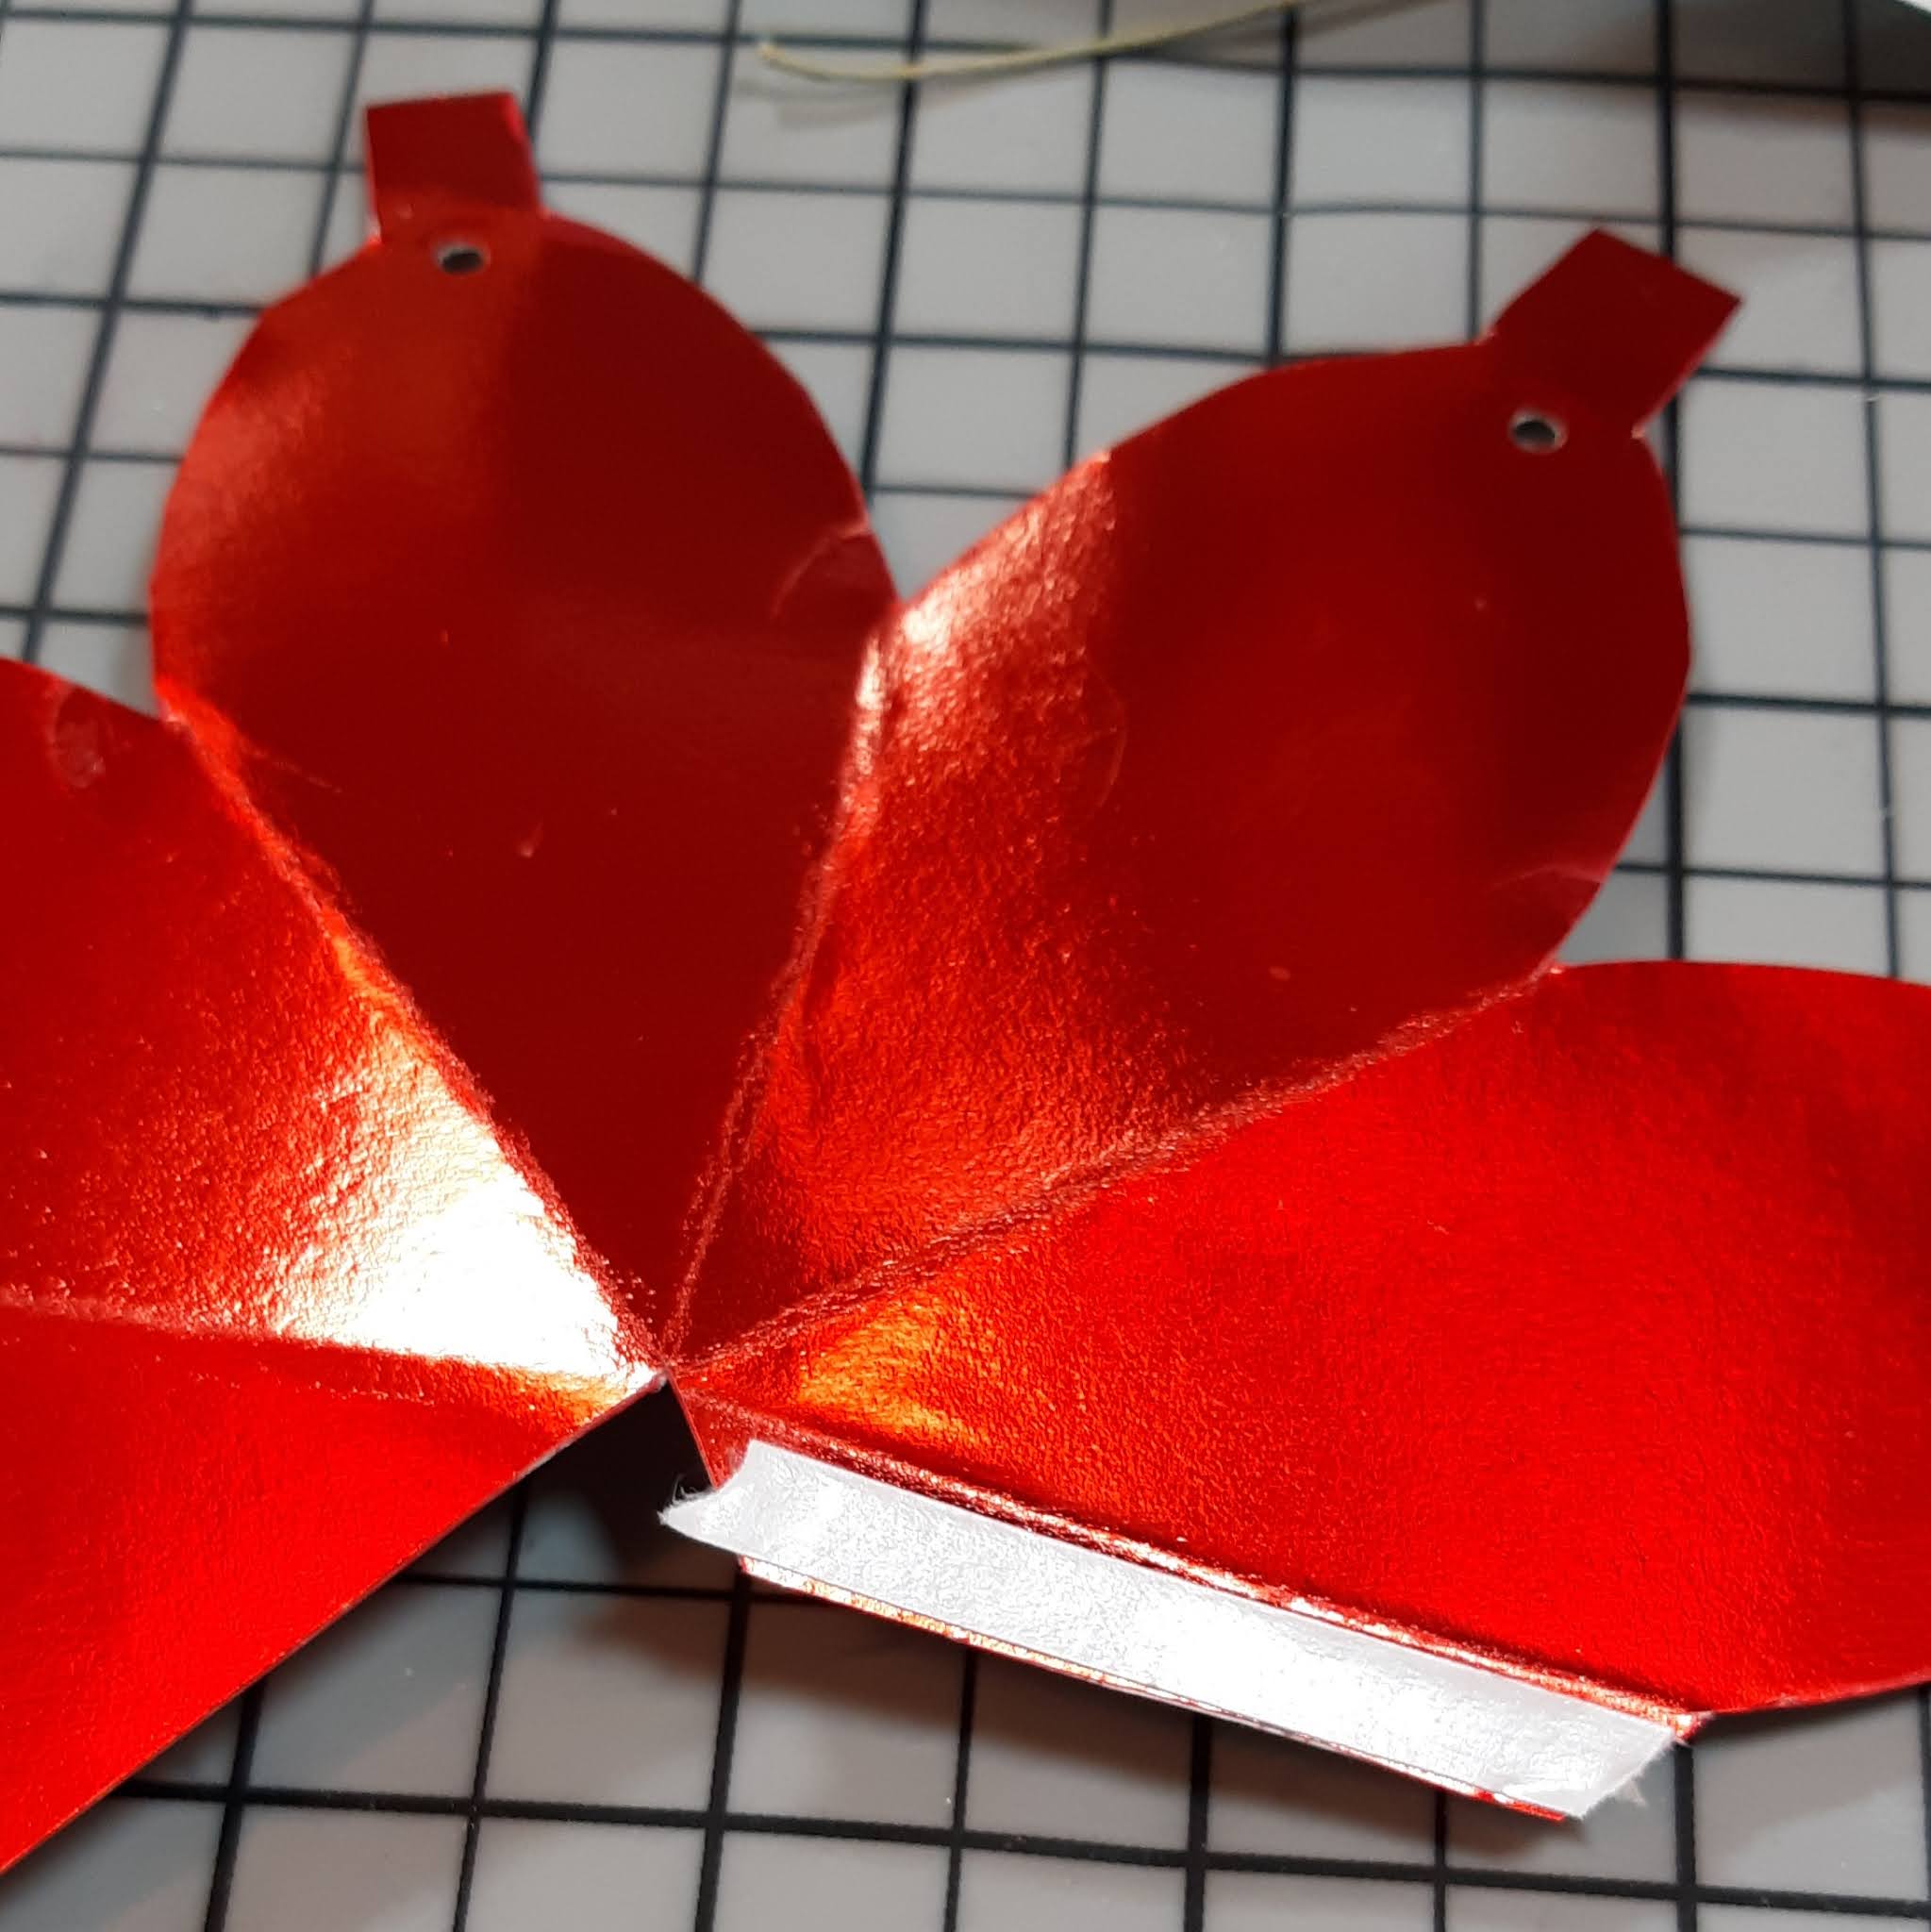
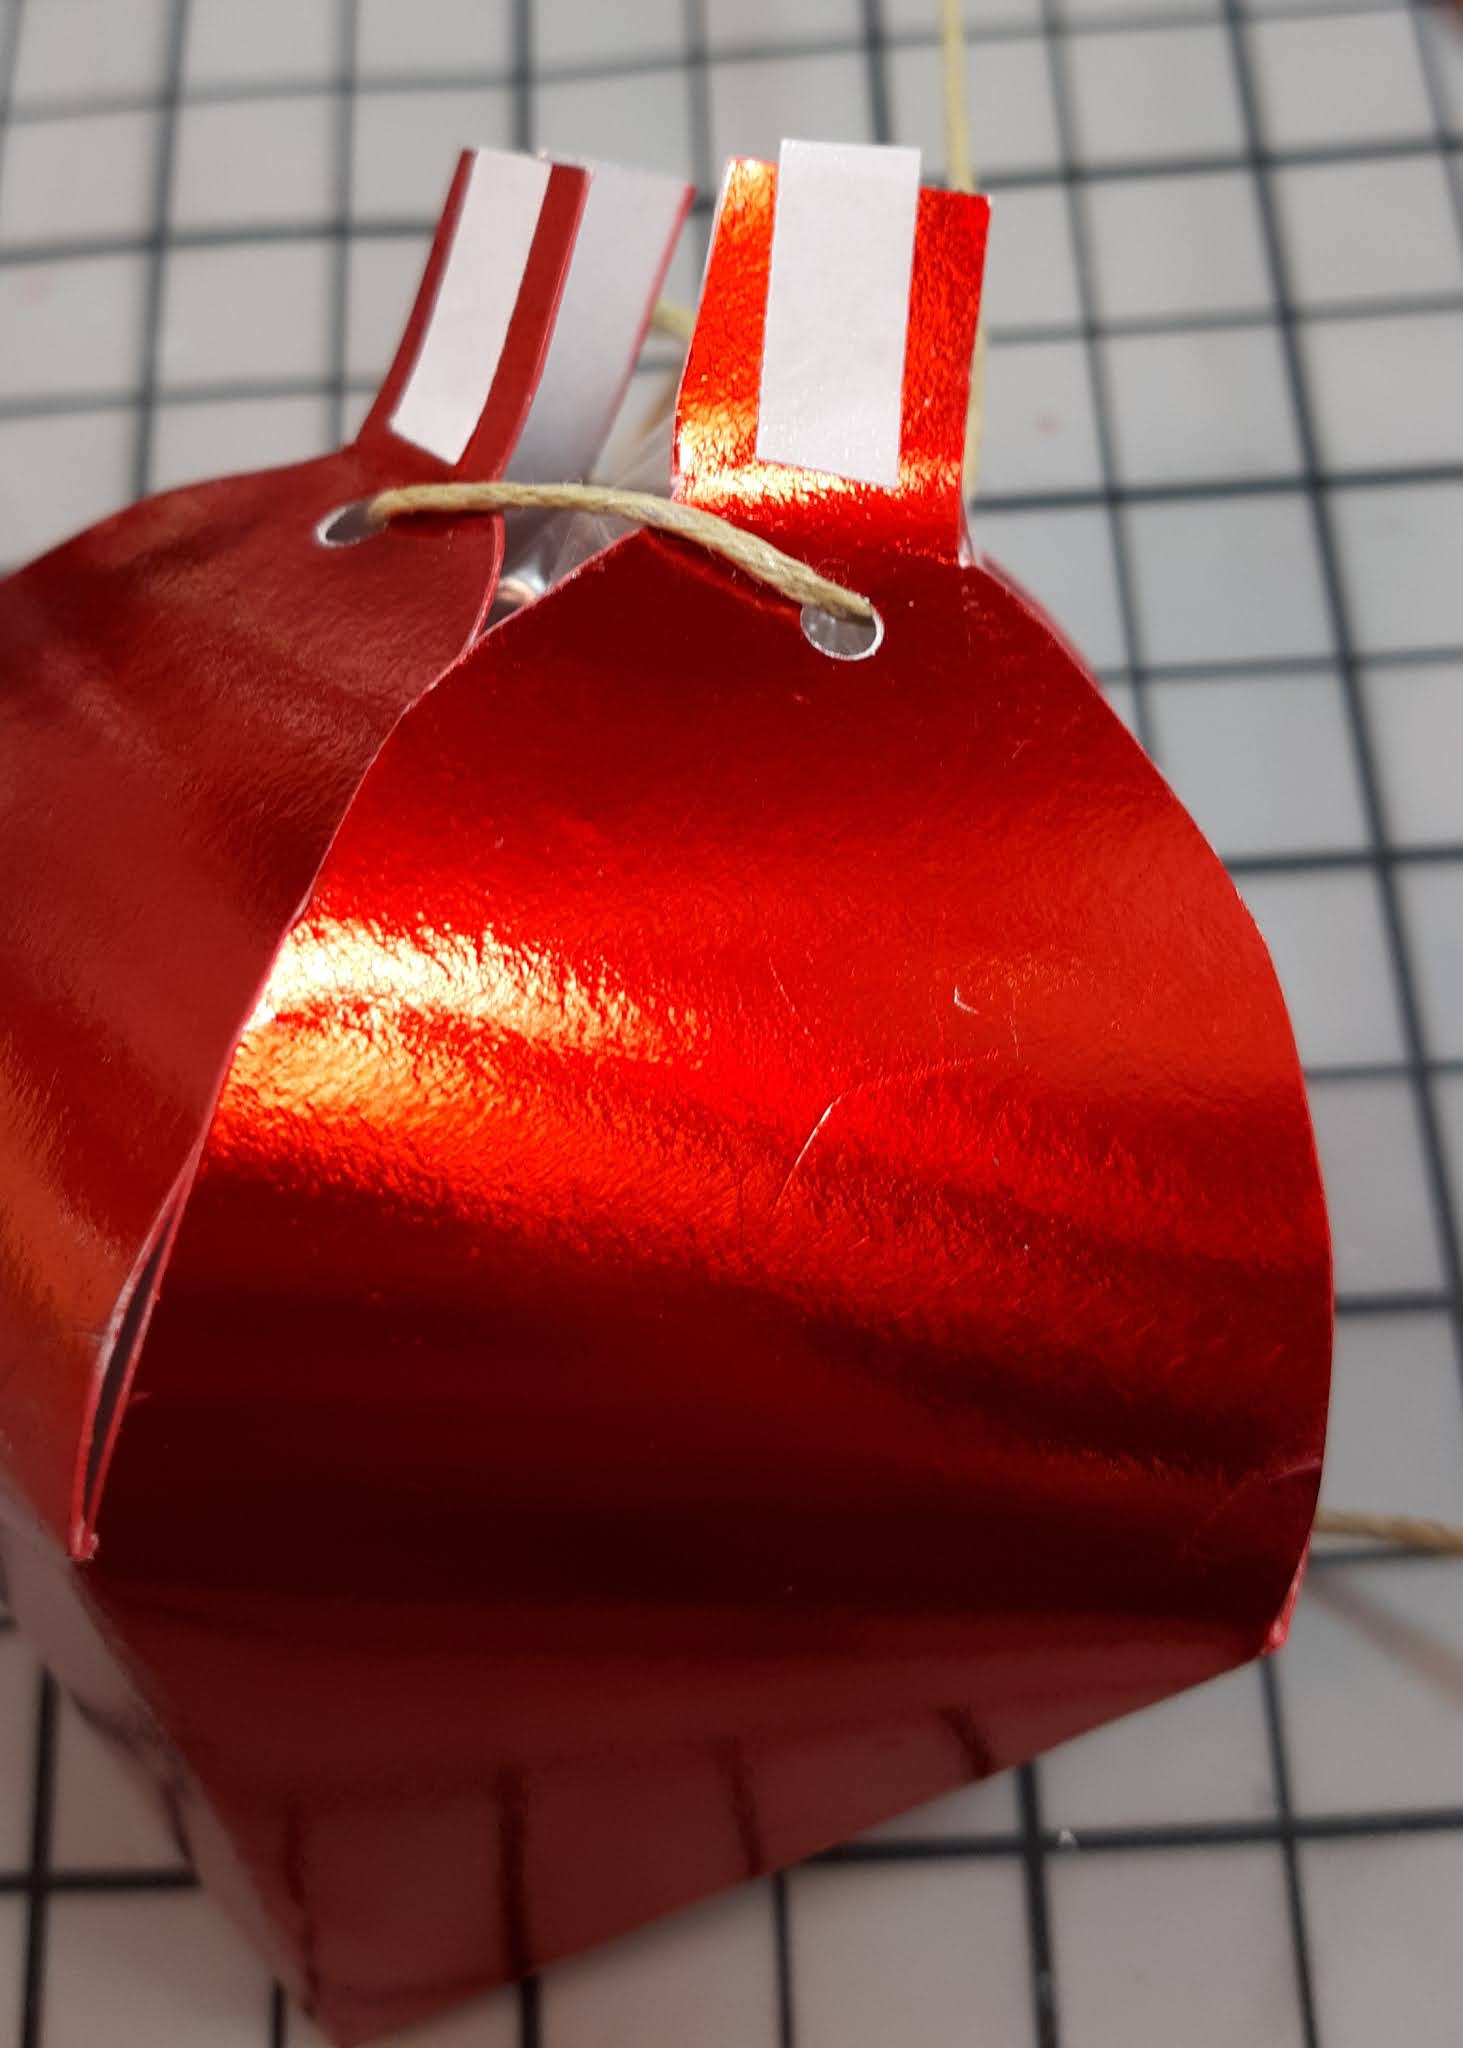
Adhere the sides together. Then, I threaded the string through the holes. Next, fill the bulb with some some treats or small trinkets.

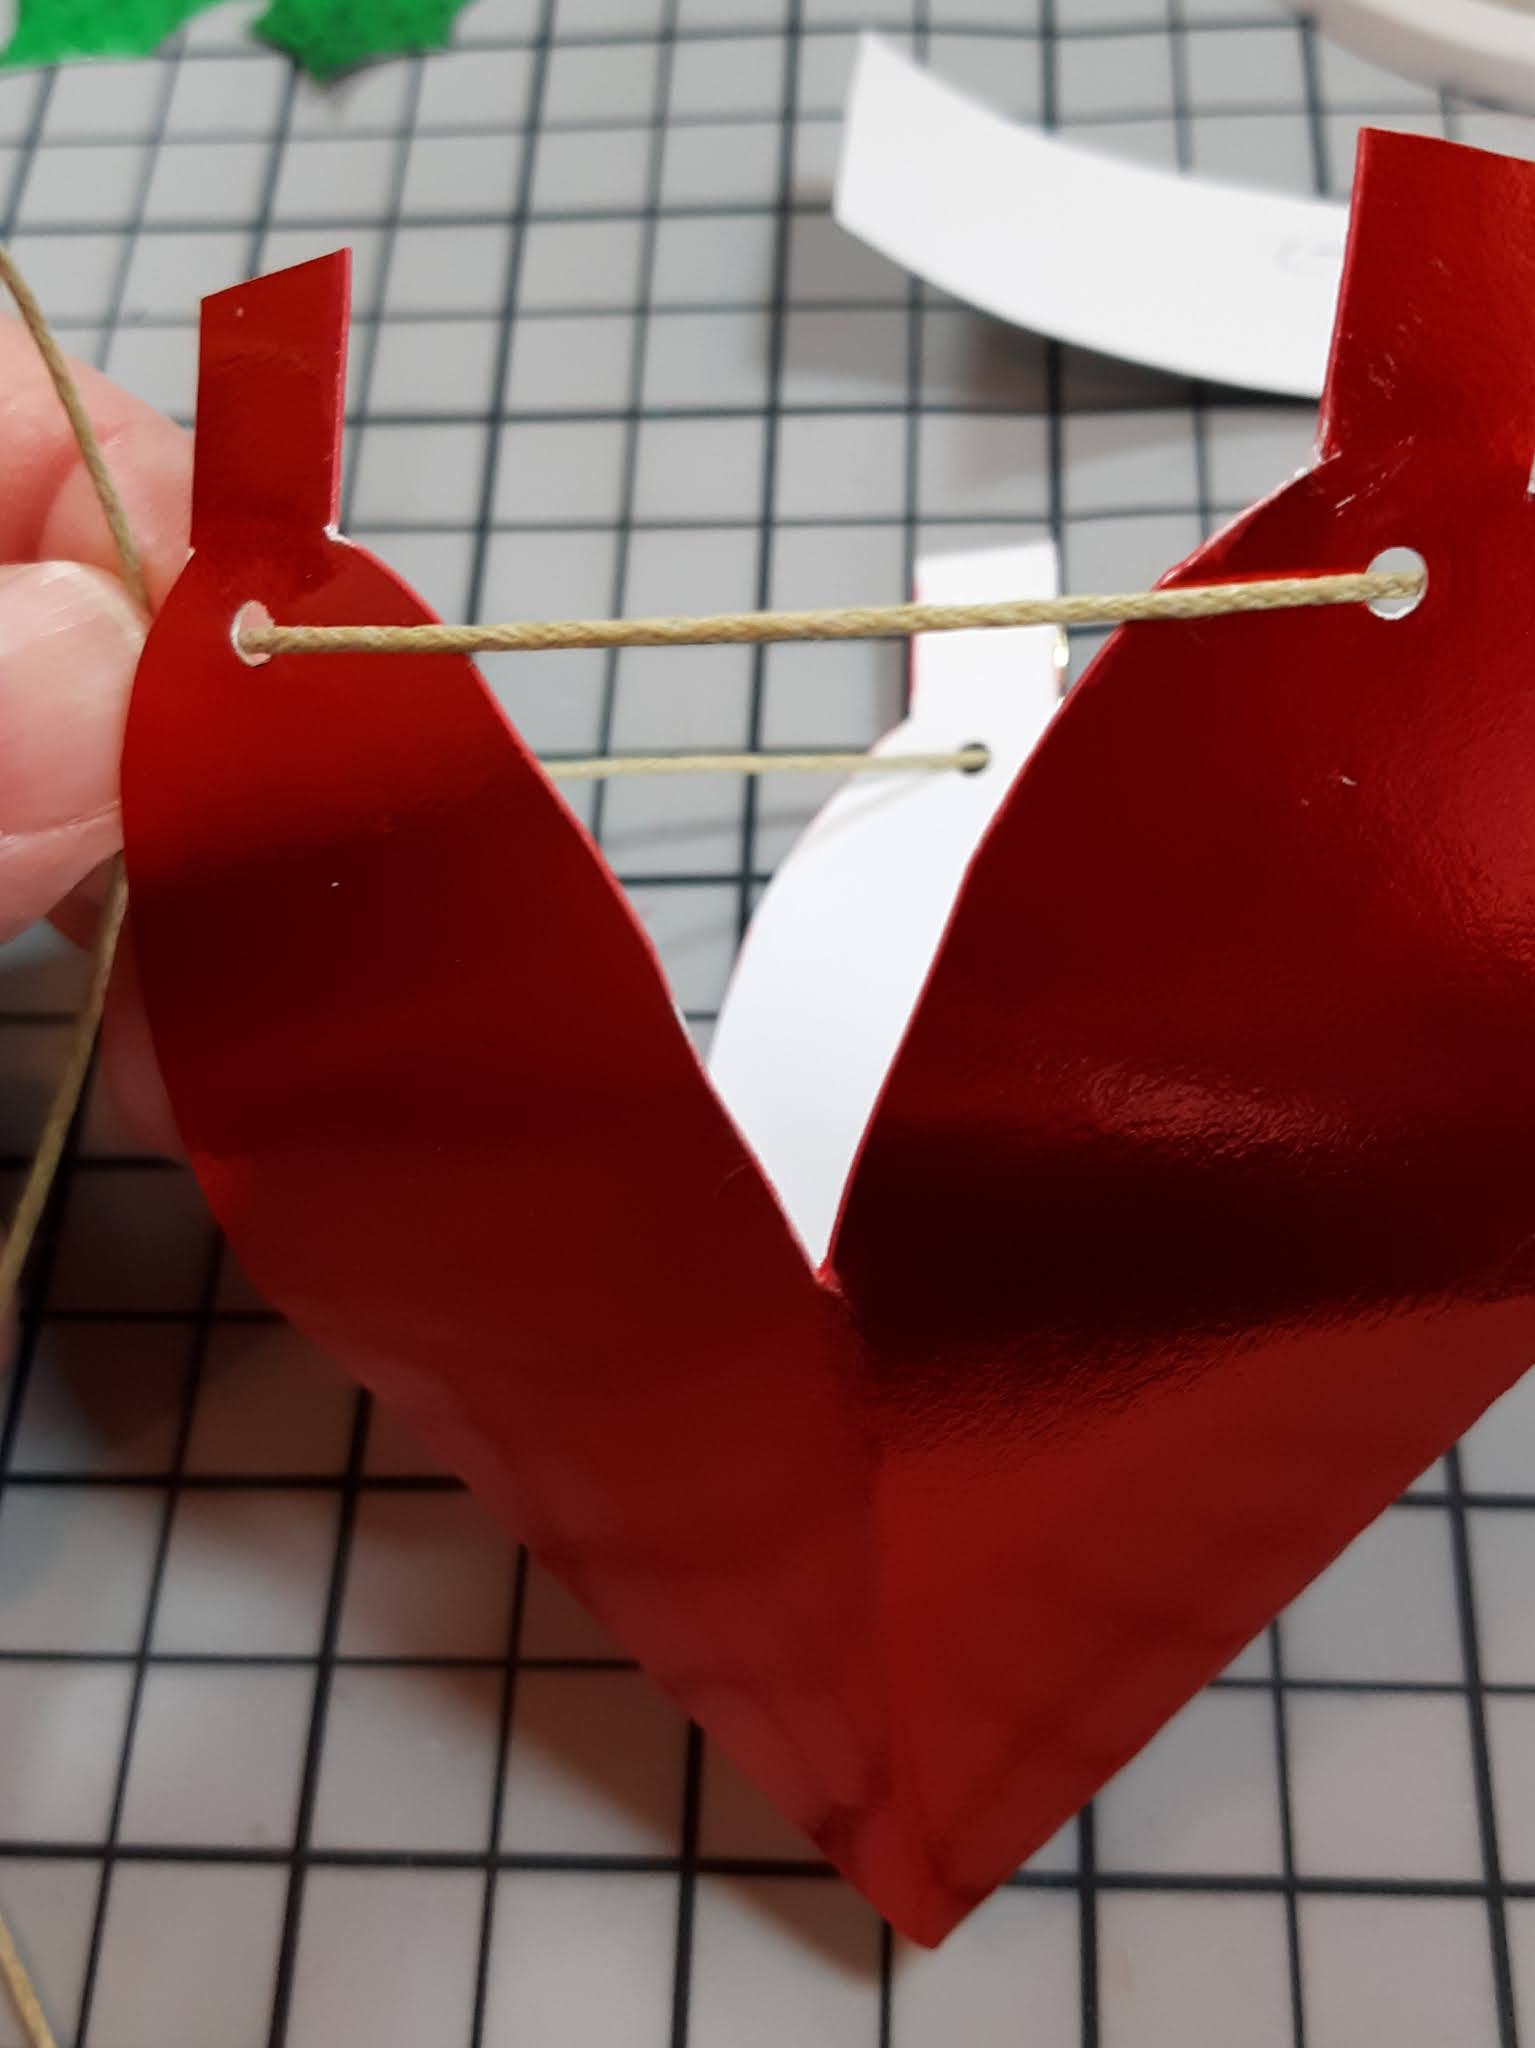
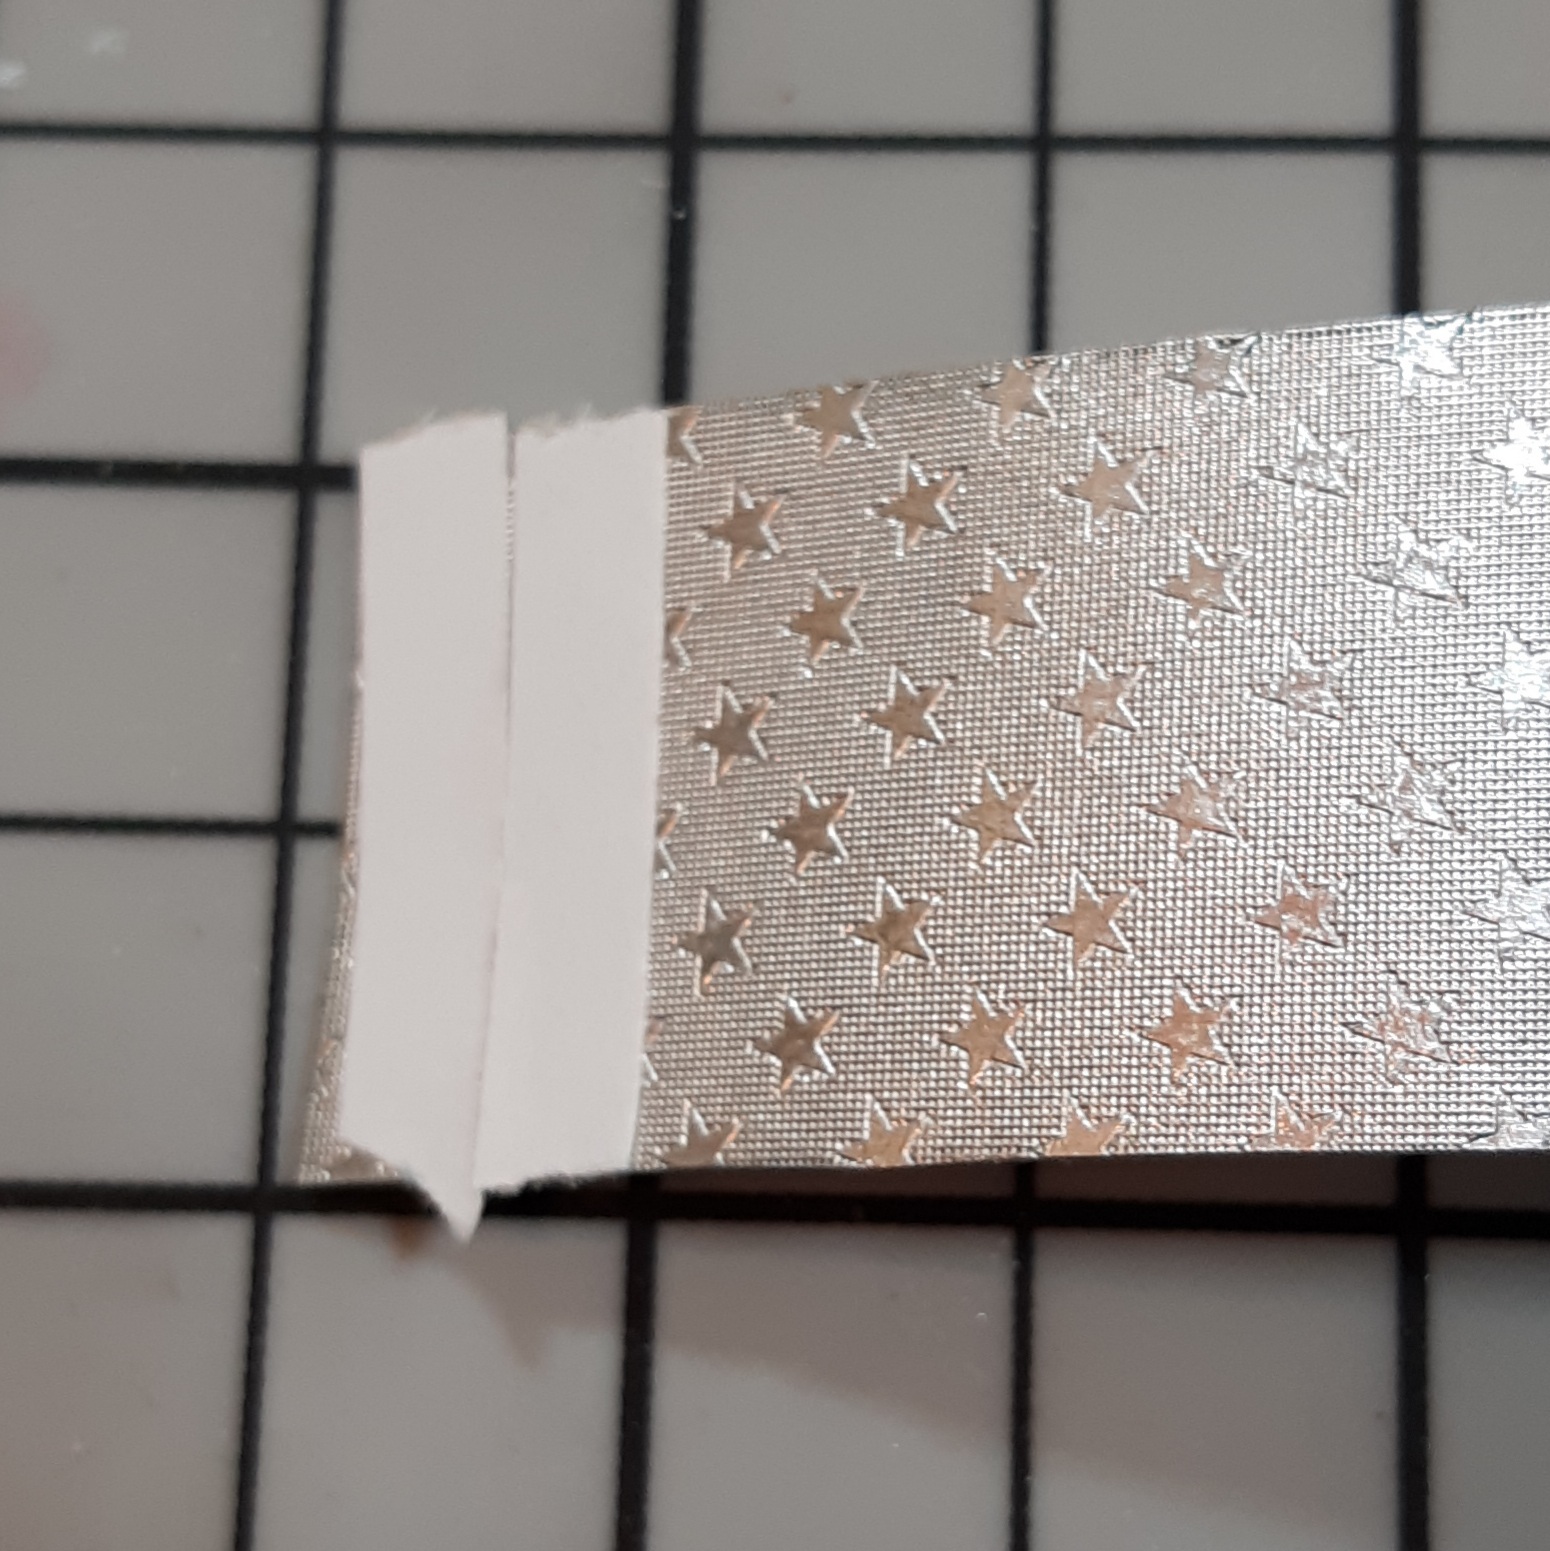
Then, gather the strings and tie a knot. Next, place some Tear It Tape on the tabs and the 
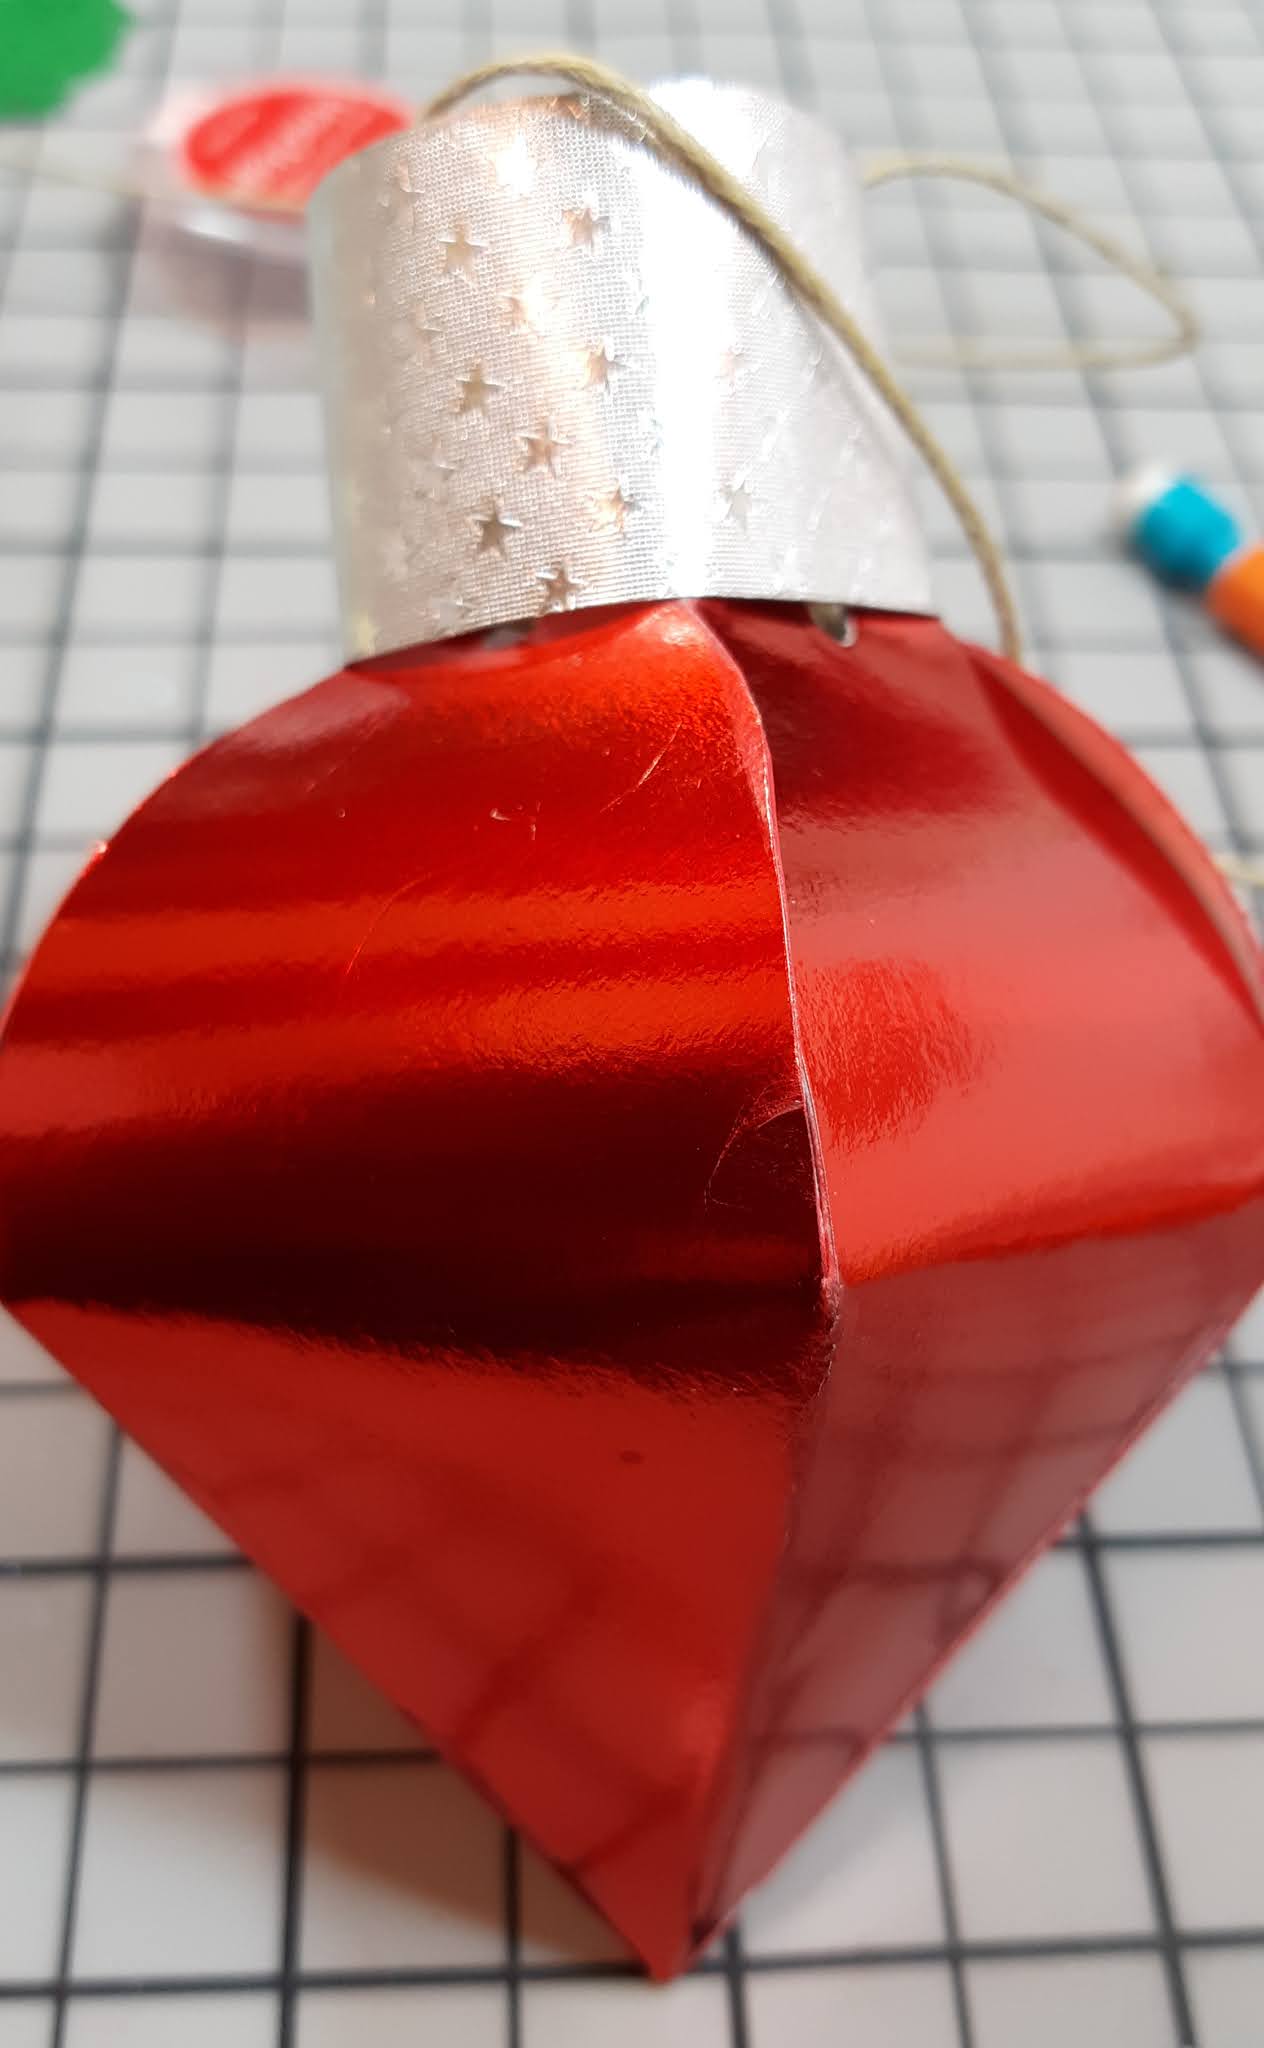
 Rinea Foil Paper: Starstruck Silver/Silver strip. Create a cylinder with the Silver strip and insert the bulb into it pressing the tab onto the Silver cylinder. 


Next, stamp your sentiment onto a piece of white cardstock and adhere it to the bulb.
 Along with the Rinea Foil Paper: Starstruck Emerald/Emerald Holly and
 Rinea Foil Paper: Glossy Ruby/Gold Berries. I then adhered the Ruby gems onto the Ruby Berries.

Now, the Christmas Bulb Treat Holder is complete!

Thanks for stoping by the blog today. I hop you found some inspiration.


Wednesday, December 9, 2020

Merry Christmas Cards with White Rose Crafts

 Hello Crafty Friends - I am here with 2 cards using the A Merry Little Christmas Kit.

Card #1 - Merry Christmas


I gathered the supplies from the kit. I have the Decoupage paper, the specialty gold cardstock, the puffy Reindeer trim and the red and green pearl stickers. From my stash I have white card base, White, Green and Red cardstock and adhesive.

I start by inserting a piece of white cardstock into my Xyron Creative Station Lite. I will use this for the decoupage paper. I adhere the decoupage paper to the white cardstock it measured 4"x51/4".

Next I adhere a strip of green cardstock to the bottom of the card panel. It measures 1"x4". I then adhere the reindeer trim on the seam of the green cardstock. Next I die cut the Merry Christmas from the Gold specialty paper and adhere it below the reindeer in the center.  I then adhere one of the red mini pearls to the nose of the first reindeer. Making him into Rudolph.

 
the card is not complete!


Supplies Used:
Memory Box Die: Merry Christmas
Xyron Creative Station Lite
Recollections Brand 110# Cardstock: White
Recollections Brand 80# Cardstock: Green and Red


Card #2 Merry Christmas


I start by gathering my supplies. I stamped the Christmas tree 3 times onto white cardstock. I also trimmed the green cardstock a 1/4" smaller than my card base. I trimmed the pattern paper to 3" X 4".


I adhered the Green cardstock onto the card base. 
Then, I adhered the pattern paper onto the green cardstock. 
Next, I put a piece of Gold Glitter washi tape at the base of the pattern paper.

Next, I die cut the tree panel with the stitched rectangle. 
I stamped the sentiment and fussy cut it out.
 I foam mounted both the tree panel and sentiment to the card.

Finally, I added some Nuvo drops to the trees and snowflakes.

Now the card is complete!

Supplies Used:
Lawn Fawn Brand Die: Stitched Rectangles
Recollections Brand 110# Cardstock: White
Recollections Brand 80# Cardstock: Green and white
Recollections Brand Washi Tape: Gold Glitter

Thank you for stopping by the blog. I hope you found some inspiration!

Be sure to tag us White Rose Crafts LLC on social media 
if you create a project with products or kits purchased on the 


White Rose Crafts Design Team Member Annie Collins 
Blog: https://littlewingscreates.blogspot.com/ IG: @anniec09

Saturday, December 5, 2020

Santa's Workshop Christmas Card with Doodles Paper Playground

 Hello Crafty Friends - Annie here with a fun card featuring Sparkle Blend: Minter Is Coming. This blend is perfect for all your holiday cards especially any red and white themed cards like the one I created below. Yes, I added a splash of green to the mix. 


A peppermint themed blend in classic bright red metallic, holographic & glitter sequins in flat,
 cupped & spiral textures on a base of iridescent, opalescent & satin matte white with plenty of Fimo candy cane shapes, peppermint pinwheels & white stars all finished with cute golden candy cane shapes.


Supplies used:
Create & Inkspire Stamp Set: North Pole
Create & Inkspire: North Pole Pattern Paper
Sizzix Brand Glitter Cardstock: White 
Tsukineko Neon Radiant Amplify: White
Tsukineko Memento Ink: Tuxedo Black
Tsukineko Stazon Ink: Jet Black
Copic Markers: R46, R59 G05, G07 Y04, B0000
Accent Opaque White 80# Cardstock: Ultra Smooth
Recollections Brand 110# Cardstock:White
Recollections Brand 65# Cardstock: Red

Thank you for stopping by the blog today. I hope you found some inspiration!

Doodles Paper Playground Resident Designing Diva

Be sure to tag us Doodles Paper Playground on social media -
if you create a project with our Sparkle Blends. 

There is also a new Facebook group where you can share the
creations you have made with Sparkle Blends!
Come check it out, share some inspiration!

Thursday, November 26, 2020

Snow-globe Card with Rinea and Crackerbox and Suzy Stamps Collab

Hello Crafty Friends - I am here with a a snow-globe scene card featuring Rinea Foil Paper and Crackerbox & Suzy Stamps.


All month long we have been collaborating with Crackerbox & Suzy Stamps.

Here is the card I create.
Supplies Used:
Crackerbox & Suzy Stamping 
Copic Markers: Y08, R27, & G07
Xyron Creative Station Lite
Versamark Ink
Imagine Crafts Mboss Embossing Powder: Metallic Berry
In Love Arts Stencil: Snowfall
Art Glitter Glue
Recollections Brand 110# Cardstock: White
Michelle's Sparkling Creations: Jewels


Let's get started!

I place the stencil onto Rinea Starstruck Foil Paper: Cobalt/Cobalt using a sponge dauber and 
the Rinea Ghost Ink 2.0 I work the ink into the small holes of the stencil. I allow the ink to sit for a moment and then I wipe off the ink. This will leave me with a ghost effect on the 
Rinea Starstruck Foil Paper: Cobalt/Cobalt. Creating the perfect snowy background.


I then stamp the globe onto the snowy background. I then trim the globe. I then stamp the cork onto Rinea Starstruck Foil Paper: Merlot/Merlot using the Rinea Ghost Ink 2.0. I also stamp the Crackerbox & Suzy Stamps: Cottage & Trees onto the Rinea Glossy Foil Paper: Arctic/ Gold. Next, I wipe off the excess ink of the cork stamped image and the cottage.

I colored the  Crackerbox & Suzy Stamps: Cottage & Trees with some Copic markers. I then, ran the Crackerbox & Suzy Stamps: Cottage & Trees and 
the Crackerbox & Suzy Stamps: Bowl/Globe & Cork through the Xyron Creative Station Lite. I backed the Crackerbox & Suzy Stamps: Bowl/Globe & Cork with some cardstock so that I could pop it up. 

Next, I adhered the Crackerbox & Suzy Stamps: Cottage & Trees onto the snowy background of the 
Crackerbox & Suzy Stamps: Bowl/Globe & Cork  creating a small scene inside the snow globe. I then Stamp the sentiment onto a piece of what cardstock and heat emboss it with Imagine Crafts Mboss Embossing Powder: Metallic Berry.

I then adhered the Rinea Starstruck Foil Paper: Turquoise/Turquoise onto the card base. I popped up the snow-globe and place it onto the card base. I then popped up the sentiment and placed it tot he right of the snow-globe. I finished up the card by added a few jewels by the sentiment and to top right.

Now the card is complete!

Thanks for stoping  by the blog today. I hop you found some inspiration.

Saturday, November 21, 2020

Fleece Navidad Card with Doodles Paper Playground

 Hello Crafty Friends - I am here with a fun card featuring Sparkle Blend: Blue Blizzard


This icy combination of cornflower & baby blue, white, 
shining clear & glittery silver sequins is full to the brim 
with 3 different styles of sequins in different colors--
from holographic silver confetti to matte white & blue Fimo snowflake shapes.

Supplies Used:
Lawn Fawn: Baah Humbug Stamp Set
Lawn Fawn: Snowy Sky Stencil
Ranger Texture Paste: Matte
Tsukineko Memento Ink: Tuxedo Black
Tsukineko Memento Ink: Bamboo Leaves
Tsukineko VersaMagic Ink: Red Magic & Tea Leaves
Tsukineko Brilliance Ink: Mediterranean Blue
Copic Markers: Hat & Gifts: R37, R39, G05, C1
Sheep: W1, W3, W5, W7 & R30
Xyron Mega Runner Adhesive
Art Glitter Glue
Accent Opaque White 80# Cardstock: Ultra Smooth
Recollections Brand 110# Cardstock: White
Recollections Brand 65# Cardstock: Navy & Med. Teal

Thank you for stopping by the blog today. I hope you found some inspiration!

Doodles Paper Playground Resident Designing Diva

Be sure to tag us Doodles Paper Playground on social media -
if you create a project with our Sparkle Blends. 

There is also a new Facebook group where you can share the
creations you have made with Sparkle Blends!
Come check it out, share some inspiration!

Thursday, November 19, 2020

Sweet Christmas Shaker Card with Doodles Paper Playground.

Hello Crafty Friends - Annie here with a fun shaker card featuring


A beautiful, soft, neutral blend of beige, nude, ivory & soft yellow shades 
with just a sprinkling of warm brown. You'll find sequins in a variety of sizes, 
shapes & finishes, like pretty spirals, flat & cupped sequins, round confetti & mylar tube beads--
perfect for subtle & vintage holiday projects or anything else you can think of. 
This blend will go with everything.

Supplies Used:
Lawn Fawn: Pumpkin Spice Stamp & Die Set
Lawn Fawn: Tiny Gingerbread Stamp Set
Lawn Fawn: Stitched Rectangle Dies
Tsukineko Memento Ink: Tuxedo Black
Sakura Gelly Roll Pens: White & Sparkle
Copic Markers: R27, R37, E33, E23,
E57, B00, G14, C1, C2, &0
My Mind's Eye Pattern 6x6 Paper: Oh What Fun!
Art Glitter Glue
Whimsy Stamps Foam Tape
Accent Opaque White 80# Cardstock: Ultra Smooth
Recollections Brand 110# Cardstock: White & Kraft
Recollections Brand 65# Cardstock: Cream
Acetate

Thank you for stopping by the blog today. I hope you found some inspiration!

Doodles Paper Playground Resident Designing Diva

Be sure to tag us Doodles Paper Playground on social media -
if you create a project with our Sparkle Blends. 

There is also a new Facebook group where you can share the
creations you have made with Sparkle Blends!
Come check it out, share some inspiration!