Showing posts with label Annie Collins. Show all posts

Tuesday, October 27, 2020

Grateful Heart Shaker Card with The Maker's Movement

Hello Crafty Friends - I am here with a fun shaker card featuring
 products from The Maker's Movement.


Video Tutorial
https://youtu.be/rfwf10pSlJk

Supplies Used:
VersaMagic Ink: Red Magic, Tea Leaves, Pumpkin Spice, 
Gingerbread, Pretty Petunia and Turquoise Gem 
Delicata Ink: Golden Glitz
Memento Ink: Tuxedo Black
Imagine Crafts Mboss Embossing Powder: Clear
Imagine Craft: Tear It Tape
Copic Makers: YR20, YR61 & YR02
Cousin Brand Jute Cord: Golden Yellow
Accent Brand 80# Opaque Cardstock: Bright White
Recollections Brand 110# Cardstock: White
Recollections Brand 65# Cardstock: Cream
Recollections Brand: Corrugated Cardstock: Kraft
Pebbles Brand Pattern Cardstock: Orange on Orange Dot
Recollections Brand Tiny Hearts, Stars & Dots Sequins: Gold, Purple, Orange and Copper
Kat Scrappiness Jewels: Orange


Thank you for stopping by the blog today. I hope you found some inspiration!

Maker's Movement Artist
Annie Collins

IG: @anniec09

Wednesday, October 21, 2020

Happy Birthday Fairy Card with Lavinia World

Hello Crafty Friends - Annie here with a fun birthday card featuring a variety of Lavinia World products.

Please remember to stop by:

Here's the card I created

The video tutorial

Suppies Used: 
 **Note - I use other stencils and products these are the closest to what I used that we have in the store.** 
Trinity Stamps: Jewels - Crystal
Recollections brand 110# Cardstock: White
Recellections Brand 65# Cardstock: Preiwinkle
Accent Opaque White 80# Cardstock: Super Smooth

Thank you for stopping by the blog today. I hope you found some inspiration! 

Lavinia World Resident Artist 
Annie Collins 
IG: @anniec09

Saturday, October 17, 2020

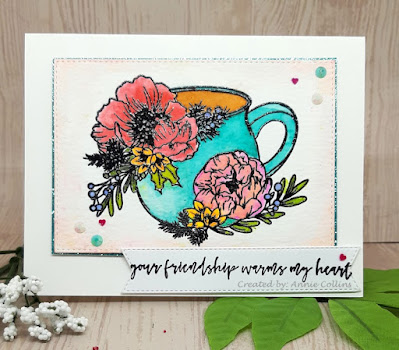
Friendship Watercolor Card with Viviva

Hello Crafty Friends - Annie here with a lovely watercolor card featuring Viviva Colorsheets 

Viviva Colorsheets Code: IGGCUST

Here's the card I created using the Viviva Colorsheets


Video Tutorial

https://youtu.be/VjIcvmUEHhE

Supplies Used:
Strathmore Watercolor Paper - Cold Press 
Recollections Brand 110# Cardstock: White 
DCWV Teal Glitter 
Cardstock Crafter's Square Thine Foam Adhesive 
Art Glitter Glue

Thank you for stopping by the blog today. I hope you found some inspiration!

Friday, October 16, 2020

Slimline Pumpkin Trio Autumn Card with The Maker's Movement

Hello Crafty Friends - Annie here with a fun slimline shaker card 
featuring products from The Maker's Movement.


Video Tutorial 
https://youtu.be/T3nvvmpeT5M

Supplies Used: 
Versafine Ink: Onyx Black 
Cousin Brand Jute Cord: Golden Yellow 
Martha Stewart Brand Pattern Paper: Fall Collection
Recollections Brand 110# Cardstock: White 
Recollections Brand 65# Cardstock: Cream, Brown, & Medium Orange 
Bazzil Brand Cardstock: Golden Yellow 
Aspire Metallic Shimmer Cardstock: Copper 
Recollections Brand Glitter: Copper 
Recollections Brand Tiny Hearts & Stars Sequins: Gold, Copper & Blue

Thursday, October 15, 2020

Wednesday, October 14, 2020

Sunday, September 20, 2020

I"m Nut About You Slimline Card with Dare 2b Artzy

Hello Crafty Friends - I am so honored to be  Guest Designing for Dare 2b Artzy this month. 

I created this Fall/Squirrel slimline card featuring the New Release 
Squirrel Stamp Set with coordinating Die set.


Here's the video tutorial of how I created this card.

https://youtu.be/tKnNXLL1hU0

Materials Used:

I did not use this but it's available:

Other Items Used:
Inks:
Memento: Tuxedo Black
Memento: Expresso Truffle
Memento Dew Drop: Summer Sky
Memento Dew Drop: Dessert Sand
Versa Magic Dew Drop: Jumbo Java
Versa Magic Dew Drop: Tea Leaves
Versa Magic Dew Drop: Ocean Depth
Copic Markers: R30, E30, E23, E35, Y32, Y02, B93, & B95
Heidi Swapp: Woodgrain Stamp 
Heffy Doodle Dies: Forest Builders 
Create & Inkspire Stencil: Meadow (clouds& grass) 
Colorbok Brand: Pattern Paper 
Sakura Gelly Roll Pens: White and Gold 
Art Glitter Glue 
Imagine Crafts: Tear It Tape 
Jot Brand: Foam Adhesive
 Recollections Brand 110# Cardstock: White (card base)
 Recollections Brand 65# Cardstock: Kraft & Light Blue 
Accent Brand Ultra Smooth 80# Cardstock: Bright White (for coloring)

Thank you for stopping by the blog today. I hope you found some inspiration!

Friday, September 11, 2020

You're Tea-riffic Card with Rinea

 Hello Crafty Friends - I am here with a fun and comforting card.

With the colder months just around the corner I thought it would be nice to 
have a few cards for those friends and family that enjoy some hot tea.

Materials Used:
SumMore Fun Stamp: Sundri's High Tea
Papertrey Ink Stamp: Rosies Posies
MFT Brand Die: Fishtale Sentiment
Copic Marker: E33 & R23
Tsukineko Memento Ink: Tuxedo black
Tsukineko Versafine Ink: Onyx Black
Imagine Crafts: Tear it Tape
Art Glitter Glue
Crafter's: Foam Adhesive
Recollections Brand 65lb cardstock: Red and White
Brother:Scan N Cut Electric Machine

Lets get started!

I gather all the supplies for the card.
 I cut all the pieces of the Simply Crafty SVG: Tea Pot Card
with my Brother:Scan N Cut Electric Machine. 
I used the Rinea Foiled Paper: Ruby Red/Ruby Red Starstruck for the main parts of the tea pot and the Rinea Foiled Paper: Merlot/Merlot Starstruck for the background.

Then, I stamped the roses and leaves onto the
and Rinea Clear round Stamping BlockI allowed the Rinea Ghost Ink 2.0  to sit for about a minute a and then wiped it off revealing the silver undertone of the the Rinea Foiled Paper.


Next,  I gathered the rest of the pieces of the card and started assembling.

I started with the tea holder. I put some tear tape onto the two flaps of the holder. (this is like those little library pockets that we used to have in our books back in the day) I then removed the backing to the tape and pressed the flap onto the tall part of the holder. I flipped the holder around and place 3 strips of tear tape on to the back of the holder. Then, I adhered it to the inside of the card.
  
 
Next, I took the card base and adhered the white tea pot panel onto the base.  Making sure align it so I would have a bit of the red all around the pot. 
 

Then, I adhered the round Rinea Foiled Paper: Merlot/Merlot Starstruck to the back of the pot lid. I then flip it over and adhered the Rinea Foiled Paper: Ruby Red/Ruby Red Starstruck panel onto the a to lid. Again making sure to align it so I would have a bit of the white lid showing. I set it aside.
  

I then adhered the Rinea Foiled Paper: Ruby Red/Ruby Red Starstruck pot bottom panel onto the card base. Again making sure to align it so I would have a bit of the white lid showing. Next, I adhered the lid to the pot on the card base.
 

Then, I adhered the Rinea Foiled Paper: Merlot/Merlot Starstruck background corners to the card base.  Again making sure to align it so I would have a bit of the red base showing

I then, stamped the tea base and sentiment onto white cardstock.  I colored the tea bag with Copic Markers E33 and R23. Next, I adhered the tea bag to the left hand bottom of the card and the sentiment onto center of the pot with some foam adhesive. The last part is to place a tea bag into the holder on the inside of the card.
  

Now your card is complete!

Thank you for stopping by the blog today. I hope you found some inspiration!

Don't forget to stop by the Rinea Shop to pick up some of our wonderful Foiled Paper.

Wednesday, September 9, 2020

Grateful Fairy Card with Lavinia World

Hello Crafty Friends - I am here with a fun fall card featuring Harietta Fairy. 
You can purchase Harietta at the Lavinia World store

You can also join us at our FB Group for inspiration. As well as our Challenge group.


This is the card I created.


Here is the Video Tutorial.


Supplies Used from Lavinia World: 

Other Supplies:
 Copic Markers: 
Skin: E0, E11 & E93
Lantern: Y17 & YR09  
Dress:V04, V06, Y02 & Y04
Wings: B01 &BO2

Thank you for stopping by today. I hope you found some inspiration!

Monday, August 31, 2020

Thankful for You Card with Same Set Syndrome

Hello Crafty Friends - am here with a floral card featuring Create and Inspire July Kit. 

This hop will have several prizes to be won. 
To be entered make sure to comment, follow and subscribe to all 
the YT team members, Instagram team members, and Blog team members.
I know you will be inspired. 


Video Tutorial

Supplies Used from the Create and Inspire July Kit:
Wildflower Stamp Set
Wildflower Sentiment Stamp Set
Wildflower Meadow Stencil
Tonic Studios A2 Perfect Craft Watercolor card (panel)
Nuvo Shimmer Powder: Sunray Crossette
Trinity Stamps: Crystal Jewels
Mohawk 110lb Bright White Smooth Cardstock

Other Supplies Used:
Memento Ink: Tuxedo Black
Versafine Ink: Onyx Black
Imagine Crafts Mboss Powder: Clear
Distress Oxide Ink: Bundled Sage
Distress Oxide Ink: Peeled Paint
Lawn Fawn Cross-stitched Rectangle Die
MFT Fishtail Sentiment Strip
Copic Markers:
Leaves: YG06 & G05
Petals: R30, R20, & R83
Center: YR12 & YR14
Recollection Brand 110lb Cardstock: White (card base)

Thank you for stopping by the blog today. I hope you found some inspiration!

Same Set Syndrome Member Annie Collins
IG: @anniec09

Wednesday, August 26, 2020

Holiday Star Gift Box with Rinea

Hello Crafty Friends - I am here with a fun Holiday gift box featuring

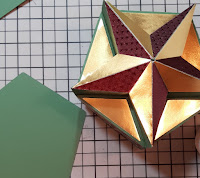
I created this wonderful Holiday Star gift box.


Materials Used
Bazzil Basic Cardstock: Green
Art Glitter Glue
Brother Scan N Cut Machine

Let's get started!

I cut all the pieces for the box using my Brother Scan N Cut Machine. I cut the box pieces from green cardstock. I then cut the decorative pieces of the box from
All the pieces:
2 green lid side panels,  5 green start pieces, 2 green box bottom pieces, 
 Rinea: Merlot/Merlot Starstruck Foiled Paper  Star decorative panels, 
Rinea: Gold/Gold Glossy Paper star decorative panels, 
Rinea: Gold/Gold Glossy Paper lid decorative panels

The Lid
This is the fussiest part of the box. So, take your time with it,

I adhered the decorative  Rinea: Merlot/Merlot Starstruck Foiled Paper onto the lower section of lid side panels. then, I adhered the Rinea: Gold/Gold Glossy Paper to the upper section of the lid side panels.
 

Next, I adhered the two sections of the lid sides together.

Star section
This is the fussy part of the lid. 
I start by adhering the Rinea: Merlot/Merlot Starstruck Foiled Paper onto one section of star panels. then, I adhering the Rinea: Gold/Gold Glossy Paper onto the other side. 
I repeat this to all the start panels.

Next, I put adhesive onto the tab of one of the star section and press them into place. This will form one of the points of the star. I repeat this to the rest of the star panels.


Next, I put some adhesive onto 2 of the tabs on the side of the star panel and press them into place. This will start creating the star. I repeat this with all the star panels until I have a full star.
 
This is the top of the star and the bottom. We will be covering the bottom. Set it aside.
 

Then, I put some adhesive on the tab of lid side panels and press into place. The star shape will form once the tabs are secure.  


Next, I put adhesive onto the star tabs and press them onto the lid side panel we just made.
This will take some time to work just take your time. 
 

The star lid is formed. 
 
Next, I adhered the green panel to the inside of the lid. 
This will cover all the tabs and make the inside look more finished. 
 

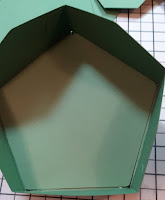
The Box Bottom

I folded all the score lines. 
Next, I glued the tabs on the side section together. Then, I put some adhesive on all the bottom tabs and press the base onto them. I turn the box over and press on the inside of the box to make sure its all secure.


Finally, I adhere the Rinea: Merlot/Merlot Starstruck Foiled Paper panel 
to the inside to make it look nicely finished. 

The finished box size is 4.9” x 4.7” x 3.8” tall. 

Now the Holiday Star Gift Box is complete!


Thank you for stopping by the blog today. I hope you found some inspiration!

Don't forget to stop by the Rinea Shop to pick up some of our wonderful Foiled Paper.