Sunday, June 9, 2019

You're Smokin' Happy Father's Day with Dies R Us

Hello Crafty Friends- I am here today with a fun Pop-up box card for Father's Day. However, this cute card can be for Summer too! 


Now, before we get started I want to let you know that - your eyes are not playing a trick on you. Yes, the card base color changes during this tutorial. I started out with a darker color of blue but, I didn't like the way it started looking so I change the color of cardstock to a lighter one.
However, the tutorial is still the same. 😁

Let's get started on how to create this simple yet fun card.

First, cut 2 pieces of cardstock 7-1/2" long by 4-1/4" wide.
You will be scoring on both pieces.

Next, you need to score the cardstock at 1/2" and 1" mark. You need to do this on both sides of your cardstock and on both pieces of cardstock.

Then, you will be folding on these score lines. The old fan style - like back in the elementary school days.
   

Next, you will need to cut a shape of your choice into one of the cardstock pieces.
(I did a Lawn Fawn Reversed Scalloped Window - actually in my finished card).

You should have one with an opening and one sold. Both with the folds on the sides.
Top View of the card base.

Now, that you have the cutting and folding done you can start decorating your card. 


I stamped and colored my images. Then, fussy cut them out because I don't have the dies to coordinate. I am ordering them soon. 😉 Next, I created a background onto a piece of white cardstock measuring 4.25x5.50" using a cloud stencil and some Distress ink. I just didn't want a plain paper for my background however, you can use pattern paper if you prefer. I also did all the die cutting for the componence I would be needing to decorate the card.  4 sets of grass (2 in light green and 2 in dark green), 2 small puffy clouds, 1 large puffy cloud, 2 suns (1 each in light and dark yellow) and 1 White scalloped window.

I adhered the cloud piece of cardstock onto the solid 
cardstock panel (which is the back of the card). 

Next, I layered the glass - I like to create layers.
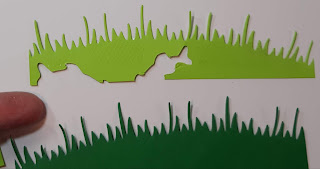
 So, I die cut each grass piece 2x from two different green cardstock.  

I like to use up my scraps for this. That's why you can see some fish shapes. 

I simply ran some adhesive onto the light green grass and adhered it behind the darker one for the back hillside and reverse it for the front grass.


Next, I adhered the back grass to the card base panel. Then, I adhered the BBQ with some foam adhesive in the center.
 

I ran the larger cloud through my Xyron sticker maker and placed it onto the background to the top right. Then, I ink the edges of the smaller clouds. I adhered one onto the larger cloud using foam adhesive. I set the back panel aside.
  

Working with the front panel - I adhered the white scalloped frame onto the card front. 
 

I layered and adhered the suns to created one two-tone sun. Then, I adhered the sun to the left top corner on the inside. Next, I adhered the other smaller puffy cloud using foam adhesive.   

Now, to the front grass. I adhered it to the inside of the bottom of the card front. making sure that the BBQ wasn't completely covered. I just do a dry fit for placement. I then set the front panel aside.
  

 Now, I turned my attention to the BBQ. On the back panel.

I start by adhering the flames to the back of the grill. **Note: I leave a bit of cardstock on the bottom of items I am tucking behind things for easy placement. I add a bit of foam adhesive to the tops of the flames. Next, I adhered the skewer of veggies and the T-Bone steak. I did add a bit of low profile adhesive to the steak.  
 

Next, finishing the card -  by adhering the front and back panels together. Run some adhesive on each of the tabs on the back panel then lining up the edges of the front panel press in place. 

The is a Top View of the tabs adhered together.

The card is almost complete all that is needed is a sentiment.

Now, you can add your sentiment.  I stamped the sentiments onto strips of white cardstock and cut a slant on one end. I adhered the BBQ Fork and Spatula to each the sentiments and then adhered them onto the card front. The bottom sentiment & spatula used low profile foam adhesive. To mail your card just gently push in the side tabs and the card will fit in a standard A2 Envelope.


Your Pop-up Box Card is now complete!

Materials Used:
Stamp:

Dies:
I didn't use them - however, they are available in the store.


Inks:

Adhesives:

Other Supplies Used:
Stamp:
Hero Arts Stamps - Celebrate CL498

Adhesive:

Copic Markers: 
B00, B01, BG72, C1, C2, C3, E15, E18, RV69 & R59

Spectrum Noir Markers: 
IG4, IG5, LY1, BO1, OR2, RB1, RB2, TN2, TN3, GB7, CG1, JG1, LG3 & MG1
** If you would like to which markers I used on each image
 I will have them listed on my blog by image. 

Cardstock
Recollections Brand Heavy Weight
White, Summer Daze, Lemon Ice, 
Golden Yellow, Green Grass & Lime

Thank you for stopping by today. I hope you found some inspiration!

Don't forget to come join in the fun at the Dies R Us Challenge Blog. There's a new challenge theme offered on the 1st and 15th of each month and one lucky randomly drawn winner will receive a gift voucher prize to the Dies R Us Store. For your convenience, all the important Dies R Us links are provided below.


Saturday, June 8, 2019

Faith, Trust And Pixie Dust with Doodles Paper Playground

Hello Crafty Friends - I am here with a fun shaker card featuring 
one our New Sparkle Blends called Pixie Dust.

Of course, as soon as I heard the name of this new Sparkle Blend 
I just thought of everyone's favorite Fairy and her Pixie Dust!

No photo description available.
We took a softer approach with this blend, 
opting for an iridescent clear base, layered with transparent, 
iridescent, opalescent and holographic pinks, 
yellows, purples, blues and greens in pastel shades. 
generous sprinkle of crystals, shard sequins,
 and silver holographic stars 
and starbursts give this blend almost a pixie glow.

Here's the cute card I made.

Materials Used:
Memento Pen - Tuxedo Black
Kindred Stamps Never Grow Up
4enScrap Die Set: Bubbles
Spectrum Noir Markers
Sakura Gelly Roll Metallic Silver Pen
Sakura Gelly Roll White Pen
Sakura Gelly Roll Black Pen

Thank you for stopping by the blog today. I hope you found some inspiration! 

Be sure to tag us Doodles Paper Playground on social media 
if you create a project with our Sparkle Blends. 

There is also a new Facebook group where you can share 
creations you have made with Sparkle Blends!
Come check it out, share some inspiration!

 All of our Sparkle Blends can be purchased only at the 

Wednesday, June 5, 2019

Treat Yourself! with White Rose Crafts LLC

Hello Crafty Friends - I am here with a fun summer inspired card.

New Month means a new sketch over at the White Rose Crafts LLC FB Gallery Group.

This is the sketch for this month
No photo description available.

Here is the card I created inspired by the sketch and summer.

Materials Used:
Memento Pen - Tuxedo Black
Sakura Gelly Roll Metallic Pen - Siver
Spectrum Noir Markers:
MG1, AP1, OR1, BO1, LY1, CT3,
 LG1, LG2, BT3, BT4, HB1, HB2, 
CG1, CG3, CG4, EB5 

Thank you for stopping by the blog today! 

Be sure to tag us White Rose Crafts LLC on social media 
if you create a project with products or kits purchased on the 
be sure to use the discount code
 Annie 10(there's a space between my name and the number).

Saturday, June 1, 2019

You are Beautiful card with A Perfect Time to Craft

Hello Crafty Friends - I am here with a card for A Perfect Time to Craft. 
New Month means a new challenge.

Our sponsor for this month's challenge isMorgan's Art World
Image may contain: text

Here is the card I created using the image Cameo
I colored the imaged with both Copics and Spectrum Noir Markers.

This is always an Open Challenge and always "Anything Goes”.
You're welcome to add 3 entries per challenge and
you may enter any crafting project with any theme.
For full details on our rules and on how to enter, please visit our rules page.

Our prizes consist of…
1st Prize: 3 sponsor images, a certificate and a badge.
2nd Prize: 1 sponsor image, a certificate and a badge.
3rd Prize:1 sponsor image, a certificate and a badge.
DT Favourites: a certificate and a badge.
Spotlight Winners: a certificate and a badge.


Thank you for stopping by the blog today - I hope you found some inspiration!

Wednesday, May 29, 2019

3 Cards 1 Kit with White Rose Crafts LLC


Hello Crafty Friends - I am here with a long post for 3 cards.


However, these cards came together rather quickly because I used the cut a part sheet from the Echo Park Coffee Collection that is part of the Barista Blend Kit. Now, This kit is sold out - but, Kay does have the Echo Park Coffee Collection 6 x 6 Pad available in the shop.

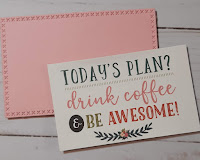
Card # 1 - Today's Plan? Dink Coffee & Be Awesome! - quick and easy.

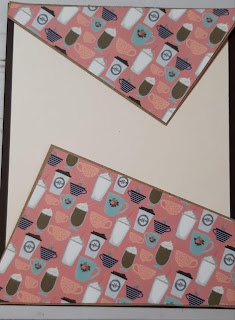
I gathered the supplies - I trimmed my card front panels. Coffee for the base and Cream for the top layer. Next, I trimmed the pattern coffee paper so I had the corners of the paper. I trimmed a layer of kraft cardstock to mat the pattern paper. I die cut pink cardstock for a mat for the sentiment which is one of the cut a parts. Along with some embellishments.
Then, I adhered the Cream layer to the Coffee panel, Next, I adhered the pattern paper to the kraft mats. Then, I adhered the pattern paper layer to the card front panel.
Next, I adhered the sentiment to the pink cardstock. Then, onto the card front panel. Finally, I added a few embellishments. A small coffee cup paper clip and a few of the Doodles Paper Playground Sparkle Blends: Caffeinated. I adhere my card front panel to my card base.

Now, the card is complete!

Card # 2 - Coffee - a few more layers.

I gathered the supplies - I trimmed my card front panels. Coffee for the base and Tan for the top layer. Next, I die cut a circle from the floral pattern paper.  I trimmed a strip of the pink X pattern paper. I cut a rectangle piece of medium brown cardstock to mat the sentiment which is one of the cut a parts.
 Along with some embellishments.

Then, I adhered the Tan layer to the Coffee panel.
 Next, I adhered the floral pattern paper circle to the card front panel. 

Then, I trimmed the washi tape in half and placed onto the card front panel.
** Tip: I stick my washi tape onto the backing that you remove from tape or foam squares
 so I can trim it or punch shapes from it.  

Next, I place the washi tape onto the card front panel about the distance of my pattern paper strip. I then adhered my pattern paper strip. Then. I adhered the sentiment onto brown cardstock and popped it up on foam square for dimension.

Then, I added a few embellishments to the card front panel. I used one of the pink Mulberry Hearts from the kit and a few sequins for the Doodles Paper Playground Sparkle Blends: Caffeinated. I added a bit of low profile foam adhesive to the Mulberry Heart.
I adhered the card front panel to my card base and my card is complete!

Card # 3 -  You're As Sweet as CowfeAu Lait.  The most layers and steps.
I gathered the supplies - I trimmed my card front panels. Black cards stock for the base and Tan for the top layer. Next, I die cut a circle from the Mulberry paper and a Flower shape from the pink paper.  I trimmed strips of the pink & red check pattern paper, the Floral pattern paper and the black and white coffee cup pattern paper. I die cut the Floral pattern paper with a border Scalloped die. 
I trimmed a rectangle piece of black cardstock to mat the coffee bean pattern paper & the sentiment.
I stamped the image and the sentiment. I colored the image with Prisma color pencils. I then trimmed my image into a circle.
 Along with some embellishments.
Then, I adhered the Tan layer to the black panel.
 Next, I adhered the strips pattern papers to the card front panel. Slightly overlapping them.


Then, I matted the coffee bean pattern paper onto the black cardstock and adhered it onto the card front panel.

Next, I inked the edge of the image circle with a bit of Distress Oxide ink: Vintage Photo.

Then, I adhered the flower die cut shape onto the card front panel and then the mulberry paper circle. Next, I added a bit of foam tape to the back of the cow image and placed it just to the right of the mulberry paper.
 

Next, I Trimmed the Mulberry Heart a bit because I felt they were too large for the space. I went old school here and just folded the hearts in half then cut a heart shape.


I will save the outer heart section for another project.

Then, I adhered the hearts on top of one another. Using a bit of foam adhesive on the top one. I added a sequin from the Doodles Paper Playground Sparkle Blends: Caffeinated mix. 
  

Finally, I added the sentiment onto a piece of black cardstock and fishtailed the end. Popped it up with some foam tape and added it onto the card front panel. I adhered the card front panel onto the card base and my card is complete!

Materials Used:
Doodles Paper Playground Sparkle Blends: Caffeinated, 
Mulberry Hearts, The Little Acres Stamp
& Doodlebug Cute Clips: Coffee Shop) 
Now, This kit is sold out. 
However, Kay does carry quite a bit of the items in the shop. 

Other:
Prisma Color Pencils
Black, White, Tan & Cream Cardstock from my stash.

Thank you for stopping by the blog today! 

Be sure to tag us Doodles Paper Playground on social media 
if you create a project with our Sparkle Blends.
 All of our Sparkle Blends can be purchased on the 
be sure to use the discount code
 Annie 10(there's a space between my name and the number).