Wednesday, December 27, 2017

Anything Goes + 3rd Annual Blogiversary 

"Welcome to the 3rd Annual Crafty Gals Corner Blogiversary!! We are so excited for you to join in the fun this week as we celebrate three years of friendship, fun, and of course challenges! To help us celebrate we have 9 amazing sponsors who have blessed us with some amazing images, and are offering prizes. We hope you participate in this wonderful event and may you all have a wonderful holiday with your loved one and we will see you in 2018! Thanks for your continued support crafties!"

Here is a list of our DT members.


Now, take a look at our wonderful sponsors and their very generous prizes

Prize: 2 Digital Images


Prize: 3 Digital Images

Prize: 2 Digital Images


Prize: 1 digital image


Prize: 3 Digital Images


My Besties
Prize: 3 images

Prize: $20 gift Certificate


Polkadoodles

Prize: $15 Gift Certificate

Sparkle N Sprinkle
Prize: $15 Gift Certificate

No automatic alt text available.

Using ~ Hugs & Kisses Avery by Paper Nest Dolls


Using ~ Moon Fairy by Cute As A Button

Please be sure to check out the rest of our simple rules for participating in our challenges,  HERE.

Friday, December 15, 2017

Ornaments with Simply Stamps

Hello Friends - some fun and easy ornaments the whole family will enjoy making.


Using the Winter Birdie Craft Stamp which can be found in the craft section of the Simply Stamps Store and some simple craft supplies. I created the ornament twice to show you 2 ways of making this cute ornament just in case you can't find the wooden tags.


Supplies Used:        
Winter Birdie Craft Stamp
Unfinished Wood Tag/Chipboard Tag
Distress Stains/Craft paint- Various Colors
Ink Pad - I used Staz-on Jet Black
Gelly Roll  Gel - Metallic Pen - Gold & Silver
Zig Wink of Stella Glitter Brush Pen
Glitter Glue - I used Ranger Stickles and Tonic Nuvo Drops
Twine or Ribbon
Other: Paint brush, wipes, craft mat

Directions:
Step 1: Paint your tag. Making sure to cover completely and even the sides/edges. Set aside to dry about 10 - 20 minutes.


Step 2:  Ink up stamp, center over tag and stamp image onto tag. Set aside to dry 1 minute.


Step 3: Use Gelly Roll  Gel - Metallic Pen - Gold & Silver &  Zig Wink of Stella Glitter Brush Pen to decorate your image.


Step 4: Tie twine/ribbon onto tag for a hanger. Use glitter glue to further decorate your ornament. (optional) Set aside to dry. Once dry hang on your tree and enjoy.


This week at Crafty Gals Corner we're doing the challenge 
Anything Goes

Our wonderful sponsor for this week's challenge is:

Image result for alicia bel digital image
Prize: 10 Euros

This is the card I created using Reindeer Couple by Alicia Bel 


lease be sure to check out the rest of our simple rules for participating in our challenges,  HERE.
You have until 12:00 pm CST on December 19, 2017 to play along with us.

Friday, December 8, 2017

Coffee Loving with Skipping Stones Designs

No automatic alt text available.


Yum - Coffee!!! 

Yes, You can say I am a coffee lover. Since, the age of 6 I have been drinking coffee. Some of the best conversations have been with a cup of coffee in my hand. So, this hop is just perfect. 

I created this card using Coffee Volume # 2 which can be found in the Skipping Stones Design Store I kept it simple for this card.


I stamped the image of the to go cup with Momento Tuxedo Black Ink, colored it with Spectrum Noir Markers. The coffee ring and bean I used colorbox Chocolate brown ink. I then used a postage stamp frame die for my background from cream and kraft cardstock. Then, I layered it onto coffee brown cardstock base.


http://skippingstonesdesign.com/wintercoffeehop/

Tuesday, December 5, 2017

Pink Christmas with Crafty Gals Corner

This week at Crafty Gals Corner we're doing an Anything Goes Challenge.  

Our wonderful sponsor for this week's challenge is:

Sparkle N Sprinkle
Prize: $15 Gift Certificate


Using ~ Winter Flamingos & sentiments

Please be sure to check out the rest of our simple rules for participating in our challenges,  HERE.
You have until 12:00 pm CST on December 5, 2017 to play along with us.

Thursday, November 23, 2017

Birthday Donuts with Skipping Stones Designs

Today, I am using the Donuts #5153 stamp set from Skipping Stones Design to create this cute birthday card.


I did some masking to create the stacked donut cake. I then colored it with Spectrum Noir Alcohol Markers. Then, placed the donuts on the cake stand and embellishment it with Nuvo drops - to add dimension to the sprinkles. I also added a doily to create my table. Stamped the sentiment onto vellum and adhered it.

Thank you for stopping by I can't wait to see your cards using the Donuts # 5153 Stamp Set.

Tuesday, November 21, 2017

This week on Jo's Scrap Shack we have another  Funday Friday Challenge!! It's an Anything Goes Challenge with a twist -  YOU MUST USE A TAG ON YOUR PROJECT.

Our Sponsors this week are:
  The winner will win 4 digital images of their choice from the Bugaboo Store!

AND
Little Blue Button Stamps
The winner will win 4 digital images of their choice from the LBBS online shop!
 So make sure to play along this week~
    Starts: Friday, Nov. 17th   12:00AM

   Ends:  Friday, Nov. 24th    6:00PM
(Eastern time)


This is the card I create for this challenge


What do you need to do to enter?
Challenge Rules

1. Please post a direct link to your blog post that includes your
challenge entry project, 
using the linky tool below. 
2. Be sure to include a link back to Jo's Scrap Shack and to the challenge post you are entering your project into

3. THREE entries per person are allowed for each challenge and you must post a separate blog post for each entry.

4. For all entries -NO BACK LINKS ACCEPTED- 
The date on your blog post should be dated between the start date & the end date for the challenge you are entering, in order to be eligible for the challenge & prizes

5. You may link up to other challenges but be sure to link back to Jo's Scrap Shack and to the challenge post you are entering 

 * All entries that do not meet the challenge requirements
WILL NOT be eligible for the top 3, any sponsor wins or any random wins by Jo
All random wins will only be mailed within the US and Canada only.
You have until Nov. 24th by 6:00PM (eastern, USA) time to link up.
All winners will be announced during the week of Nov. 27th.


Saturday, November 18, 2017

Thankful with Crafty Gals Corner

This week on the Crafty Gals Corner Blog we're doing the challenge of THANKFUL. 

Using this week sponsors

Our wonderful sponsors for this week's challenge are:

Prize: 2 Digital Images


Prize: 2 Digital Images

For this challenge I created this card using 3 Autumn Girls by All Dressed Up


Please be sure to check out the rest of our simple rules for participating in our challenges,  HERE.
You have until 12:00 pm CST on November 21, 2017 to play along with us.

Friday, November 17, 2017

Fall Designer Model - Autumn with Simply Stamps

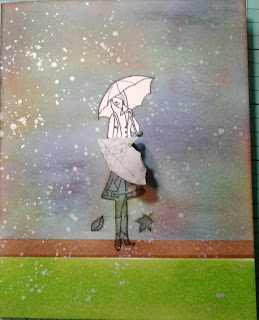
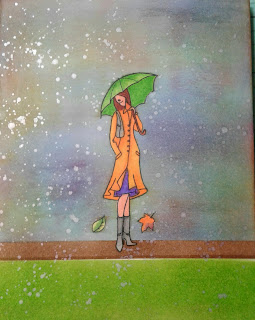
Here again with another card using the Fall Designer Model - Autumn Craft Stamp for Simply Stamps. This lovely, yet simple stamp allows for some fun masking and coloring.


Supplies:
Fall Designer Model Stamp
Canson - Bristol Smooth Cardstock
Momento Black Ink
Distress Inks - Various colors
Spectrum Noir Markers
Adhesive - Xryon Mega Runner
Masking paper
Optional: Die Cut trees & Pearl White Metallic Paint

Directions:

1.  Cut and Fold your card stock to 5-1/2x4-1/4" creating a A4 card base.

2. Stamp the Fall Designer Model on masking paper add cut out on the black lines. Set aside, then mask bottom of the card to create a grass and ground for you Fall Designer Model to stand on.


Using Distress ink sponge on the Distress ink in Ground Expresso. Then, remove the pink mask to create the grass area using Mowed Lawn - making sure to the cover the Ground Express.

3. Now, Stamp the Fall Designer Model on the card base. Then place the mask over the image to cover it for the next phase; which is creating the Fall sky using Distress Ink in Broken China, Salty Ocean, Fire Brick, Spiced Marmalade & a touch Seedless Preserves. 


4. Now, remove the masks over the Fall Designer Model and the small leaves. to reveal the fresh stamped image. Using the Spectrum Noir Markers to color the stamp image.


To finish my card I used some die cut trees and a sentiment. Along with some pearl white metallic paint splatters.