Thursday, December 26, 2019

Celebrating the New Year with Rinea

Hello Crafty Friends - I am here with a fun way to celebrate the New Year!

I can't even believe it's going to be 2020! 

Today, I have a Champagne Bottle and 2 toasting glasses.
These fun 3D projects are perfect to decorate your table or mantel.

Champagne Bottle and 2 toasting glasses

Materials Used
Silhouette Cameo 3 Die Cutting Machine
Xyron Creative Station Lite
Aleene's Tacky Glue
Recollections Brand: Gold Jewels
I purchased and downloaded the bottle and glass cut files from
the Silhouette Design Store.

I cut them using the Rinea Foil paper on the vellum setting and a light tack mat. I then assembled the projects as per the directions in the Silhouette Design Store.

I hope you found some inspiration today! 

Please tag us on social media if you create any project using any of our wonderful Foil Papers!
Don't forget to stop by the shop Rinea.com

Happy New Year with Dies R Us

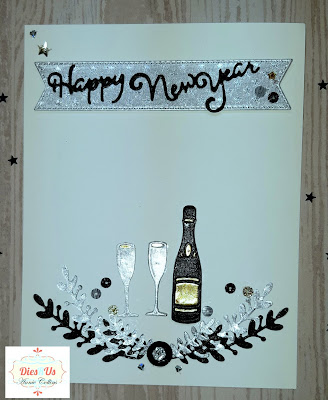
Hello Crafty Friends - I am here with a quick and easy New Year's card.

Can you believe it's almost here! 
A new year filled with new experiences, memories, 
birthdays, anniversaries, and so much more! 

This card is so quick to create you can still make them and get them out to all the family and friends!

I gathered all the supplies. The die, Rinea Foil paper for some shine and some Doodles Paper Playground Sparkle Blend called Celebrate along with some cardstock.

I die cut all the pieces from the foil paper. I die cut the leaves in Rinea Foil paper Starstruck Ebony and Starstruck Silver. The champaign bottle I cut from Rinea Foil paper Starstruck Ebony and I cut and an extra one from Rinea Foil paper Glossy Gold for the inlays of the labels. I then cut the glasses from Rinea Foil paper Starstruck Silver. I also die cut the label banner from Rinea Foil paper Starstruck Silver. Finally, I die cut the sentiment from Rinea Foil paper Starstruck Ebony.

I start by assembling the champaign bottle. I put some low profile foam adhesive on the back of the bottle and then turn it over to place the small label piece into place.
  

Next, I adhered the leaves to the bottom of my white card front panel. Starting with the black leaves first then the silver. Then, I adhered to the bottle and the glasses just above the leaves.
 

Then, I adhered the sentiment onto the banner and added some low profile foam adhesive to the back of the banner and place it on the card panel making sure to center it. 
 

Next, I added some sequins to the card front panel. I created a small cluster at the center between the leaves and two other clusters on the sides of the bottle and glasses. I finished with a final cluster by the sentiment. 
 

Then, I adhered the card front panel onto the card base and the card is complete!

Materials Used:
Amy Design - Dies - Christmas Wishes - Champagne

Elizabeth Craft Designs - Dies - Happy New Year

Elizabeth Craft Designs - Dies - Banners

Rinea Silver/Silver Starstruck Foiled Paper


Jot Brand: Low profile Foam Adhesive
Recollections Brand 65lb Cardstock: White
Recollections Brand 110lb Cardstock: White
Crafter's Edge Crossover Die Cutting Machine
Imagine Crafts: On point Glue

Thank you for stopping by the blog today. I hope you found some inspiration!

Sunday, December 22, 2019

Season's Greetings with Doodles Paper Playground

Hello Crafty Friends - I am here with a fun shaker card. 

This is a no frame shaker card featuring 
 A soft palate of pink, grey, white and black & white sequins of every texture &
 finish, combined with transparent pink ice crystals and 
a healthy mix of penguin-shaped Fimo slices.


Materials Used:
My Minds Eye Brand: Oh What Fun Pattern Paper (Black dot and Pink Snowflake)
White Rose Designs Brand Pattern Paper: Pale Pink and Multi-Color Striped)
Inks:
Tsukeniko: Memento Tuxedo Black
Tsukeniko: Memento Dew Drop: London Fog
Tsukeniko: Memento Dew Drop: Potter 's Clay
Tsukeniko: Memento Dew Drop: Rose Bud
Tsukeniko: Memento Dew Drop: Paris Dusk
Tsukeniko: Versafine Onyx Black
Tsukeniko: StazOn: Jet Black
Stamps:
Papercraft: Christmas Characters
Maker's Movement: Christmas is Best with You (sentiment)
Adhesives:
Ranger Glossy Accents
Imagine Crafts: On Point Glue
Imagine Crafts: Tear It Tape
Other:
Sakura Gelly Roll Pens: White and Black
Clear Packaging
Recollections Brand 110lb Cardstock: White (card base)

Thank you for stopping by the blog today. I hope you found some inspiration!


Be sure to tag us Doodles Paper Playground on social media -
if you create a project with our Sparkle Blends. 

There is also a new Facebook group where you can share 
creations you have made with Sparkle Blends!
Come check it out, share some inspiration!

All of our Sparkle Blends can be purchased only at the 

Wednesday, December 18, 2019

Merry Christmas and Trashy New Year Card with Jaded Blossom

Hello Crafty Friends - I am so honored and excited to be Guest Designing for Jaded Blossom.

I created a fun card featuring a new release stamp set is called Trashy and Classy 

This is the card I created. You can see the full tutorial video below.
Materials Used:
Other stamps: 
Practical Publishing: Festive Friends: snowflakes and little pine trees
Paper:
DCWV Brand: Glitter Cardstock - Snow
Recollections Brand: 110lb Cardstock - White (card base)
Recollections Brand: 65lb Cardstock - Light blue
Adhesive:
 Imagine Crafts: Tear It Tape
Imagine Crafts:On Point Glue
Inks:
Tsukineko Brand: Memento: Tuxedo Black
Tsukineko Brand: Stazon Pigment Ink: Shamrock Green
Tsukineko Brand: Versamark 
Tsukineko Brand: Versafine Onyx Black
Spectrum Noir Alcohol Markers:
DR1, DR6, DR7, AG2, EB3, IG2, IG3, IG4, IG5, IG6
Sakura Gelly Roll Pens: White, Black and Silver
Embellisments:
Ranger Brand Embossing Powder: Detail White
Elle Tru Brand: Jewels 
Tools:
EK Success Embossing Powder Tool
EK Success Cutter Bee Scissors
Paper Studio Trimmer
Jot Brand Thin Foam Adhesive

The Video Process

Don't forget to stop by the Jaded Blossom store for all 
the new released stamps and dies!

Thank you for stopping by the blog today. I hope you found some inspiration!

Tuesday, December 17, 2019

Ho Ho Ho Card with Die Cut Divas

Hello Crafty Friends - I am here with a fun card featuring several dies from

We have a Challenge on the Die Cut Divas Blog our
theme is: WINTER/CHRISTMAS 2019

This is a special month as we have two, not one, but two sponsors. The theme will be Winter/Christmas time. There will only be two posts this month, today, the first and December 15th, however, the challenge will last through December 31st, 9:00 p.m. Pacific time as always.

Cheapo Dies. Check out their site for Cheapo dies and many more well-known brands. Cheapo Dies offers a $15 gift certificate as the prize for December.


This is the card I created.

Materials Used:
Nuvo Glitter Drops: White Blizzard
Ranger Liquid Pearls: Rouge
Papercrafter Pattern Paper
Recollections Brand 110lb Cardstock: White and Black

Sunday, December 15, 2019

Be Merry with Doodles Paper Playground

Hello Crafty Friends - I am here with a fun shaker card featuring 
 This bold combination of ultraviolet, teal, ruby red,
emerald green, and coppery orange and gold is sure to fit the bill, 
with its variety of bright metallic cup sequins, assorted-sized star confetti,
 sparkly faceted crystals and prismatic giant glitter in both hexagonal and diamond shapes. 
You can't go wrong with this striking blend for any celebration!


Here is the card I created


Materials Used:
Papercrafter Die: Be Merry
Recollections Brand 65lb Cardstock: Red
Recollections Brand 65lb Cardstock: Gold
Recollections Brand 110lb Cardstock: White
Spectrum Noir Markers:
MB3, MB4, EB5, CR2, MG1, MG2, BT2, BT3
HB2, HB3, TB2, TB3, AG2, AG3, CT4, GY2, 
DR1, DR4, IG3, IG4, BG2, BG3
Copic Marker: B00
Sakura Gelly Roll Pen: Gold, White, and Black

Thank you for stopping by the blog today. I hope you found some inspiration!

Be sure to tag us Doodles Paper Playground on social media -
if you create a project with our Sparkle Blends. 

There is also a new Facebook group where you can share 
creations you have made with Sparkle Blends!
Come check it out, share some inspiration!

All of our Sparkle Blends can be purchased only at the 

Friday, December 13, 2019

Hello Crafty Friends - Annie with 2 fun cards featuring Lemony Fizz Stamps

To purchase these and many more wonderful stamps from Lemony Fizz 
please visit the Lemony Fizz Shop


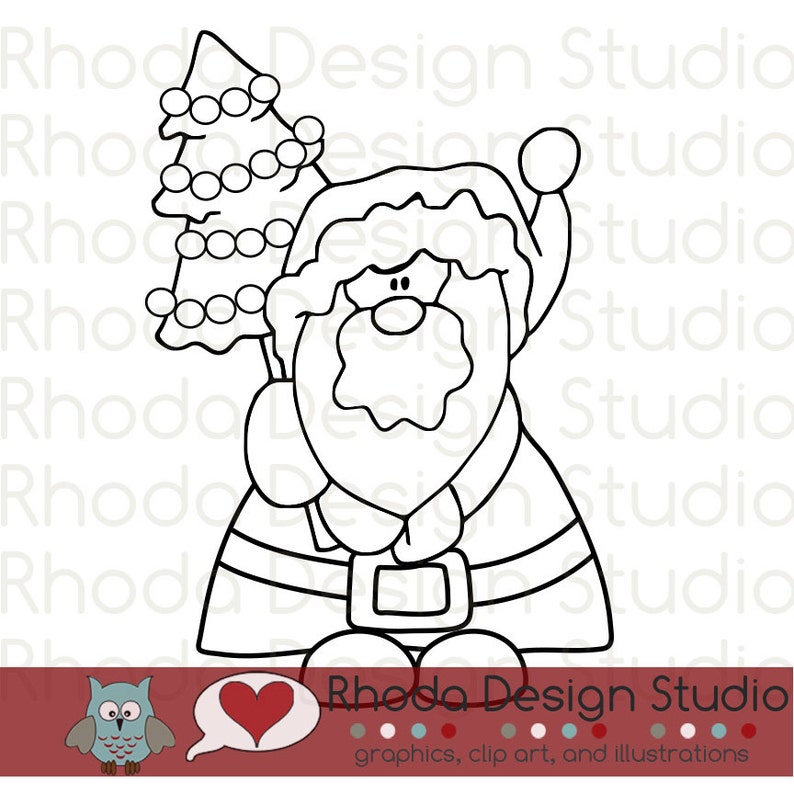
Santa and Tree Digital Clip Art Christmas stamps image 0

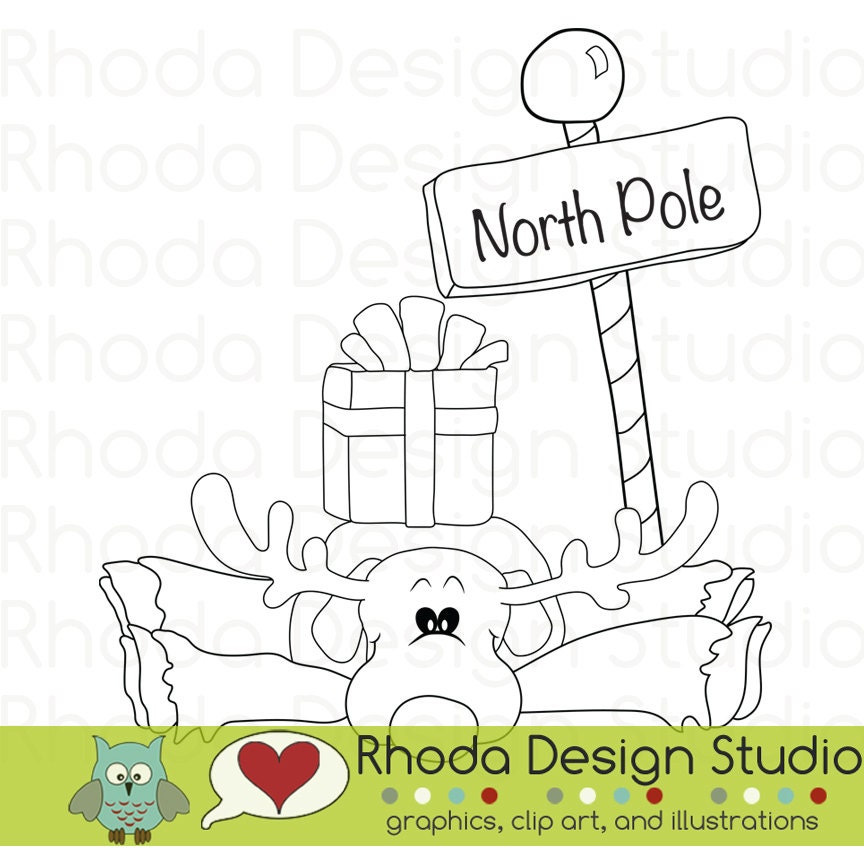
I also used Reindeer

Here are the cards I created.

Be Merry


North Pole

Materials Used:
Lemony Fizz: Santa and Tree
Lemony Fizz: Reindeer
DCWV Pattern Paper: Green and Red Plaid
Tattered Lace Brand: Pattern Paper Blue Snowflakes
Spectrum Noir Markers
Sakura Gelly Roll Pens: White, Black, Gold, and Glitter
Recollections Brand 65lb Cardstock: Red and Green
 Recollections Brand 110lb Cardstock: White
MFT Die: Fishtail Sentiment Banner
Lawn Fawn Die: Stitched Hillside Border
Elle Tru: Jewels and Snowflake sequins

Thank you for stopping by the blog today. I hope you found some inspiration!

Please visit my blog for the materials used - Little Wings Creates

Please join in on the fun at The Coffee Bean Challenge Blog

Wednesday, December 11, 2019

Brand Week: Craft O'Clock with White Rose Crafts LLC

Hello Crafty Friends - I am here with 2 cards featuring the brand of the week over at 

Craft O'Clock 


Card One

Materials Used:
Recollections Brand 110lb Cardstock: White (card base)
Recollections Brand 65lb Cardstock: Cream


Card Two

Materials Used:
Tim Holtz Tiny Attacher
Sakura Gelly Roll Pen: Glitter
Recollections Brand 110lb Cardstock: White (card base)
Recollections Brand 65lb Cardstock: Black

Thank you for stopping by the blog today - I hope you found some inspiration!

Be sure to tag us White Rose Crafts LLC on social media 
if you create a project with products or kits purchased on the 

Christmas Ornaments with Rinea

Hello Crafty Friends - I am here with some fun, quick and easy ornaments.

I have 3 ornaments for you to try.
You can even create these with the kids by simply using bigger beads, string and a plastic craft needle.

Please bear with me and this really long post. I wanted you to have plenty of photos.
Ornament Trio
Materials Used:
Darice Brand: Jingle Bells: Gold and Silver
Darice Brand: Sequins Green, Gold, and Silver
Darice Brand: Faceted Clear Beads: Red, Light Brown, and Yellow
Darice Brand: Faceted Opaque Beads: Blue, and Silver  
Darice Brand: Opaque and Clear Flower Beads: Purple and Yellow
Darice Brand: Fancy Gold Bead Cap
Craft Trims Holiday Time: Red and Green Ric Rac
Craft Trims: Grossgrain White Ribbon
DMC Brand: Floss Light Blue, White with Silver and Gold
DMC Brand: Thread White
26 Gauge Wire: Gold
Plastic Straw
Lawn Fawn Dies: Stitched Scalloped Border
Tools: Needle, Scissors, Needlenose Craft Pliers, 
Paper Trimmer and Paper Piercer
Tassel Maker: Cardboard/Chipboard 2" x 31/4"
The pattern for Ornament  #1

Ornament #1 Round Red Ornament

Let's get started!

I gathered my supplies. I printed and cut the ornament pattern. 
Rinea Starstruck Ruby/Ruby Foil paper and other supplies.

For extra stability, I adhered the cardstock ornament pattern onto the back of the 
 Rinea Starstruck Ruby/Ruby Foil paper. 

Next, I used a paper piercer to punch small holes in the ornament. One hole in the center and one on each of the petals. 
 

Then, I cut about 5 inches of wire. I curl and loop one end. Next, I add one red bead and sequins to the wire. I then thread the wire through the center hole of the ornament.
  

Next, I add a 2 -1/2" piece of straw to the wire (this is for extra support). I then start to insert the wire through each of the petals to form a ball.
 . 


 Then, I add the other green sequin, followed by the gold sequin and finally the red bead. I trim off any extra wire. leaving just enough to create the loop in the wire. 
This will be the bottom loop for the bell. 
 

To attach the bell - I used some of the leftover wire and simply threaded the wire through the bell and then the bottom loop. Curling to secure in place.
 

I added some decorative trim to the top loop and then knotted the ends. Trimmed off any extra.
 

Now your ornament is complete!


Ornament #2 Round Blue and Silver Tassel Ornament


Let's get started!
I gather my supplies. I trimmed 6 - 1/2" x 6" strips of Rinea Foil paper in the colors of your choice.
 I used Starstruck Turquoise and Silver along with Glossy Turquoise and Silver Foil paper.

I start by creating the tassel for the ornament. 

To create the tassel you will need some chipboard/cardboard that measures 2"x31/4" I like to cut a small slit on the short side to hold the floss while I wrap it. You wrap the floss several times around the chipboard. The more you wrap the thicker your tassel will be. Once you have the desired thickness you trim off the floss. 
 
Next, you cut a piece of thread or floss to about 12" long. Then, you slip in under the floss wrapped around the cardboard.  Next, you bring it toward the top (short side of the chipboard) and tie a knot. I like to double knot it. 
 

Then, slip off the floss bundle from the chipboard. Next, with another piece of floss about 4" long you tie it around the top of your tassel as shown. Now you can trim the bottom of the tassel.  
 

Using a needle thread the floss strings at the top of the tassel through the beads and the sequin. If you have trouble doing it this way you can simply cut another piece of floss, thread through the needle tie a knot at one end and sew thru the top of the tassel and follow with the beads and sequin. Set the tassel aside for a bit.


Now, gather the foil paper strips. Stack them. Poke holes at each end and center of the strips. Stacking them makes this easier and lines them up.


Now, thread the tassel through the center of the stack.  Note this will be the bottom of your ornament.
 

Next, fan out the stack of strips. Insert 1-1/2" straw to the center of the ornament-Optional.  Then, start threading the floss through the strips. Making sure to do the same strip ends. I started with the bottom turquoise strip left end followed by the right creating a loop. Repeat with all the strips.
  

Once you have all the strip through the floss you will have a ball shape. 
Next, add the other silver sequin followed by the beads.
 

You can tie a knot close to the silver bead. 
I chose to thread the floss through the bead again from the bottom to secure it.
 

Next for the hanger - I chose to add a white ribbon. 
However, you can just cut off the needle and tie a knot to the floss.
To add ribbon I simply thread through the center of the ribbon and tied a double knot and trimmed off the extra floss. Then, I tied a knot at the ends of the ribbon.


Now as a finishing touch I added a bit of foil paper to the tassel. This is completely optional.

Trim a 1" x 2" piece of Glossy Silver Foil paper. Fold up the bottom (long side) to the center. Next, fold down the top. Then, fold over one end of the strip. as shown below.


Next, add adhesive. I used strong double-sided adhesive. Wrap the foil paper over the string shown in the photo below. 


Now your ornament is complete!


Ornament #3 Angel Ornament

Let's get started!
I gather my supplies.
I trimmed 2 - 4" x 6" strips of Rinea Foil paper in the colors of your choice.
 I used Glossy Violet/Gold Foil paper.

I die cut each end of the foil paper. I used the small and medium Lawn Fawn Stitched  Scalloped border dies - however, you can use a border punch or decorative scissors. If you do not have any of these you can leave the paper as is. I am using the small border as my top and the medium as the bottom.
 

Then, I use a needle to thread about 12" gold floss. I tie a knot at the end and add the two flower beads. Follow by the light brown bead, then the gold cap. 

Next, I start on the long side and simply accordion fold the foil paper. I do this to both pieces. 
 

Then, I measure about 2" from the top of the accordion-folded the foil paper and fold down on the Violet side. Next, I add some strong adhesive to each accordion-folded the foil paper from the fold down only. Then, bring the beads over and place the string in between the accordion-folded the foil paper. Remove the backing from the adhesive and press the two accordion-folded the foil paper together making sure that about 2" of the string is sandwiched in between. 

This will be the body of your angel.
  

Now, tie a knot at the top of the gold cap as close as possible. Trim off the needle and tie another knot to create your hanger.


Next, to create the wings - on the Violet side of the foil paper add some adhesive. Then, using some more gold floss thread a jingle bell and a bead to create the angel's arms and hands
 
Then, separate the thread into two sections (about 3 strands each) and place them on either side of the angel's body. Remove the adhesive backing and press the wings down onto the body.  Next, fan out the body and wings of the angel.
  

Now, the angel ornament is complete!

Thank you for hanging in with me through this very long post. 

I hope you found some inspiration today! 

Please tag us on social media if you create any project using any of our wonderful Foil Papers!

Don't forget to stop by the shop Rinea.com