Thursday, July 30, 2020

New Release with Joy Clair Designs

Hello Crafty Friends - I am here with a New Release Set 
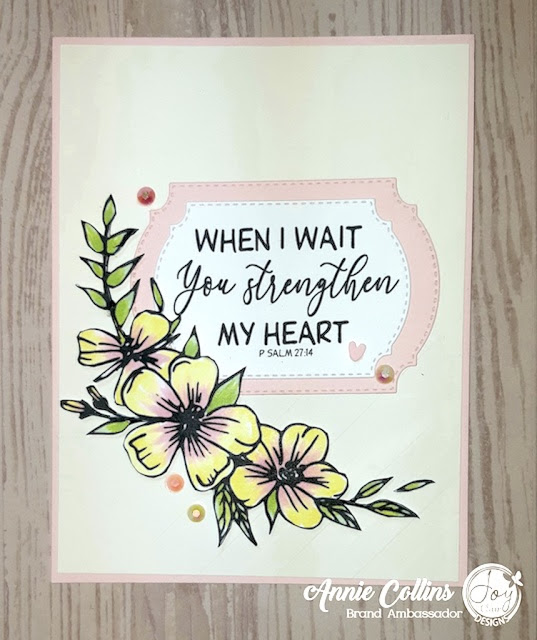
This set has 3 images and 4 sentiments.

Here are the cards I created with this set.
Materials Used:
Copics: C0, C1, C2 Y21, G14, YG13 & 0
Stitched Hexagon Die
Robin's Nest Dew Drops: Light Blue & Yellow
Ranger Liquid Pearls: Gold Pearl

Materials Used:
Copics: RV000, R81, Y00, Y11, G12, YG13 & 0
Art Glitter Glue
Craftsmart Embossed Cardstock: Cream
Stitched Label Dies
Fima Heart: Pink
Jewels: Pink andWhite

Thank you for stopping by the blog today. I hope you found some inspiration!

Please continue with the hop!

You are invited to the Inlinkz link party!
Click here to enter

Monday, July 27, 2020

Christmas in July with Joy Clair Design


Hello Crafty Friends - I am here with a fun Christmas card featuring the Holly Jolly Santa Set.
This set contains 3 sentiments and 3 images.

Be sure to stop at the Joy Clair Design Shop to pick up this wonderful set.

Make sure to continue on the hop - Start at the Joy Clar Blog


Materials Used:
Joy Clair Designs:Holly Jolly Santa Set
Copics: R27, R37, G07, G14, YG17, BV13, 
B02, E00, E93, C1, C2, C7 & 0
Sakura Gelly Roll Pens: Black, White
Gold and Sparkle

Thank you for stopping by the blog today. I hope you found some inspiration.

Sunday, July 26, 2020

Summer Flip Flops Decor with Rinea

Hello Crafty Friends - I am here with a cute set of Flip Flops that you can use to decorate your home.


Materials Used:
Tim Holtz Distress Oxide Ink: Carved Pumpkin
Tim Holtz Distress Oxide Ink: Fossilized Amber
Tim Holtz Distress Oxide Ink: Broken China
Recollections Brand  65lb Cardstock: Navy
Xyron Creative Station Lite: Adhesive
Imagine Crafts: Tear It Tape
Brother Scan N Cut Machine

Let's get started

I gathered all the components for the flip flops. I used the Brother Scan N Cut for the cut file.
I have 2 Navy cardstock soles(1 with slots for the straps and one without), I have 4 Navy cardstock Straps, I have a total of 4 sets of flowers a larger one, and small one.
Rinea: Glossy Marigold/Gold Foiled Paper  large flowers,
Rinea: Glossy Marigold/Gold Foiled Paper small flowers, 2 Rinea: Starstruck Gold/Gold Foiled Paper large stamens, Rinea: Starstruck Gold/Gold Foiled Paper small stamens, 
Rinea: Starstruck Turquoise/ Turquoise Foiled Paper  soles and straps.


Flowers: I did the flowers first to give them some time to dry. I cut the flowers and stamen from Rinea: Starstruck Gold/Gold Foiled Paper Rinea: Glossy Marigold/Gold Foiled Paper
I inked all the flowers and stamen with Distressed Oxide Inks. I use Carved Pumpkin on the flowers and Fossilized Amber on the stamen, I do this because our Foiled Paper has a white core and I don't want it to show.

Next, I added a bit of Imagine Crafts: Tear It Tape to the open tabs of the flowers and press them closed. This will make the flowers curve. Next, I just curl the petals of the flowers. 
 
Then, I adhered to the small center flower into the bigger flower. I followed by gluing the stamen to the center of the flower. I adhered a Fushia colored jewel to the center of the flowers. I set them aside to dry.
  

Flip Flops: I ran the Rinea: Starstruck Turquoise/ Turquoise Foiled Paper soles and straps of the flip flop through the Xyron Creative Station Lite.  
 

Then, I pressed the Rinea: Starstruck Turquoise/ Turquoise Foiled Paper soles and straps onto the Navy cardstock.
 

Next, I added some Imagine Crafts: Tear It Tape to the back of the straps. Then, I insert them into the slits on the flip flops.
   
I removed the backing from the adhesive and pressed them onto the back of the flip flops.
 
I then adhered the finishing sole to the flip flops to hide all the tabs.
 

Next, I adhered the flowers to the flip flops. I attached the large flowers to the center of the straps and then small flowers right next to the large flowers.

Now, the Flip Flops are complete and ready to be used for decor. You can attach a string to hang them up if you would like.
 

Thank you for stopping by the blog today. I hope you found some inspiration!

Don't forget to stop by the Rinea Shop to pick up some of our wonderful Foiled Paper.

Saturday, July 25, 2020

Just For You At Christmas Box Card with Doodles Paper Playground

Hello Crafty Friends - I am here with a fun shaker card featuring 
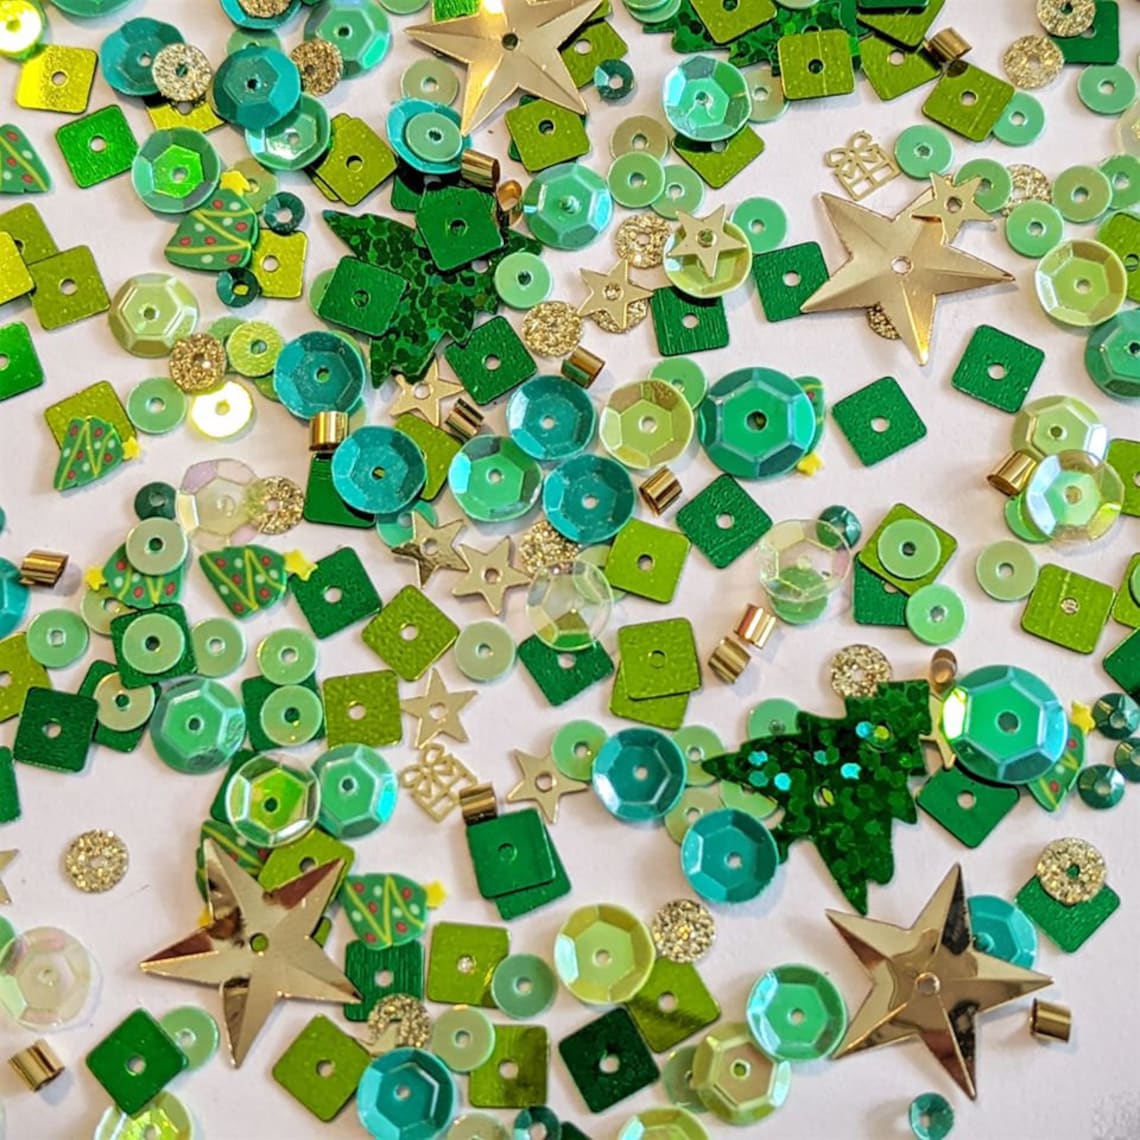
the New July Release Sparkle Blend called Oh Christmas Tree.

Oh Christmas Tree  Doodles Paper Playground: Sparkle Blends image 0
This green & gold blend is a more subtle holiday offering of flat square, 
flat round & cupped round sequins, with a sprinkle of gold stars in two sizes
--finished with adorable Fimo slice Christmas Trees, 
tiny gold frame gift packages & big holographic tree confetti, 
making it perfect for all of your holiday needs!

Here is my shaker card.

This is the card standing up. I got a shadow from my lights. 
That's why I am sharing the card laying down as well

Laying down.


A close-up of the shaker bits

This is the inside panel of the card.
Materials Used:
Angela Poole Designs: Cold Day, Warm Heart Stamp Set
Stampendous: WindowRama Box Card Frame
Maker's Movement Die: Versa Dies Circle - Perfect Foam Cutters
Rinea Foiled Paper: Glossy Emerald/Gold Foiled Paper
Tsukeniko Memento Ink: Tuxedo Black
Tsukeniko Versa Fine Ink: Onyx Black
Distress Oxide Ink: Broken China
Distress Oxide Ink: Shaded Lilac
Copic Markers: R27, G02, G14, E50, E17, E23, E35
Nuvo Glitter Drops: White Blizzard
Nuvo Crystal Drops: Simply White
Imagine Crafts: Tear It Tape
Art Glitter Glue
Maker's Movement: Double-Sided Foam Adhesive
Acetate

Thank you for stopping by the blog today. I hope you found some inspiration!


Be sure to tag us Doodles Paper Playground on social media -
if you create a project with our Sparkle Blends. 

There is also a new Facebook group where you can share the
creations you have made with Sparkle Blends!
Come check it out, share some inspiration!

Tuesday, July 21, 2020

Birdcage Decoration with Rinea

Hello Crafty Friends - I am here with a fun Bird in its Birdcage decoration. 
This a fun project you can make with the kids or just for fun.


Materials Used:
Kaiser Crafts: Black Jewel
Xyron Creative Station Lite: Adhesive
Imagine Crafts: Tear It Tape
Art Glitter Glue
Distress Oxide ink: Hickory Smoke
Distress Oxide Ink: Chipped Sapphire
Recollections Brand 110lb Cardstock: White
String: 2 Inches

Let's get Started

I gathered all the components for the birdcage. I printed the pattern from LittleStuff PDF: Birdcage, Along with Rinea Glossy Silver/Gold Foiled Paper and Rinea Starstruck Cobalt/Cobalt Foiled Paper.

1 Birdcage base, 1 Birdcage inside base, 2 Birdcage inside liners, 
8 Birdcage strips(wires of the cage), 2 small circle tabs, 1 Bird body, and 2 wings.

Birdcage: I ran all the cut-up patterns through the Xyron Creative Station and adhered them to the back of the Rinea Glossy Silver/Gold Foiled Paper and trimmed them all out. 

Then, I added a bit of Art Glitter Glue to all the small tabs and press the base of the birdcage to the tabs. I repeated this to the other side. I then adhered the side together and used two small clothespins to hold the seems together until they were dry.
  

Next, I inked all the components of the birdcage with Distress Oxide ink in Hickory Smoke.

Next, I adhered the inside bottom layer to the cage.

Then, I added the wires to the birdcage base. I put a bit of Imagine Crafts Tear It to one end of the strips and adhered them to the inside of the base. I repeat this with all the wires.
 

Next, I adhered the inside liners to the base of the cage to hide the bottom of the wires.
 

Then, I put some Imagine Crafts Tear It Tape to the 2 small circles. I then place the tops of the wires to one of the circles. I started with 2 then continues to adhere the rest of the wires. I then adhered the top circle to make the cage top look finished.
  

Now, the birdcage is complete. I set it aside while I work on the bird.

The Bird: I ran the bird body and wings through the Xyron Creative Station Lite. Then, I peeled off the adhesive liner and ran it through again. This way the bird was sticky on both sides. I then placed the bird and the wings onto the Rinea Starstruck Cobalt/Cobalt Foiled Paper I then trimmed it out. 

Next, I inked the bird body and wings with Distress Oxide Ink: Chipped Sapphire.
  
Then, I added some Imagine Crafts: Tear It Tape to the wings and adhered them to the body. I curved them a bit for some dimension.


Next, I punched a small hole to the top of the birdcage and to the bird. I then threaded some string through the bird and then through the top of the birdcage. I tided a knot at the top to keep the bird floating in the cage. *optional you can add a small bead for a more finished look.


Now, the Birdcage with a small bird is complete! You can make these for decorations or gifts. 

Thank you for stopping by the blog today. I hope you found some inspiration!

Please be sure to stop by the Rinea Shop to pick up some of our Wonderful Foiled Paper.