Sunday, September 1, 2019

You Are Awesome To The Core with Dies R Us

Hello Crafty Friends - I am here with a fun back to school card.  

First On behalf of Dies R Us and myself - We would like to say that if you are in the path of Hurrican Dorian please know that you are in our thoughts. Please be safe!

Now, I decided to make this card quick and easy so you can make several if you would like to give several to teachers or students.

This card was inspired by Leeanne Allinson.

Let's get started!

I gathered all the materials for the card.

I then die cut 4 squares from the pattern side of the red paper and 4 of the solid side of the red paper. I die cut 2 leaves - 1 from the light green dot pattern paper and 1 from the green woodgrain pattern paper. I also die cut the word awesome 3 times from white cardstock. I trimmed a white cardstock panel to 4" x 5.25" and light green cardstock to 4.25" x 5.50" for the card front panels.


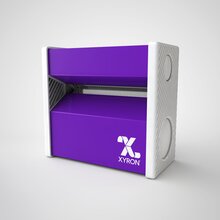
Next, I trimmed only two small leaves from the bigger leaf. I did on both leaves. Then, I ran the components through the 3" Xyron and adhered the card panels together matting the white with the green cardstock.


Next, to create the apple I cut the squares in half. 2 of the squares I cut into 4 pieces. I then ink all the sides with Distress Oxide ink in Fire Brick.

I start with the center two pieces using a pattern side and then solid. I create a square in the center and then just use half on either side.

Then, I create another square over the center one. This time I use the smaller pieces. I then create a square on each side of the center square.
 

Now, for the top of the apple, I cut the square not quite in half I leave a bit of the corner. 
 

Next, I layer in the stem and leaves. Which I have inked with Distress Oxide in Gathered Twig and Peeled Paint.
 

Then, I stamped out the rest of the sentiment in Versafine Clair ink, and Distress Oxide ink Fire Brick. I then them cut it into strips. Next, I inked the edges of the strips with Distress Oxide ink in Peeled Paint. I also cut a strip of the green dot pattern paper for a layer behind the word CORE. I ran the three die-cut awesome through the Xyron Sticker Maker. 
  

I placed the sentiment onto the card front panel layering the first strip onto the apple.

Now, for some finishing touches. I added some Nuvo Glitter Drops in White Blizzard on the word Awesome for a bit of shimmer. I then added a few drops of Nuvo Crystal Drops in Red Berry and Liquid Pearls in Key Lime. I also adhered a tiny clay apple by the sentiment.


Now, your card is complete!

Materials Used:

Elizabeth Craft Designs - Dies - Frame It Stitched Squares

Impression Obsession - Dies - Small Leaf Set
Memory Box - Dies - Awesome Jotted Script
Distress Oxide Ink Pad - Gathered Twigs


Distress Oxide Ink Pad - Fired Brick
Distress Oxide Ink Pad - Peeled Paint
VersaFine Clair Ink Pad - Nocturne
See the source image

Nuvo Crystal Drops - Gloss Red Berry
Nuvo Glitter Drops - White Blizzard

Thermoweb - 3D Foam Squares - White .25" 176/Pkg

Other Materials Used
Teresa Collins Mega Runner
Xyron 3" Disposable Sticker Maker

Recollections Brand Cardstock: Heavy Weight White & Light Green
DCWV Brand: Pattern paper: Brown Woodgrain paper & Green dot 
Martha Stewart Brand: Red and white/solid Pattern paper
Park Lane Brand: Light Green Woodgrain paper
Elle Tru Brand: Tiny Clay Apple

Thank you for stopping by today. I hope you found some inspiration!

Don't forget to come and join in the fun at the Dies R Us Challenge Blog. There's a new challenge theme offered on the 1st and 15th of each month and one lucky randomly drawn winner will receive a gift voucher prize to the Dies R Us Store. For your convenience, all the important Dies R Us links are provided below.

Friday, August 30, 2019

Welcome to the World Little Ones Card with Doodles Paper Playground

Hello Crafty Friends - I am here with a cute baby card.  

We all know someone who is having babies or grandchildren. Some twins!
 So, I figured I better get some cards in my stash. 

I mixed some of the New Sparkle Blends for this card.

No photo description available.
A clear, iridescent base is paired perfectly with
soft blue and aqua sequins in opalescent, high gloss, 
satin & holographic finishes with big blue butterflies, 
seed beads and crystals giving the blend texture and interest.

No photo description available.
A clear, iridescent base is complimented by soft, 
pinks and orchid shades in opalescent, high gloss,
satin and holographic finishes with 
big pink transparent flower shapes, 
crystals and tiny tube beads for texture and interest.

Welcome to the World Little Ones

Materials Used:
Fiskars Brand: Oh Baby Stamp Set
Neenah Solar White Cardstock
Recollections Brand Heavy Weight 110lb Cardstock: White & Yellow
Spectrum Noir Alcohol Markers
Sakura Gelly Roll Pen: White
Imagine Crafts On Point Glue
Dies: Lawn Fawn: Valentine Borders (hearts)
Memory Box: Frame


Be sure to tag us Doodles Paper Playground on social media -
if you create a project with our Sparkle Blends. 


There is also a new Facebook group where you can share 
creations you have made with Sparkle Blends!
Come check it out, share some inspiration!


All of our Sparkle Blends can be purchased only at the 

Monday, August 26, 2019

Baby Oh Baby Boy Card with Doodles Paper Playground

Hello Crafty Friends - I am here with a cute baby card.  

We all know someone who is having a baby or a grandchild.  So, I figured I better get some cards in my stash. 

No photo description available.
A clear, iridescent base is paired perfectly with
soft blue and aqua sequins in opalescent, high gloss, 
satin & holographic finishes with big blue butterflies, 
seed beads and crystals giving the blend texture and interest.

I pair all the soft shades of blue with white and a bit of yellow.


Materials Used:
Fiskars Brand: Oh Baby Stamp Set (little chick)
American Crafts Pattern Paper: Baby Boy Collection
Neenah Solar White Cardstock
Recollections Brand Heavy Weight 110lb Cardstock: White
Spectrum Noir Alcohol Markers
Sakura Gelly Roll Pen: White


Be sure to tag us Doodles Paper Playground on social media -
if you create a project with our Sparkle Blends. 


There is also a new Facebook group where you can share 
creations you have made with Sparkle Blends!
Come check it out, share some inspiration!


All of our Sparkle Blends can be purchased only at the 

More Back To School Fun with Rinea

Hello Crafty Friends - Annie here with some fun projects for this year Student! 

I know it's that time already - Summer is just flying by. Here in Florida, the children head back to in August. I know that some of your children will be heading back in September. 

I thought why not create some projects for the student this time. 

Here are the fun projects I created. 


The Backpack
This perfect to add a little notebook, a mini mechanical pencil, and some fun erasers.

 The back view

Side views
  

Materials Used:
Imagine Crafts Tsukineko StazOn Pigment Ink: Shamrock Green
Rinea Jade/Jade Starstruck Foil Paper
Recollections Brand Cardstock: White
Hero Arts Just A Note Stamp Set CL404
Woodware Craft Collection School Tots Stamp Set
Kleurplaat Rugzakjes maken - Blanco - Kleurplaten.nl

Let's get started

I started by downloading and printing the template. Next, I trimmed the template and adhered it onto the Rinea Jade/Jade Starstruck Foil Paper. I also trimmed an extra panel for the inside of the backpack flap and the straps.


Next, I used a craft knife and cut the slits into the backpack. These will be for the straps.

 Then, I used my scoreboard to score all the dotted lines (score lines).
 

Next, I used Imagine Crafts Tsukineko StazOn Pigment Ink: Shamrock Green, Hero Arts Just A Note Stamp Set CL404 and Woodware Craft Collection School Tots Stamp Set to decorate the backpack. I even stamped on the straps.


Now, to attach the straps to the backpack. I insert the strap notch into the slit and add some adhesive to the tab and pressed into place.


Next, I adhered the side tab to the press into place. I repeat the process on the other side. Cleaning up any adhesive along the way if needed.

Next, I add a bit of velcro to the front of the backpack for a closer. I use a small velcro tab that I cut in half. I stack the velcro tabs the hook and loop part onto the felty part. Then, I  place the velcro onto the backpack flap first. Next, I close the flap and press the bottom part of the backpack.
 

Now, the mini backpack is complete!


Mini Pencil Box
This fun little pencil box is perfect for a few treats, stickers or some fun erasers.

Materials Used:
Rinea Clear Round Stamp Block
Recollections Brand Cardstock: White & Cream
Hero Arts Just A Note Stamp Set CL404

Pencil box Template
pencil box
Now, just like my last post - I didn't make a tutorial for this project. 
I will, however, link the template I used to make this mini pencil box.


Thank you for stopping by the blog today. I hope you found some inspiration!
Be sure to stop by the Rinea Store to pick some of the wonderful Rinea Products.