Hello Crafty Friends - I am here with a fun dimensional project.
This vase and flowers can be created for any celebration or just because.
Materials Used:
Various Floral Dies
Green Washi Tape
Craft Wire
Darice Brand: Beads and Sequins
Brother Scan n Cut Electronic Machine
Crafter's Edge Crossover II Die Cutting Machine
Xyron Inc. Creative Station Lite
Aleene's Original Tacky Glue
Recollections Brand 12x12 80lb Cardstock: White
Let's get started!
Vase
I got the Beer Glass cut file from Simply Crafty SVGs. Uploaded it into my Brother Scan N Cut. I cut the base of my vase out of plain white cardstock.
* Note I only cut the glass, not the lid I also cut the outer panels of the glass out
Rinea: Starstruck Arctic/Arctic Foil Paper.
Assembly:
I started by gluing one of the tabs of the vase and continued down the panel.
*Note: Simply Crafty SVGs has YT videos and PDF for assembly.
I did this to all 10 panels to create the base of the vase.
To close the bottom of the vase I adhered the decagon shape to the bottom tabs of the vase.
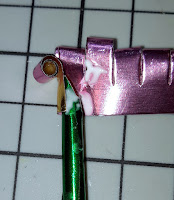
Next, I cut a length of craft wire into about 20 inches. I then folded the wire in half. Added a bit of washi tape to the loop part of the wire. I take the center of the flower (comb/fringe) add a bit of adhesive to the little tab side and start rolling the center around the wire. Making sure to add a bit of adhesive along the way.
Then, I adhered the petals (they are 3 attach little one) to the center of the flower. I then continue with the single petals medium, followed by the larger ones. I then, wrap the green washi to the wire of the flower to create a stem. I added the leaf along the way.
The Hyacinths
I simply followed the easy directions on the back of the
Assembly:
Next, the flowers, I adhered the two
Rinea: Glossy Blush/ Gold Foil Paper. Then, I use the skewer to roll the petals of the Hyacinths (making sure the curls are facing out). Once all the petals are curled into place. I adhered the petals to the stem by applying a bit of adhesive the inside of the base of the petals to the stem. Making sure to add a bit of adhesive along the way so the petals are secure. I follow the petals with the
Rinea: Starstruck Jade/Jade Foil Paper leaves.
*Note I repeated this process for each Hyacinth created.
Blush and Marigold Flowers
I die cut the petals for all the flowers I created 2 Blush Flowers and 1 Marigold Flower.
Assembly:
I start by adhering the petals in the configuration I want for each flower. Next. I slide one bead onto the craft wire (Trimmed about 20 inches). I twist the wire to secure the bead in place; I then slide the sequin on to the craft wire. They will be the centers of the flowers. Then, I slide the centers into the opening in the petals of the flowers. I add a bit of adhesive to the back of the sequins to help secure the centers in place. I then, wrap the wires with the washi tape. Making sure to add a leaf along the way.
Tiny Violet Flowers
Assembly:
I adhered the layers of the flowers together. I created a small hole to the center of the petals of all the flowers for the stems. To create the stem I did the same as before. I slid the bead to the wire folded it in half and gave a bit of a twist. Insert it through the flower petals and wrapped washi tape to the wire starting at the base of the flower petals. *Note: for this flower, I wrapped each flower individually along with the leaf. Next, I wrap two of the flowers, then add the last flower and leaf. I continue to wrap the stem. This created a multi-flower stem.
I finally add all the flowers to the vase and the project is ready to decorate any table, desk, or bedside table. Perfect for any occasion.
Thank you for stopping by the blog today. I hope you found some inspiration!
Please tag us on social media if you create any project using any of our wonderful Foil Papers!