Wednesday, November 14, 2018

With Gratitude with Doodles Paper Playground

Hello Crafty Friends - Annie here with a shaker card using a mix of Gingerbread Man Sparkle Blend and Very Cranberry Sparkle blend. These two blend are perfect for your Fall cards. 

I have been clearing out my craft room and I found a few card kits that I hadn't used. I decided to give one ago for this card. I used a Paper Pumpkin kit from 2016. 

This kit was perfect because it was designed to be a shaker kit. I only used the following: Card base, Leaves cut outs, Die cut bits, Acetate window & twine. I used the Doodles Paper Playground Sparkle Blends for the shaker bits.

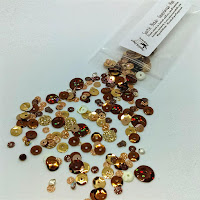
This blend combines rich reds, browns
 and a touch of beautiful gold and green
. it's has crystals, micro beads and muti-hued no hole beads.
 So lovely with it's glitter, shiny metallic and matte elements
.


This Sparkle Blend has holographic brown sequins,
 gold glitter sequins, little crystals,
 and the tiniest gingerbread men ever. 


Supplies:
Paper Pumpkin Thank You kit
Gold Glitter paper - Jot Brand


Let's get started on how I put this shaker card together.

First, I stamped all the squares and the sentiment.with the stamp set provided in the kit.  

Next, I adhered the strip of gold paper towards the bottom of the card base. Then, I adhered the 3 stamped squares above the gold glitter paper. Next, I added the gold paper to the top of the card base. I set it aside while I work on the card front panel.


I adhere the acetate film to the back of the leaf die cut panel. Then, I place foam strips and some foam squares.  to the back of the panel. 


 Then, I place the mix of Sparkle Blends onto the card base on the stamped squares. Next, I placed the front panel onto the base. Making sure that the Sparkle Blends stay inside the sqaures


Now, I placed the fishtailed banner piece to the left hand corner. Then, the stamped sentiment piece on top of the banner. I added a bit of the gold glitter paper under sentiment. Finally I added a bow.


Thank you for stopping by today. Be sure to tag us on social media if you create a project with our Sparkle Blends. All of our Sparkle Blends can be purchased on the White Rose Crafts LLC Website.

Monday, November 12, 2018

Happy Little Trees with Kindred Stamps

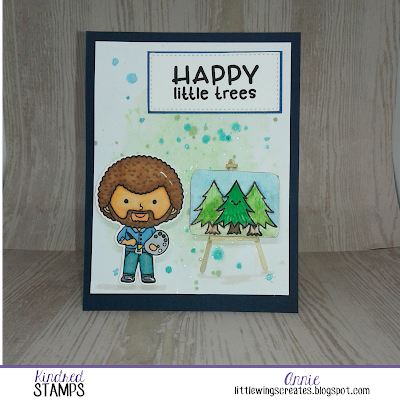
Hello Crafty Friends - I am here with another fun card.

Today, we're panting HAPPY trees!

I used Happy Accidents - this stamp features
 everyone's favorite artist and his happy little tree
 along with a puffy cloud and 2 sentiments.


Happy Accidents


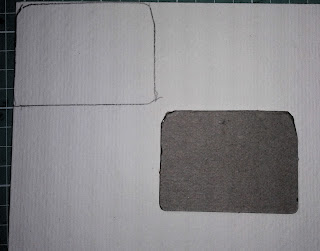
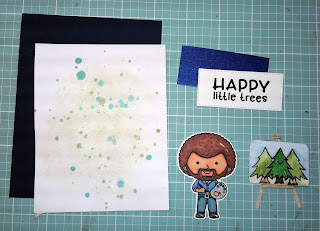
Let's get started on this quick tutorial. I started by tracing the chipboard square piece onto water color paper. Then, I stamped the little tree onto the water-color paper making sure to wipe off the face before stamping it. I used Versafine Onxy Black ink. 


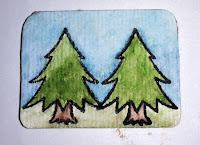
I then, used my Faber-Castell water-color pencils to color the images. I used a small paint brush & water to move the color. I set it aside to dry.


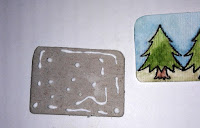
Once the images where dry I trimmed it down - following the pencil lines. I then adhered the little painting onto the chipboard piece. I then stamped and colored with my Spectrum Noir Marker the little tree as well as the artist. I then trimmed it and adhered it to the little painting. Placing an acrylic block on top of it.


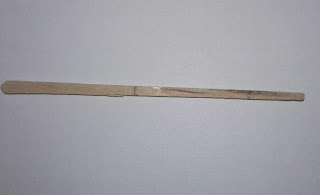
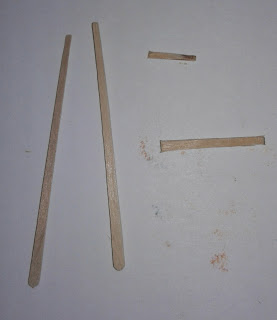
Now, To create the easel. I used 3 toothpicks for the easel. I cut one into 3 pieces. I only used 2 of those pieces. I started by gluing the 2 full toothpicks along with the larger of the 2 cut pieces - forming a capital A. Then I added the little piece to the top. Set aside to dry.


Once the little painting and easel were dry I adhered them together. set aside to dry. 


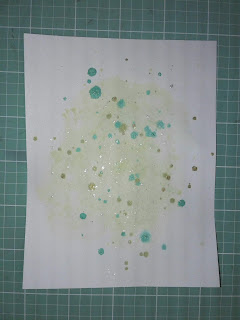
Now, I created the background to the front panel of the card. On heavy weight white card stock I did a bit of water-color wash with Distress ink in Twisted Citron and Crushed Olive. Then I did a bit of sprinkle with Heidi Swapp Color Shine in Tinsel, Citron and Teal. Set aside to dry.


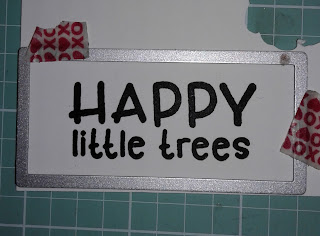
Then, I stamped the sentiment onto heavy weight white card stock. I then die cut it using a rectangle stitched die.


Now, that all of the components are all ready - it's time to put our card together.  I adhered the front panel on to Dark Navy card base. I adhered the sentiment onto shiny Navy card stock. Add a bit of thin foam to the back of the easel so that it laid even on the card. I also add a bit of thick foam tape to the artist. I placed the painting to the bottom right of the card front and the artist to the left of the card. Next, I placed the sentiment a bit to right. 


There you have it a fun Artist painting HAPPY little trees! 


Thank you for stopping by today!  

Sunday, November 11, 2018

Hello Crafty Friends - We at Rinea Foil Paper Inspires are doing a collaboration with Imagine Crafts all month long. Today, I have a fun project for your Thanksgiving table. With this placeholder you can put flowers or a treat in it for your guests.

Let's gather our supplies and get started on our project:

Autumn Variety Crafter's Pack - Marigold Starstruck & Mocha Startstruck 
Lawn Fawn Forest Friends - Sentiment

Recollections Brand heavy weight card stock in Pumpkin & Cream
Aleene's Tacky Craft Glue
Horizon Group USA- Braiding Cord in Chocolate Brown
Electronic Die Cutting Machine, 
Scissors, Small Hole punch

So, let's get started. First, download and cut the Pumpkin Favor SVG. Next, Only on the outer panels of pumpkin which are cut from Marigold Starstruck Foil Paper stamp the leaves and pinecone. I only stamped on one panel the pine cone with the Imagine Crafts Ganache Stazon Ink. I then made a mask for it; then stamped the leaves around it In the Imagine Crafts Stazon Claret Ink. 


 Next, on the remaining panels I just stamped the leaves. I then set them aside to dry completely. The best part about the Imagine Crafts - StazOn ink is that it dries pretty quick.
 Now, I will assemble the Pumpkin Favor Box according the site and PDF provided by Simply Crafty SVG. Once the Pumpkin is assembled - you can then adhere the Marigold Starstruck Foil Paper stamped panels.


Next, I assembled the handle for the Pumpkin favor box. I layered the Marigold Starstruck Foil Paper handle onto the cardstock handle adhered in place. Then I gave it a slight curve. I love that the Rinea Foil Paper holds it's shape. 
Next, I punched a small hole on each of the handle and on the pumpkin. I then inserted a small brad into both to attach in place. Note: you can just adhere the handle in place if you do not have small brads.  You could be done at this point but I added a small tag - this is where I will add the person's name. 
  

To create the tag I first stamped onto Cream card stock the pine cone with Imagine Crafts Ganache Stazon Ink and sentiment Happy Thanksgiving with  Imagine Crafts Stazon Claret Ink. leaving some room under the sentiment for the name. I then layered and adhered each layer Cream card stock,  Marigold Starstruck Foil Paper, Pumpkin card stock and then Mocha Starstruck Foil Paper. I then gave the tag a slight curve.

Next, I punched a small hole into the tag by the pine cone. I then added the Chocolate braiding cord threw it. leaving enough to tie the tag onto the favor box's handle. I cut off any extra and tied a small bow and adhered it to the tag.
  
Now, tie the tag onto the pumpkin favor and you have a wonderful placeholder for your Thanksgiving table.
I am so happy stopped by the blog today. I hope you found some inspiration - if you did and create a project using the Autumn Variety Crafter's Pack be sure to tag us on social media!