Saturday, June 15, 2019

Shoes Can Change Your Life with Doodles Paper Playground

Hello Crafty Friends - I am here with a fun shaker for those of us that know 
what a great pair of shoes can do!

and a tiny bit of Sparkle Blend: Icicle - mostly the tiny teal glitter sequins. 

No photo description available.
The high shine base of this blend includes gloss, 
iridescent and opalescent sequins and 
cupped confetti ranging from 3mm-10mm. 
We added tons of texture with seed & tube beads,
 tiny flower sequins and heart confetti to give this blend 
lots of interest without the distraction of a more brightly colored blend.

No photo description available.
This chilly blend of white, clear, ice blue and silver. 
This combination of tiny iridescent gem confetti, 
3D clear diamonds, bitty iridescent hearts, 
and gloss, iridescent & transparent glitter sequins
 in a variety of sizes evokes those chilly stalactites.

This is the card I created.
I drew the show and cut it out with a craft knife. 
Then did some paper inlaying to create contrast in the shoe.

Materials Used:
Memento Pen - Tuxedo Black
Spectrum Noir Markers
Sakura Gelly Roll Sparkle Pen
Sakura Gelly Roll Black Pen

Thank you for stopping by the blog today. I hope you found some inspiration! 

Be sure to tag us Doodles Paper Playground on social media 
if you create a project with our Sparkle Blends. 

There is also a new Facebook group where you can share 
creations you have made with Sparkle Blends!
Come check it out, share some inspiration!

All of our Sparkle Blends can be purchased only at the 

Friday, June 14, 2019

June Sparkle Blends Release Hop with Doodles Paper Playground

Hello Sparkle Blends Fans!

It's time for the June Release Blog Hop! 

This month, 6 beautiful Sparkle Blends have made their debut. Have you had a chance to see them all?  We've got Pearl and Ruby (from the Birthstone Collection), Dragon Glass, Pixie Dust, Mermazing, and Unicorn Dreams

For a chance to win some Sparkle Blends of your own from this release, be sure to visit all of the stops on the hop, leave them some love, and then circle back to the Doodles Paper Playground Blog to let us know which new Sparkle Blend is your favorite. 

Don't forget! Sparkle Blends are all Limited Edition. Once they're gone, they're gone, so be sure to grab your favorites from White Rose Crafts LLC while you can. 
White Rose Crafts is the exclusive retailer for Sparkle Blends.

Here's the card I created using Unicorn Dreams

Materials Used:
Doodles Paper Playground Sparkle Blend: Unicorn Dreams
Image: Space Unicorn - Design by Artist: JadeDragonne
Copic Markers: B00, B01, B93, E00, E000, 
E11, G21, G29, BV17 &R59
Spectrum Noir Markers: OR1, OR2, CG1, 
CG2, LY1, CT3 & HB1 
Sakura Gelly Roll Pens: White, Sparkle 
& Metallic Silver
Recollections Brand Cardstock: White & Medium Purple

Please Hop along with the rest of the Designing Divas
Annie - You are here!

Wednesday, June 12, 2019

You are Classic with White Rose Crafts LLC

Hello Crafty Friends - I am here with a vintage Father's day/Masculine card.

Using the ScrapBerry Auto Vintage Stamp - This set has 4 images and 4 mini sentiments.


We all have a car lover in the family and masculine cards are not always that easy to make for some of us. However, ScrapBerry makes it so easy with their collections. From fun and quirky to classic and vintage. You can find a good assortment of ScrapBerry collections in the White Rose Crafts LLC Store.

Let's get started.

Since the image isn't very large I went with a lot of layers. I stamped and colored my image with a mix of Copic and Spectrum Noir markers. Then I fussy cut it out. I then trimmed all my cardstock and pattern papers.

I had a leftover piece of cardstock that I had pressed off some of the extra glitter pasted I used on another project and thought it was perfect for this one. I layered the dark blue cardstock, the medium blue cardstock and the cream stenciled glittered cardstock. I trimmed about 1/8" of the medium blue and about 1/4" of the cream. keeping all the layers towards the top.  

Next, I layered the map pattern paper and then I added a strip of tape adhesive to the pattern paper so I could attach a small piece of Mulberry Specialty paper. I find this the easiest way to attach Mulberry paper. I top the Mulberry paper with a small piece of striped pattern paper.
  

Now, using some foam tape I attached the Vintage car to the layers.

I stamp the trimmed the sentiment into a fishtail banner and layer it onto some Gold Specialty cardstock. Adhered it to bottom left of the card with some foam adhesive.
 

Now, for some finishing touches. I used some Doodles Paper Playground Sparkle Blends by the image and the sentiment and some by the right bottom corner of the card front panel.

 I adhered my panel onto an A2 card base and the card is complete.

Materials Used:
Memento Pen - Tuxedo Black
Sakura Gelly Roll Metallic Pen - Siver & White

Thank you for stopping by the blog today! 

Be sure to tag us White Rose Crafts LLC on social media 
if you create a project with products or kits purchased on the 

Tuesday, June 11, 2019

Fourth of July Wreath with Rinea

Hello Crafty Friends - I am here with a quick and easy 4th of July Wreath. 


Materials Used:
Brother Scan n Cut for water drop shapes
Lawn Fawn Stitched Star Die
Chipboard
Lawn Fawn Twine
Aleene's Tacky Glue
Hot Glue Gun and Glue sticks

Let's get started!

I started by cutting the water drop shape in 3 sizes on my Brother Scan n Cut. However, if you do not have an electronic cutting machine you can draw the water drop shape. 

I then traced and cut the water drop shapes onto the Foil paper 12x in each color. I did the large shape in the Ruby/Ruby Starstruck Foil Paper. the medium one in Silver/Silver Starstruck Foil Paper and the small in the Sapphire/Sapphire Starstruck Foil Paper

Next, I die cut the 3D Roll Star shape from die #2 from Ruby/Ruby Starstruck Foil Paper. I also die cut the star for the center and the small stars for the accents from Silver/Silver Starstruck Foil Paper & from chipboard (please note that the star dies I have in the photo are not the dies I ended up using they were to large for what I needed and changed them to the Lawn Fawn Star die)

I then created the 3D star and I covered the chipboard star with the Silver/Silver Starstruck Foil Paper. I used a Silver sharpie to color the edge of the chipboard star before adhering the Foil paper.


Then, I added a double layer of foam adhesive to the back of the star and centered it onto the Rolled Star. I then set the star aside while I worked on the rest of the wreath.

Next, I start creating the cone shapes that will become the wreath. I roll each water drop shape into a cone and adhere the ends together (I used hot glue - however, I did a few with some tacky glue and it holds wonderfully) 

Next, I put a bit of glue on the back of the Ruby/Ruby Starstruck Foil Paper cone and the   Silver/Silver Starstruck Foil Paper cone and insert them into one another. Then, I insert them into the Sapphire/Sapphire Starstruck Foil Paper cone. I repeat this for all 12 shapes. 
 

Then, I adhere all the stacked cones onto a chipboard circle (you can cut this freehand it doesn't have to be perfect because it will not be seen).

Finally, I add a bit of Twine to the back of the chipboard circle. Next, I
cut a circle shape and adhere it to the back of the wreath to cover the chipboard piece

Now, I flip the wreath over and adhere the star to the center of the wreath. I adhered a few of the tiny stars for accents (this is optional).

Your Wreath is now complete and ready to be displayed 
- Please note that this is an indoor wreath.

Thank you for stopping by the blog today - I hope you found some inspiration!

Sunday, June 9, 2019

You're Smokin' Happy Father's Day with Dies R Us

Hello Crafty Friends- I am here today with a fun Pop-up box card for Father's Day. However, this cute card can be for Summer too! 


Now, before we get started I want to let you know that - your eyes are not playing a trick on you. Yes, the card base color changes during this tutorial. I started out with a darker color of blue but, I didn't like the way it started looking so I change the color of cardstock to a lighter one.
However, the tutorial is still the same. 😁

Let's get started on how to create this simple yet fun card.

First, cut 2 pieces of cardstock 7-1/2" long by 4-1/4" wide.
You will be scoring on both pieces.

Next, you need to score the cardstock at 1/2" and 1" mark. You need to do this on both sides of your cardstock and on both pieces of cardstock.

Then, you will be folding on these score lines. The old fan style - like back in the elementary school days.
   

Next, you will need to cut a shape of your choice into one of the cardstock pieces.
(I did a Lawn Fawn Reversed Scalloped Window - actually in my finished card).

You should have one with an opening and one sold. Both with the folds on the sides.
Top View of the card base.

Now, that you have the cutting and folding done you can start decorating your card. 


I stamped and colored my images. Then, fussy cut them out because I don't have the dies to coordinate. I am ordering them soon. 😉 Next, I created a background onto a piece of white cardstock measuring 4.25x5.50" using a cloud stencil and some Distress ink. I just didn't want a plain paper for my background however, you can use pattern paper if you prefer. I also did all the die cutting for the componence I would be needing to decorate the card.  4 sets of grass (2 in light green and 2 in dark green), 2 small puffy clouds, 1 large puffy cloud, 2 suns (1 each in light and dark yellow) and 1 White scalloped window.

I adhered the cloud piece of cardstock onto the solid 
cardstock panel (which is the back of the card). 

Next, I layered the glass - I like to create layers.
 So, I die cut each grass piece 2x from two different green cardstock.  

I like to use up my scraps for this. That's why you can see some fish shapes. 

I simply ran some adhesive onto the light green grass and adhered it behind the darker one for the back hillside and reverse it for the front grass.


Next, I adhered the back grass to the card base panel. Then, I adhered the BBQ with some foam adhesive in the center.
 

I ran the larger cloud through my Xyron sticker maker and placed it onto the background to the top right. Then, I ink the edges of the smaller clouds. I adhered one onto the larger cloud using foam adhesive. I set the back panel aside.
  

Working with the front panel - I adhered the white scalloped frame onto the card front. 
 

I layered and adhered the suns to created one two-tone sun. Then, I adhered the sun to the left top corner on the inside. Next, I adhered the other smaller puffy cloud using foam adhesive.   

Now, to the front grass. I adhered it to the inside of the bottom of the card front. making sure that the BBQ wasn't completely covered. I just do a dry fit for placement. I then set the front panel aside.
  

 Now, I turned my attention to the BBQ. On the back panel.

I start by adhering the flames to the back of the grill. **Note: I leave a bit of cardstock on the bottom of items I am tucking behind things for easy placement. I add a bit of foam adhesive to the tops of the flames. Next, I adhered the skewer of veggies and the T-Bone steak. I did add a bit of low profile adhesive to the steak.  
 

Next, finishing the card -  by adhering the front and back panels together. Run some adhesive on each of the tabs on the back panel then lining up the edges of the front panel press in place. 

The is a Top View of the tabs adhered together.

The card is almost complete all that is needed is a sentiment.

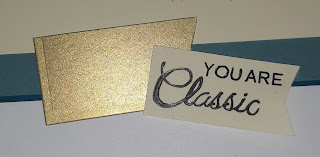
Now, you can add your sentiment.  I stamped the sentiments onto strips of white cardstock and cut a slant on one end. I adhered the BBQ Fork and Spatula to each the sentiments and then adhered them onto the card front. The bottom sentiment & spatula used low profile foam adhesive. To mail your card just gently push in the side tabs and the card will fit in a standard A2 Envelope.


Your Pop-up Box Card is now complete!

Materials Used:
Stamp:

Dies:
I didn't use them - however, they are available in the store.


Inks:

Adhesives:

Other Supplies Used:
Stamp:
Hero Arts Stamps - Celebrate CL498

Adhesive:

Copic Markers: 
B00, B01, BG72, C1, C2, C3, E15, E18, RV69 & R59

Spectrum Noir Markers: 
IG4, IG5, LY1, BO1, OR2, RB1, RB2, TN2, TN3, GB7, CG1, JG1, LG3 & MG1
** If you would like to which markers I used on each image
 I will have them listed on my blog by image. 

Cardstock
Recollections Brand Heavy Weight
White, Summer Daze, Lemon Ice, 
Golden Yellow, Green Grass & Lime

Thank you for stopping by today. I hope you found some inspiration!

Don't forget to come join in the fun at the Dies R Us Challenge Blog. There's a new challenge theme offered on the 1st and 15th of each month and one lucky randomly drawn winner will receive a gift voucher prize to the Dies R Us Store. For your convenience, all the important Dies R Us links are provided below.