Showing posts with label Dies R Us. Show all posts

Thursday, October 10, 2019

So Thankful for You with Dies R US

Hello Crafty Friends - I am here with an easy thankful card perfect to send out for Thanksgiving or as a simple thank you card.

I used light fall colors for this card.

Let's get started!

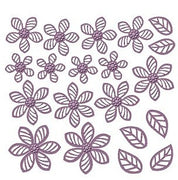
I started by die cutting the flowers from yukon gold and pumpkin orange cardstock. 6 in total - 4 yukon gold and 2 pumpkin orange. I die cut the center of the flowers from metallic copper cardstock, the sentiment from the light yellow ochre cardstock. The leaves I die cut from leftover Rinea Foil Paper I used for another project - I used some Tim Holtz Alcohol inks on the foil paper. I trimmed my card front panel from Kraft cardstock (4-1/4" x5-1/2") and I also trimmed some striped pattern paper(4" x 5-1/4")

I adhered the pattern paper to the kraft cardstock panel. I then set it aside to work on the flowers.

I use a pad (you can use a mouse pad or thick craft foam) under my flower and a stylus and curl the flowers upward towards the center. I then put a bit of glue in the center of the flowers and stack them making sure that the petals are all alternating.  Finally, I adhered the center of the flowers.
 

Then, I adhered the leaves to the card panel. I placed them in the left bottom corner. Next, I adhered the flowers overlapping the leaves. Making sure to place the Medium flower toward the bottom for some weight. Then, I adhered the sentiment to the top of the card. 
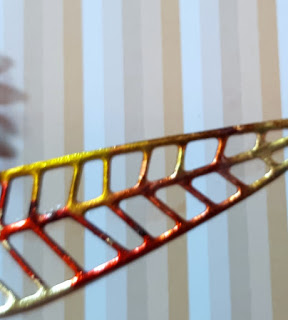
(below you can see a close- up of the leaves. I used reds and some green on the leaves)
 

For some finishing touches, I added some Jewels to the center of the flowers and in the upper right corner. I also added a yellow Heart to the card panel. I adhered the card panel to a white card base.

Now the card is complete!

Materials Used:
Lawn Fawn - So Thankful Border Dies
Elizabeth Craft Designs - Dies - Big Flower Set 1

Frantic Stamper - Dies - Boho Flowers

Best Glue Ever
Tim Holtz Alcohol Inks
Rinea Glossy Gold/Gold Foil Paper
Teresa Collins Brand: Memorabilia Collection Pattern Paper
Bazzil Cardstock: Pumpkin Orange & Yukon Gold
Recollections Brand 65 lb Cardstock: Kraft
Recollections Brand 110lb Cardstock: White (card base)
Elle Tru: Jewels and Pearl Yellow Heart 

Thank you for stopping by I hope you found some inspiration!

Sunday, September 8, 2019

Fall Thank You Card with Dies R Us

Hello Crafty Friends - Annie here with a quick and easy Fall card.

You can make a few of these cards and have them ready to give out throughout the Fall season. 
You can simply change the sentiment.


Let's get started!

I gathered all the supplies. Then, I die cut several leaves from a variety of cardstock in fall colors. I also die cut some leaves from Aspire Petallic Cognac cardstock. 
Along with the sentiment (I die cut 3x) and a sentiment banner.
 

I adhered the cream cardstock(4"x5-1/4") panel to the medium brown panel to create my card front panel. Next, I start adhering and layering the leaves into the card panel, towards the bottom half.

Then, I adhered the sentiment - I die cut it 3x and stacked them for some dimension. I adhere the sentiment onto the banner. I added some foam adhesive to the back of the sentiment banner and layered onto the leaves. Next, I tucked a few leaves and the sprig behind the banner. I made sure to add the Petallic Cognac leaves in three areas to keep the warm color throughout the card.

I added some Doodles Paper Playground Sparkle Blends in 
3 clusters to keep the eye moving across the card. Now, the card is complete.

Materials Used
Lawn Fawn - Stitched Leaves Dies

Lawn Fawn - Spring Sprig Dies

Impression Obsession - Dies - Small Leaf Set


Sue Wilson Designs - Finishing Touches - Faux Quilled Blooms


Paper Rose - Dies - Thank You


Thermoweb - 3D Foam Squares - White .25" 176/Pkg

Aspire Petallic Cognac cardstock
Recollections Brand Cardstock: Heavy Weight Cream, Kraft & Medium Brown
Doodles Paper Playground Sparkle Blend: Be-Leaf in Yourself

Thank you for stopping by today. I hope you found some inspiration!

Don't forget to come and join in the fun at the Dies R Us Challenge Blog. There's a new challenge theme offered on the 1st and 15th of each month and one lucky randomly drawn winner will receive a gift voucher prize to the Dies R Us Store. For your convenience, all the important Dies R Us links are provided below.

Sunday, August 4, 2019

Geometric Happy Birthday Card with Dies R Us

Hello Crafty Friends - I am here with a fun quick and easy geometric, rainbow birthday card.

I figured with some of us already back to school shopping and some of us still on summer break it would be a good idea to keep this weeks card simple.

Here's the card I created.

Let's get started

I start by gathering my supplies; the dies and scraps of cardstock in rainbow colors, white cardstock for the sentiment and a black cardstock card front panel.

Next, I die cut the squares from the rainbow cardstock. I only used the 3 smaller square dies. I also die cut the sentiment 3 times.

Then, I ran the squares and the sentiments (except the Red and Blue squares) through my Xyron 3" sticker maker. I then rub and removed the protective sheet from the Xyron adhesive sheet. 


Next, I placed my squares onto the black cardstock front panel. Keeping the squares to the left side of the front panel. I used some foam adhesive on the red and blue squares for some added dimension.

Then, I stacked the sentiments on top of one another to get some dimension. This was really easy because of the Xyron adhesive.
 

Next, I  added the sentiment to the card front panel. Then, I added some sequins for a finishing touch. I kept the sequins in rainbow colors.


Now, the card is complete!

Materials Used:
Dovecraft - Dies - Happy Birthday

Memory Box - Dies - Stitched Squares

Xyron 3" Sticker Maker
Recollections Brand Cardstock: Red, White, Black, Yellow, 
Orange, Green, Purple, and Blue
Darice Brand Sequins: Birthday Hat, Stars, Round, and Tiny Confetti
Low Profile Foam Adhesive

Thank you for stopping by today. I hope you found some inspiration!

Don't forget to come and join in the fun at the Dies R Us Challenge Blog. There's a new challenge theme offered on the 1st and 15th of each month and one lucky randomly drawn winner will receive a gift voucher prize to the Dies R Us Store. For your convenience, all the important Dies R Us links are provided below.

Sunday, November 4, 2018

Thank you with Dies R Us

Hello Crafty Friends - I am here with another using some of the amazing dies that are available at Dies R Us.


Let's get started.

First let gather our Supplies:

Now, die cut the leaves from both shades of green card stock. Die cut the two smaller flowers from the medium orange card stock and the large flower from both the dark orange card stock and the holographic paper.

Since the holographic paper is to thin I am backing it with the dark orange card stock. to give it more body. you can use the medium orange card stock for this but I like the finish look it gives with the matching card stock. 


I add a bit of adhesive on the card stock flower then slowly place the holographic paper on top of it.


Next, adhere the kraft card stock layer onto the brown card stock card base. The start adhering the leaves and flowers onto the card front. I  decided to do this on the bottom left hand side.

I start with the leaves. I adhere the dark green ones, then layer the medium green on top. Next, I adhere the medium orange flowers by the leaves just over lapping the leaves.


 I place the larger leaves in the corner and add the holographic flower just above them. I add foam adhesive behind the large flower for some dimension.


Now, adhere the die cut sentiment "Thank you" to the card front. Next, it's time for finishing touches - Light Gold sequins and jewels


I layered the sequins and jewels for the center of the flowers. I first adhered the sequins in place, then put a bit more glue in the center of the sequin and  placed the jewels. 


Now, the card is complete - quick and simple. I like to die cut flowers and small sentiments like this from a variety of card stock and have them on hand for quick cards. 


Supplies:

Sue Wilson Designs - Finishing Touches - Faux Quilled Blooms

Memory Box - Dies - Perky Thank You


Best Glue Ever


Fineline 20 Gauge Applicator & Bottle - Empty 1/Pkg


Other:
Recollections Brand Card stock:
 Brown, Kraft,  Medium Orange,
 Dark Orange, Dark Green & Medium Green

Recollections Brand: Gold Glitter Card stock

Jot Brand Holographic Paper: Orange

Embellishments:
 Doodles Paper Sequins 
 Pretty Pink Posh Jewels

Adhesive

Thank you for stopping by today. Be sure to share your creations with us on social media!