Monday, October 16, 2017

Skipping Stones' Meet Our New Design Team Blog Hop


Hello - Thank for stopping by.  Let me introduce myself my name is Annie Collins. This is my first term with Skipping Stones Designs - Design Team. I am so honored that I was asked to be a part of the team. 

I have been a  paper crafter for over 20 years now. I have been a crafter in one form or another my entire life. I enjoy the creative process. I live in sunny Florida with my wonderful family. My loving and supportive husband and our 3 amazing children along with our sweet pets - both cats and dogs.

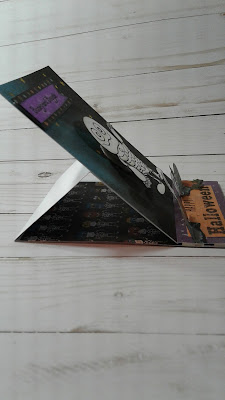
Now, I would like to share my project with you. I created this card using the beautiful I'd Pick You stamp set pictured below.


I first created a watercolor background using Distress Ink in the following colors Tumble Glass, Peacock Feathers, Salty Ocean & Blueprint sketch. I let it dry then sprinkled some Heidi Swapp in Gold & Citron set it a side to dry.

I then colored the image. Die cut the little label for the sentiment, I also cut the plum card stock to back my card front panel. Once the background was completely dry I pierced the card front panel and stitched with gold metal embroidery thread.

Then, I adhered the floral image to the card panel using foam adhesive for some height. finished with some more gold thread, sequins and enamel dots.

Thank you so much for coming by my blog. I hope you visit Skipping Stones Designs Store and purchase some wonderful stamps for your collection. 

I hope that you stop by again and visit me here.

Please be sure to stop by each of the Skipping Stones Designs - Design Team Members Blogs and leave a bit of love on their project. Thanks Enjoy your day!

Debra


Sunday, October 15, 2017

Hello Creative Friends!

I would like to introduce myself,  my name is Annie Collins and I am honored to be Peek-a-boo's Guest Design Team Member for the month of October.  I was so excited to create cards with such  beautiful stamps.

The first set of cards I created using the Madhubani Stamp Set.  I used the Peacock and flowers of the set for my first card.

 
This card is an A2 size (4.25"x 5.50"), I created the card panel by using Distress Ink in Mustard Seed, Ripe Persimmon, Seedless Preserve. Then I sprinkled some Heidi Swapp Color Shine in Gold. While my panel dried I colored the images with Copic Markers; then used a gold gel pen to add some highlights. Once the gel pen was dry I applied a bit of Wink of Stella in clear shimmer to the Peacock. I then mounted the watercolor panel on peacock blue cardstock. I then added the images to the panels and adhered them to the card. I finished off the card with Liquid Pearls in Peacock.


This card is an A2 size (4.25"x 5.50"), I created the card panel by using Distress Ink in Mustard Seed, Ripe Persimmon, Seedless Preserve.  While my panel dried I colored the images with Copic Markers; then used a gold gel pen to add some highlights. I then die cut the word Congratulations from white and black card stock. I then layered and adhered them together. Once the watercolor panel was dry I die cut a circle from it to use as a layer behind the two Elephants. To add a grounding element for the elephants I covered a scrap piece of card stock with some floral washi tape' I then cut fish tails into both ends. I layered the the washi tape on top of the leaves from the stamp set. All the components were then layered on top of black card stock panel. Which was adhered to the card front. I finished the card with Gold shimmer enamel dots.


 For my final card today, I used the Panda Hugs Stamp Set. This set is simply adorable. From the set I used the pandas with balloons. I saw these two love pandas letting their heart take flight.


This card is an A2 size (4.25"x 5.50"), I created the card panel by using Distress Oxide Ink in Broken China and Faded Jeans. I then sprinkled with water. I then ran a few stitch dies (heart, loop & wave) over the panel to create a wind feel. Next, I die cut  the entire panel with a cross-stitch die, I then die cut some white card stock with a cloud die. I colored the balloons with Distress Markers in Mustard Seed, Worn Lipstick, Broken China, Seedless Preserve & Twisted Citron. I then applied some Wink of Stella in Clear Shimmer to all the balloons. I adhered all the components to the card base. I then added the sentiment which I then added the word LOVE (Heidi Swapp stamp) stamp in Distress Oxide Ink Fire Brick. I finished the card with a red enamel heart, a purple epoxy heart and red flat back pearl heart.

Friday, October 13, 2017

Have a Bewitching Halloween -with Sunsational Stamps

Hello Sunny Friends!  

This month we're celebrating Halloween on the Sunsational Stamps Design Team! Each of the Design Team Members will be creating fun Halloween theme projects. I created a card using the Little Witch from Trick Or Treaters Stamps

She has a goody bag and a lot of candy to add to it. I hope you join us for all the Halloween fun!!


Cute Dancing Skeleton Card with Simply Stamps

Hello Creative Friends!! I am so happy that you are here for another card tutorial. 

I am here with an easel card. You can choose any theme for your card.  Along with Simply Stamps great selection I am sure you will find a stamp to meet your theme.
----------------------------------------------------------------------------------------
Here are some quick and easy directions for making an easel card just in case you have never made one.
1. Cut a piece of card stock to 41/4" X 11" This will be your card base. I am using white here just to show you the measurements. 
20171007_014923.jpg
2. Score at 2 3/4" & 5 1/2"  Set aside.
20171007_015328.jpg
3. Cut another piece of card stock at 4 1/4" x 5 1/2" This will be your card top. Now stamp, print or create your preferred image. you can do this directly to the top or on your preferred paper. (for this demo I am using a piece of green card stock but my finished card will be different - It will be a white card base covered with pattern paper)
   20171007_015601.jpg  

I begin creating my card topper by Stamping the Cute Skeleton Image onto White card stock. (I like to stamp it twice just in case I mess up).


Next, I add a bit of color to the Skeleton image with copic marker cool Grey and blend out with a colorless marker. Then I trim out the image. I also trimmed some smaller skeletons from pattern paper to use as accents on the card.

Once, all the images are trimmed, I stamped the sentiments and cut some pattern paper for the background of the topper (this is the same size as the topper 41/4"x 51/2"). 

I have all the components to the card I want to add a bit of color to the card front sentiment. I do that with some Distress Oxide Ink. I then star to assemble the card front. 


I add a Action Wobbler to the back of the Cute Skeleton image (you can trim the wobbler to fit your image.) I then removed the adhesive backing and placed the cute skeleton on the card topper.


Once you have your card top finished it's time to assemble your card. 


4. Fold on the 51/2" score line of the card base. Then fold on the 2 3/4" score line. Now, You will have one side that is solid and one that have two sections. Only put glue on the the bottom section of the side of the base that has the two sections.
 20171007_020339.jpg
5. Now, place your topper onto the base lining up the edges. 
Now, you have an easel card - well almost. It needs a little help stay up.
 6. You can make a holder for your card by either using a sentiment or embellishment. The choice is yours. Since it depends on what you use I don't have exact measurements for you. However, I like to keep it  the width of the card. Either way you will need to give it some height. Not a lot of it but some. I do this with some foam tape. For my example I used an additional sentiment. 
20171007_020042.jpg20171007_005731.jpg
Next, open your card base. Line up the sentiment/embellishment with the bottom of the inside of the card. This will now be your top holder.
20171007_020627.jpg
That's it!! Your card is finished.  You have created an easel card.

Here he is a bit blurry showing you the action.


Side view of the card.


Stick it Down - Guest Design Team

Hello Creative Friends -

I am Annie Collins and I am honored to be Guest Designing for Stick It Down this month. When Laura invited me to create a layout using this awesome double page sketch I was so excited.

Here is the sketch:

This is the layout I created using the sketch as inspiration. I pretty much kept to the sketch. I did a few minor changes to best fit my pictures and style.


Some close ups of the pages.


Items I used to create this layout: Card stock: Navy and Kraft - Recollections, Pattern Paper: Plaid by TLC, all other pattern paper - DCWV Pet Collection, Stickers - Jolee's Boutique Title, Stick-abilities - Hobby Lobby, Sticko Puffy- EK Succes, Puffy Paws - recollections, Stamps - Autumn Leaves - Journaling Doodle Tags, Puurfect et Collections by Crafts Magazine - Woof speech bubble, Bones and dog, Ink Splatters, Heidi Swapp - Navy and Citron, Mister Huey - Reds. Enamel dots - various.


Friday, October 6, 2017

FFC # 209


This week for Jo's Scrap Shack Fun-day Friday Challenges is Anything Goes! 


Little Blue Button Stamps

http://lbbstamps.com/
 Starts: Friday,  October 6st  12:00AM

Ends:   Friday,  October 13th    6:00PM
(Eastern time)


Here is the card I created for this challenge using 
Little Blue Button Stamp - Anna with Balloons


What do you need to do to enter?
Challenge Rules

1. Please post a direct link to your blog post that includes your
challenge entry project, using the linky tool below. 
2. Be sure to include a link back to Jo's Scrap Shack and to the challenge post you are entering your project into

3. THREE entries per person are allowed for each challenge and you must post a separate blog post for each entry.

4. For all entries -NO BACK LINKS ACCEPTED- 
The date on your blog post should be dated between the start date & the end date for the challenge you are entering, in order to be eligible for the challenge & prizes

5. You may link up to other challenges but be sure to link back to Jo's Scrap Shack and to the challenge post you are entering 

 * All entries that do not meet the challenge requirements
WILL NOT be eligible for the top 3, any sponsor wins or any random wins by Jo
All random wins will only be mailed within the US and Canada only.
You have until October 13th by 6:00PM (eastern, USA) time to link up.
All winners will be announced during the week of  Oct. 16th

Thursday, October 5, 2017

Crafty Gals Corner Challenge

This week on the Crafty Gals Corner Blog - the Design Team was challenged to create projects and we had to add a bat. Please feel free to join us and create your wonderful project and add it to the challenge on the blog for your chance to win.

The wonderful sponsor for this challenge is:

Prize: 3 Digital Images


Here is the card I created for this challenge.

No automatic alt text available.

Close up of Breanna Bat Fairy & center of card


Please be sure to check out the rest of our simple rules for participating in our challenge HERE.
You have until 12:00 pm CST on October 10, 2017 to play along with us.