Sunday, September 29, 2019

National Coffee Day BlogHop with A2Z Scrapbooking


Image may contain: text

Welcome to the National Coffee Day Blog Hop!

We the A2Z Scrapbooking Design Team are showcasing some inspiration for you today! 
We are honored to be a Sponsor of the
 Coffee Loving Cardmakers National Coffee Day Hop

A2Z Scrapbooking is giving away a $20 prize to a randomly selected winner from those who commented on the a2z Scrapbooking blog.

Visit each of the Design Team blog posts and comment. One randomly selected winner from each Design Team blog post will win two coffee themed digital prizes.
Deadline to comment is Oct 5, 11:59 pm EDT. 


Winner will be announced on Oct 7th.

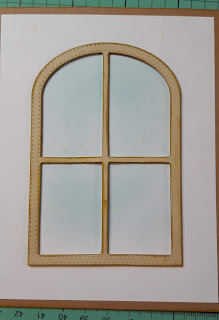
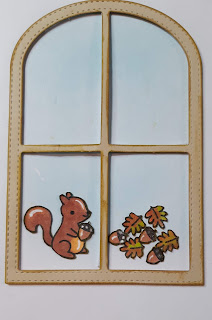
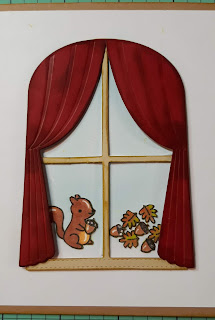
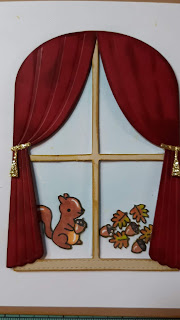
Here's the card I created using some Hero Arts Stamps

Materials Used:
Spectrum Noir Alcohol Markers:
IG1, IG2, IG3, BO1, BO2, BO3
Recollections Brand 80lb Cardstock: Cream and Dark Violet
Recollections Brand 110lb Cardstock: White Cardbase

Hop List

Thank you for hopping along with us today. I hope you found some inspiration!

Happy Fall Card with Dies R Us

Hello Crafty Friends - I am here with a fun fall card.


Let's get started!

I gathered all the supplies I need for the project. 

I started by die cutting all the components I needed for the card. Then, I stamped, colored and trimmed squirrel, acorns, and leaves.  

Next, I added a bit of Tumbled Glass Distress ink to the white card panel which 
I trimmed to 4"x 5-1/4". I then added some ink to the die cuts for some added dimension.

I then layered the white panel onto a kraft panel. 

Next, I start adding the die-cut pieces with some foam adhesive to the card front panel. Then, the squirrel, acorns, and leaves
  

Next, I add the curtains and the tie backs with some foam adhesive.
  
Then, the twigs and sunflowers to the top of the curtains.

Finally, I stamped the sentiment onto a die-cut banner and adhere it with some foam adhesive.

For finishing touches, I add a few drops of Nuvo Crystal Drops in Copper Penny to the center of the sunflowers and to the sentiment strip.

Now, the card is complete!

Materials Used:

Creative Expressions Dies: Stitched Collection Christmas Window
Creative Expressions - Stitched Collection  - Christmas Window Craft Die

Lawn Fawn - Forest Feast Stamps


Nuvo Crystal Drops - Metallic Copper Penny

Lawn Fawn - Magic Color Slider Dies

Inks: Memento Tuxedo Black
Tim Holtz Distress Inks: Aged Mahogany, Fossilized Amber,
Brushed Corduroy & Tumbled Glass
Spectrum Noir Markers
Recollections Brand Cardstock: White, Kraft, Dark Red, Tan, Dark Yellow

Thank you for stopping by the blog today I hope you found some inspiration!

Saturday, September 28, 2019

Happy Halloween Shaker Card with Doodles Paper Playground

Hello Crafty Friends - I am here with a fun Halloween shaker card.

Today, I used 4 of the wonderful Sparkle Blends in my shaker card.


I also used a digital image from C.C. Design called
Gothic Girl

Materials Used:
C.C. Design: Gothic Girl
Pebbles Paper Pad Midnight Haunting
Neehan Solar White Cardstock
Spectrum Noir Markers
Recollections Brand Cardstock: Black and Orange

Thank you for stopping by the blog today. I hope you found some inspiration!

Be sure to tag us Doodles Paper Playground on social media; 
if you create a project with our Sparkle Blends. 

There is also a new Facebook group where you can share creations 
you have made with Sparkle Blends! Come check it out, share some inspiration!


All of our Sparkle Blends can be purchased only at the 

Friday, September 27, 2019

Happy for You Card with A2Z Scrapbooking

Hello Crafty Friends -I am here with a quick and easy thank you card.

Please join us in this month’s “Anything Goes” challenge for your chance at a free digital stamp set AND, if you used Hero Arts or Sugartree Stamps, a $20 gift card to our etsy store. Our current monthly challenge can always be found in the menu bar and runs from the 1st to the last day of the month.  Use my discount code Annie15 to get 15% off your purchase of $25 or more.
Sept

I used Hero Arts Pretty Blossoms Printable Digital Kit PT002 and Hero Arts Stamp and Cut Happy Set DC150

I simply printed the digital file and colored the flower in shades of pink and a hint of yellow for the center. I then trimmed the flower.
I used some low profile foam adhesive to mount the flower onto the cream and medium pink cardstock. I offset the cream cardstock to the left. I then die cut the word HAPPY and stamped the sentiment for you from a stamp set onto a bit of medium pink cardstock; used some foam adhesive to mount the sentiment onto the card front panel. I then adhered the card front panel to the card base. For finishing touches, I used a few Nuvo Crystal Drops in Copper

Thank you for stopping by the blog today. I hope you found some inspiration! 
Annie

Hero Arts Stamp and Cut Happy Set DC150
Spectrum Noir Alcohol Markers
Nuvo Crystal Drops Metallic Copper
Ink: black
Recollections Brand 80 lb Cardstock: Cream and Medium Pink
Recollections Brand 110 lb Cardstock: White

Thursday, September 26, 2019

Thanksgiving Table Setting with Rinea Foil Paper and Joy Clair Stamps

Hello Crafty Friends - I am here with two fun and Thanksgiving projects for you today.

We're collaborating with Joy Clair Stamps all the month of September.

For this project, I am using Joy Clair Turkey Talk Stamp set and some Fall Rinea Foil Papers.


I made two table settings a Silverware Holder and a Napkin Ring.


The first project - I Am So ThankFULL - Thanksgiving Silverware Holder. 

Let's get started!

I stamped, colored and fussy cut Turkey Pilgrim.  I added a sentiment to the Turkey's sign.
Then, I cut the silverware holder on black cardstock. 
Next, I adhered the cardstock holder onto Rinea Glossy Copper/Gold Foil paper and 
Rinea Glossy Marigold/Gold Foil paper. I trimmed it out. I did the same for the flowers but I used Rinea Starstruck Voilet/Voilet Foil Paper 

Next, I inked the edges of the holder with some Distress Ink in Walnut - to hide the white edges of the foil paper.

Then, I added some adhesive to the tabs of the holder and pressed into place - creating a pocket for the silverware.
 

Next, I added some Distress Oxide ink in Wilted Violet to the petals of the flowers. I also added some Distress Oxide in Fossilized Amber to the center circles of the flower. Then, I used some foam adhesive to adhere the layers together. I curled the petals of the flower for some dimension.
 

I added some foam to the back of Turkey Pilgrim and adhered it to the holder along with the flower.
 

Now, the Thanksgiving Silverware Holder is complete.


Second Project - Eat More BEEF - Napkin Ring
I stamped, colored and fussy cut Turkey.  I added a sentiment to the Turkey's sign.
I die cut the napkin from black cardstock from the Cricut Tablescapes - Fall/Winter cartridge. I adhered it to Rinea Starstruck Jade/Jade Foil Paper - on the ornate section of the napkin ring. For the ring part, I adhered Rinea Glossy Mocha/Gold Foil paper.

I wrapped the Rinea Glossy Mocha/Gold Foil paper around the ring part and glued it in place. I added a bit of Distress Oxide ink Bundled Sage to the edges of the ornate paper. I also added a bit of Distress Oxide ink in Gathered Twigs to the ring part.


Next, I formed a ring by curling the band. There are two slits in the ornate part of the napkin ring that will hold the ring together.

Then, I added a bit of Distress Oxide ink Carved Pumpkin to the petals of the flower and Distress Oxide inkFossilized Amber the circle center. Using some foam adhesive I layered the flower petals. I used a bit of adhesive to adhere the center of the flower. Then, I used some foam adhesive on the back of the flower and place it onto the ornate part of the ring.
 

I added a bit of foam tape to the back of the turkey and placed it onto the ornate part of the ring.
Next, I place the ornate ends into each other via the slits. Form a ring.  

Now, The Eat More BEEF Napkin Ring is complete!

Materials Used:
Joy Clair Talk Turkey Stamp
Rinea Starstruck Jade/Jade Foil Paper
Rinea Glossy Gold/Gold Foil paper
Rinea Glossy Copper/Gold Foil paper
Rinea Glossy Marigold/Gold Foil paper
Rinea Starstruck Voilet/Voilet Foil Paper
Rinea Glossy Mocha/Gold Foil paper
Rinea Starstruck Marigold/Marigold Foil Paper
Rinea Clear Round Stamp Block
Aleene's Tacky Glue
Simply Crafty SVGs Thanksgiving Silverware Holder
Cricut Tablescapes - Fall/Winter - Napkin Ring
Versafine Onyx Black Ink
Memento Tuxedo Black Ink
Distress Ink in Walnut
Distress Oxide Ink: Bundled Sage, Fossilized Amber,
Wilted Violet, Carved Pumpkin & Gathered Twigs
Spectrum Noir Markers
Foam Adhesive
Neenah Solar White 80lb Cardstock
Recollections Brand: Heavy Weight Black Cardstock

Thank you for stopping by the blog today. I hope you found some inspiration!
Be sure to stop by the Rinea Store to pick some of the wonderful Rinea Products.

Wednesday, September 25, 2019

Happy Halloween With White Rose Crafts LLC

Hello Crafty Friends - I am here with a Halloween card. 

This week at White Rose Crafts LLC we're doing Distress Techniques on our projects.


I created this Halloween card.

Let's get started.

I start by trimming a piece of Core-dinations cardstock Black/Purple. I then run it through an embossing folder. I also do some embossing using embossing plates from Fiskars of the pumpkin and cat. I used a bit of Distress ink on the pumpkins. I stamped my sentiment.


I trimmed the pumpkins & cat out then with a distress tool I roughed up the edges. If you don't have a distress tool you can use your scissors. I tore the edges of the banner sentiment.

On the embossed black panel, I used a distress sander - You can use a bit of sandpaper (fine grit). To reveal the purple color underneath.  Next, I adhered the black/purple panel onto a light green piece cardstock.  Then, I adhered the pumpkins, cat, and sentiment using foam adhesive.   

I also added a few sequins for a finishing touch.

Materials Used
Fiskars Embossing Plates
Hero Arts Stamp (sentiment)
Versafine Onyx Black Ink
Recollections Brand: Cardstock  White and Light Green
Doodles Paper Playground Sparkle Blend

Thank you for stopping by the blog today - I hope you found some inspiration!


Be sure to tag us White Rose Crafts LLC on social media 
if you create a project with products or kits purchased on the