Wednesday, January 8, 2020

Mini Valentine's Cards with White Rose Crafts

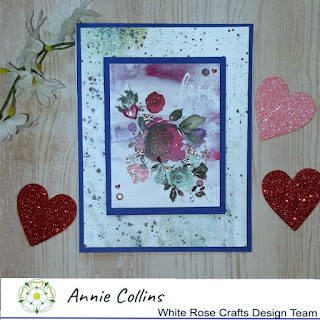
Hello Crafty Friends - I am here with a fun project or I should say fun projects.

Today, I am creating mini Valentine's Day cards that are quick and easy and perfect to give to friends and family. You can attach them to a small box of chocolates or stuffed animals.

These mini cards measure 3"x 3" when complete. 
I used a variety of Lawn Fawn Products because over on the White Rose Crafts FB Gallery we're featuring Lawn Fawn as the Brand of the Month!

Let's get started

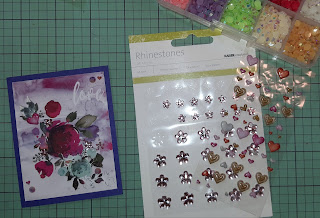
I gathered Lawn Fawn stamps and papers. 
I stamped my images and colored them with Spectrum Noir Markers. 
I then fussy cut them out because I didn't have the coordinating dies for all the images I wanted to use. I also stamped sentiments onto some stitched banner die cuts.

I die cut some Lawn Fawn Cross-stitched circles from the Lawn Fawn pattern papers. Next, I trimmed the cardstock in onto 3" x 6" and scored them at 3".
 

I adhered the circles to the card bases. 
Then, the sentiment and image onto the circle using foam adhesive. I then adhered a heart (which I did use the die from the Stinkin' Cute coordinating die set). to the top left side of the card or top right side of the card. I repeated this process for all 6 cards I created.
 

For finishing touches, I added a bit of highlight with white gel pen.
Now the cards are complete!

Materials Used
Sakura Gelly Roll Pen: White & Black
Recollections Brand 110lb Cardstock: White (card base)
Spectrum Noir Marker:
DR1, CR1, CR2, OR1, OR2, BO1, MG1, MG2, 
AP1, CG1, LG3, BG1, BG2, BG3, BGR1, 
IG2, IG3, IG4, IG5, IG6 and Blender
Copic Marker:
C1

Thank you for stopping by the blog today - I hope you found some inspiration!


Be sure to tag us White Rose Crafts LLC on social media 
if you create a project with products or kits purchased on the 

Thursday, January 2, 2020

Happy Valentine's Day with Dies R Us

Hello Crafty Friends - I am here with a fun rainbow hearts Valentine's Day card.


I gathered my supplies.

I die cut the heart from the pattern paper. Along with 3 Happy from white cardstock. I stacked and adhered the happys together. I stamped my sentiment onto a strip of cardstock.
 

I adhered the heart onto black cardstock and trimmed it down to 5-1/4"x 4" so I have a nice white border once I adhere the card front panel to the card base.
 

I adhered the card front onto the card base. 
 

Next, I adhered the happy and sentiment to the card.

For finishing touches, I added jewels to the hearts in the same colors.
Now the card is complete!

Material Used


Tsukeniko Versafine Ink: Onyx Black
Ms. Sparkle & Co: Wood Grain Pattern Paper
Recollection Brand 110lb Cardstock: Black & White
Elle Tru: Jewels

Thank you for stopping by the blog today. I hope you found some inspiration!

Wednesday, January 1, 2020

Birthday Wishes with A Perfect Time To Craft

Hello Crafty Friends - I am here with a cute and fun card featuring Charlie's Stamps 
for January's Challenge on A Perfect Time To Craft

This is always an Open Challenge and always "Anything Goes”. You're welcome to add unlimited entries per challenge and you may enter any crafting project with any theme.
For full details on our rules and on how to enter, please visit our rules page.

For the first challenge of 2020, we have TWO sponsors. We welcome Bugaboo for the very first time!


We also welcome back Charlie's Stamps.

Here's my card - I chose to use Trouble Kitty

Materials Used:
Charlie's Stamps: Trouble Kitty
Dies:
 Sunny Studios: Wishes
Memory Box:  Birthday
Maker's Movement: Versa Rectangles
Cuttlebug: Mini Confetti
Spectrum Noir Markers:
IG1, IG2, IG3, BGR1, BT2, BT3,
 BT4, PP1, MG1, EB2,  & EB3
Sakura Gelly Roll Pens: Black & White
Zig Wink Of Stella: Clear Glitter
Pebbles Inc: Green & White Dot Cardstock
Accent Digital Smooth 80lb Cardstock: White
Recollections Brand 110lb Cardstock: White

Thank you for stopping by the blog today. I hope you found some inspiration!

Love Card with White Rose Crafts

Hello Crafty Friends - I am here with a love card created using the New Mood Board Challenge on the White Rose Crafts FB Gallery Group

January's Mood Board
No photo description available.

This is the card I created.


Let's get started on how I made this card.

I gathered my materials along with the mood board.
 I chose to create a love card inspired heart motifs in the board. 
I used 13 @rts Paper along with some cardstock and embellishments to create the card.

I trimmed and matted some speckled pattern paper from 13 @rts to fit an A2 card (4-1/4"x5-1/2"). Next, I trimmed one of the journaling cards that came in the Elements paper - I matted that in blue cardstock as well.
 

From one of the pattern papers, I fussy cut a blue rose cluster and a few leaves. I adhered them to the small card panel with some foam adhesive.
 

I then added a few jeweled flowers, jewels and tiny puffy hearts to the small panel.


I adhered the small panel using foam adhesive to the card front. 
 Finally using a Sakura Gelly Roll Pen in Glitter I went over the word LOVE. 
My card is now complete.

Materials Used:
Sakura Gelly Roll Pen: Glitter
Recollections Brand 110lb Cardstock: White (card base)
Recollections Brand 65lb Cardstock: Dark Blue
Recollections Brand: Puffy Hearts
Jewels 

Thank you for stopping by the blog today - I hope you found some inspiration!

Be sure to tag us White Rose Crafts LLC on social media 
if you create a project with products or kits purchased on the 

My Crafty Friend Shaker Card with Die Cut Divas

Hello Crafty Friends - I am here with a fun shaker card featuring dies from Kat Scrapiness 

Kat Scrappiness is our terrific sponsor for January 2020.  
Kat Scrappiness

The challenge is NEW THINGS 
(new stamps, dies, stencils, embossing powders or folders, papers, digital images)


We all made it through the holidays, so now it's time to craft away and what better prize than a Kat Scrappiness Prize pack which includes your choice of one stamp set, one die and three packs of embellishments (sequins, gems or sprinkles)?  


Materials Used:
Kat Scrappiness dies Hello My Crafty Friend
Kat Scrappiness dies Diagonal Backdrop Die 
Tsukeniko Versamark Ink
Stampendous Embossing Powder: Jewel Gold
Paper House Pattern Paper: Color Washed
Recollection Brand 110lb Cardstock: White card base
Recollection Brand 65lb Cardstock: Dark Gray
Nuvo Deluxe Glue
Acetate
 Foam

Thank you for stopping by the blog today. I hope you found some inspiration!

Thursday, December 26, 2019

Celebrating the New Year with Rinea

Hello Crafty Friends - I am here with a fun way to celebrate the New Year!

I can't even believe it's going to be 2020! 

Today, I have a Champagne Bottle and 2 toasting glasses.
These fun 3D projects are perfect to decorate your table or mantel.

Champagne Bottle and 2 toasting glasses

Materials Used
Silhouette Cameo 3 Die Cutting Machine
Xyron Creative Station Lite
Aleene's Tacky Glue
Recollections Brand: Gold Jewels
I purchased and downloaded the bottle and glass cut files from
the Silhouette Design Store.

I cut them using the Rinea Foil paper on the vellum setting and a light tack mat. I then assembled the projects as per the directions in the Silhouette Design Store.

I hope you found some inspiration today! 

Please tag us on social media if you create any project using any of our wonderful Foil Papers!
Don't forget to stop by the shop Rinea.com

Happy New Year with Dies R Us

Hello Crafty Friends - I am here with a quick and easy New Year's card.

Can you believe it's almost here! 
A new year filled with new experiences, memories, 
birthdays, anniversaries, and so much more! 

This card is so quick to create you can still make them and get them out to all the family and friends!

I gathered all the supplies. The die, Rinea Foil paper for some shine and some Doodles Paper Playground Sparkle Blend called Celebrate along with some cardstock.

I die cut all the pieces from the foil paper. I die cut the leaves in Rinea Foil paper Starstruck Ebony and Starstruck Silver. The champaign bottle I cut from Rinea Foil paper Starstruck Ebony and I cut and an extra one from Rinea Foil paper Glossy Gold for the inlays of the labels. I then cut the glasses from Rinea Foil paper Starstruck Silver. I also die cut the label banner from Rinea Foil paper Starstruck Silver. Finally, I die cut the sentiment from Rinea Foil paper Starstruck Ebony.

I start by assembling the champaign bottle. I put some low profile foam adhesive on the back of the bottle and then turn it over to place the small label piece into place.
  

Next, I adhered the leaves to the bottom of my white card front panel. Starting with the black leaves first then the silver. Then, I adhered to the bottle and the glasses just above the leaves.
 

Then, I adhered the sentiment onto the banner and added some low profile foam adhesive to the back of the banner and place it on the card panel making sure to center it. 
 

Next, I added some sequins to the card front panel. I created a small cluster at the center between the leaves and two other clusters on the sides of the bottle and glasses. I finished with a final cluster by the sentiment. 
 

Then, I adhered the card front panel onto the card base and the card is complete!

Materials Used:
Amy Design - Dies - Christmas Wishes - Champagne

Elizabeth Craft Designs - Dies - Happy New Year

Elizabeth Craft Designs - Dies - Banners

Rinea Silver/Silver Starstruck Foiled Paper


Jot Brand: Low profile Foam Adhesive
Recollections Brand 65lb Cardstock: White
Recollections Brand 110lb Cardstock: White
Crafter's Edge Crossover Die Cutting Machine
Imagine Crafts: On point Glue

Thank you for stopping by the blog today. I hope you found some inspiration!