Showing posts with label Hero Arts. Show all posts

Saturday, February 17, 2024

Sending You Love Card With Die Cut Divas

  Hello Crafty Friends - Today, I am sharing this non-traditional Valentine's card. It's for the challenge we having over at the Die Cut Divas Blog. Hero Arts our wonderful sponsor for the challenge this month.

Here is my card.


Items Used:
Cardstock 110lb: white 
Cardstock: 80lb: Black and White
Distress Oxide Inks: Bundled Sage, Scattered Straw, 
Salt Water Taffy, Shaded Lilac & Speckled Egg
VersaFine Ink: Onyx Black


A long time company in the stamping industry, Hero Arts remains a mainstay in the rubber stamping community.  We are so grateful that Hero Arts continues to support our blog by sponsoring Die Cut Divas Challenges. 

The theme this month is to make a Non-Tradional Valentine Card 
and Hero Arts is donating a 
$25.00 Gift Card to the randomly picked winner.

Thursday, February 1, 2024

You & Me Card with Die Cut Divas

 Hello Crafty Friends - Today, I am sharing this non-traditional Valentine's card. It's for the challenge we having over at the Die Cut Divas Blog. Hero Arts our wonderful sponsor for the challenge this month.

Here is my card.

Items Used:
Wood Veneers
Clay Bit Hearts - Red
Copic Markers: E93, C1,E00, &Y23
Cardstock 110lb: white 
Cardstock: 80lb: Red and Kraft
Accent 80lb cardstock: Opaque White
Memento Inks: Tuxedo Black and Ladybug Red


A long time company in the stamping industry, Hero Arts remains a mainstay in the rubber stamping community.  We are so grateful that Hero Arts continues to support our blog by sponsoring Die Cut Divas Challenges. 

The theme this month is to make a Non-Tradional Valentine Card 
and Hero Arts is donating a 
$25.00 Gift Card to the randomly picked winner.

Friday, February 17, 2023

Happy Birthday Bird Card with Die Cut Divas

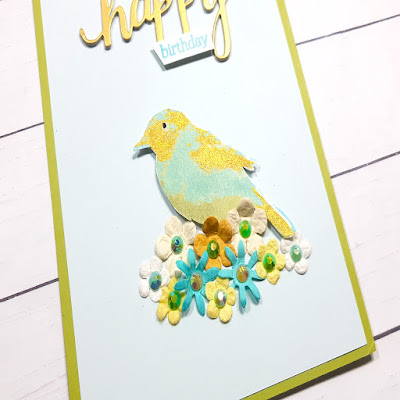
Hello Crafty Friends - I am here with a floral friendship card featuring Hero Arts stamp and some gold. I used Hero Arts Color Layering Bird and Branch Stamp Set CL866  and Happy Stamp and Cut Stamp Set DC150 for my card. I kept my colors in shades of Blue, Green, and Gold. 

Close-up of bird

Supplies Used:
VersaMagic Tea Leaves Ink
VersaMagic Sea Breeze Ink
Delicata Golden Glitz Ink
Prima Flowers: White, Yellow, Golden, Blue
Flat Back Gems: Gold, Green and Blue
Recollection Brand 110lb Cardstock: White
Recollection Brand 80lb Cardstock: Shimmer Gold
Recollection Brand 65lb Cardstock: Light Blue & Green

Die Cut Divas' Sponsor for February is none other than Hero Arts.

The Theme: Add some gold - heat embossing, foiling, gold pen, gold thread,
gold gems/sequins/enamel dots... something GOLD.


It's always time for Hero Arts who have always supported Die Cut Divas since we started sponsorships and we are always pleased to spend time with our Hero Arts products.

Thank you for stopping by the blog today. I hope you found some inspiration!!

Wednesday, February 1, 2023

You're A Beautiful Friend Card with Die Cut Divas

Hello Crafty Friends - I am here with a floral friendship card featuring Hero Arts stamp and some gold. I used Hero Arts Color Layering Rose Stamp Set for my card. I kept my colors neutral - in Yellows, Creams, Black and Gold. 


Close-up of the layering roses.
Close -up of the sentiment and leaves.

Die Cut Divas' Sponsor for February is none other than Hero Arts.

The Theme: Add some gold - heat embossing, foiling, gold pen, gold thread,
gold gems/sequins/enamel dots... something GOLD.


It's always time for Hero Arts who have always supported Die Cut Divas since we started sponsorships and we are always pleased to spend time with our Hero Arts products.

Thank you for stopping by the blog today. I hope you found some inspiration!!

Tuesday, February 1, 2022

Love You More Card with Die Cut Divas

Hello Crafty Friends - I am here with a fun love card for the Die Cut Divas Challenge. This month we're going on an angle with Hero Arts!


The Challenge for February is: Angle It!

Hero Arts is giving a $25 gift card to their website for our winner.  The challenge ends February 28th at 9:00 p.m. Pacific time. Our winner will be posted on March 3. 

We all love playing with our Hero Arts toys, whether it be stamps, stencils, dies or inks, so lets see what the DT have in store for us today!

Supplies used:
Hero Arts Stamp and Cut Set: Love DC175
Recollections Brand Pattern Paper: Sweetheart's Day
Recollections Brand 110# Cardstock: White and Black
Recollections Brand 80# Shimmer Cardstock: Blue
Bearly Art Glue
Foam Dots
Sequins

Thank you for stopping by the blog today. I hope you found some inspiration!

Monday, June 17, 2019

Mini Notepad Holder with A2Z Scrapbooking


Hello Crafty Friends - Annie here with a fun project you can make in about an hour or less.

These mini note pad holders are perfect to add to a gift basket or just as is.
Adobe_20190529_204825

So, Let's begin the project. - I like to break it down into a few steps.

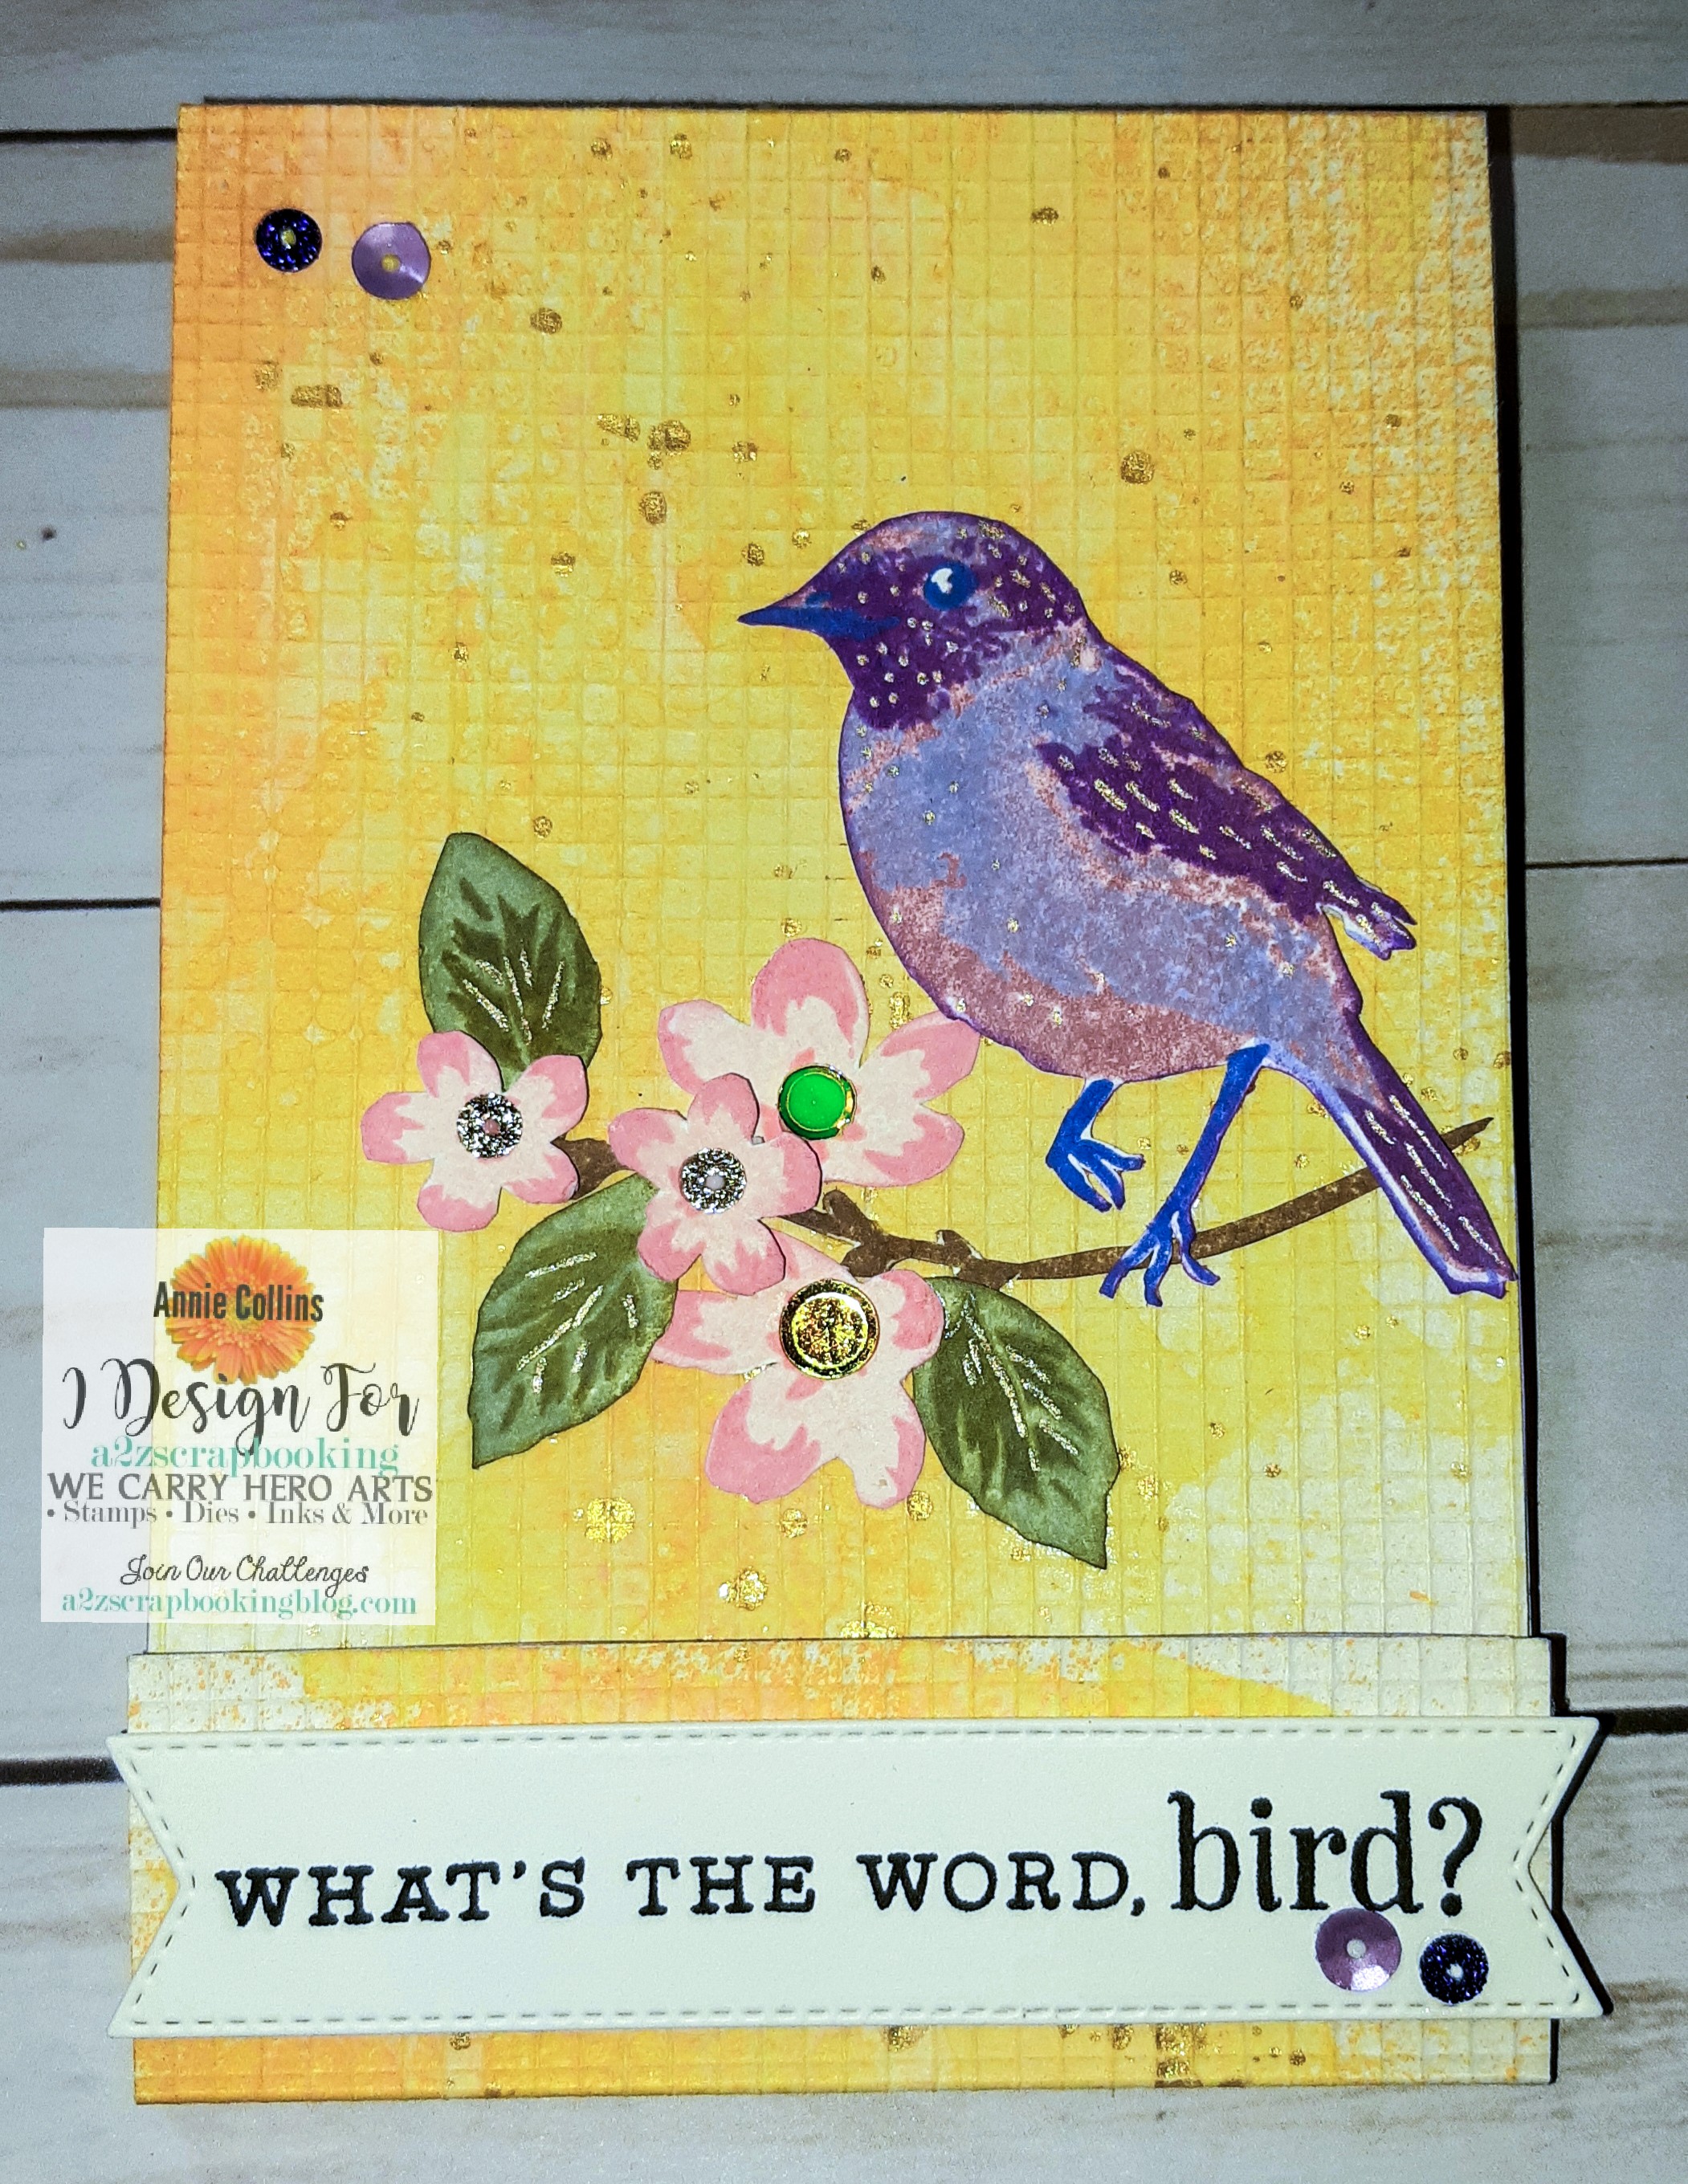
1. Stamp the images (which are layering bird, leaves, branch, and flowers). Fussy cut them. Then, Stamp the sentiment on a banner shape. Set them aside while you work on the cover. Next, trim the 12" x 12" White heavyweight card stock into 3-1/2" x 11-3/4". Save the remaining card stock for another project.
2. let's score the cover for our note pad. Using a scoring board or a trimmer channel - using the bone folder - score at  5" & 5-1/4".  Then at 10-1/4" & 10- 3/8". 
Next, crease the score lines - using the bone folder.


3. Apply a bit of Gesso on to your cover; heat set or air dry. (I heat set mine). Then, Spray some Tim Holtz Distress spray (heat Set). Next, do a few splatters with Heidi Swapp Colorshine.

4. Adhere the pad into the cover. Place adhesive of choice on the back of the note pad and the creased section of the cover. I added an extra piece cardstock to the inside of the cover as well as to the bottom closer.  Press firmly.    
 
 .  

Next, push on the crease to the top of the note pad really sticks to the cover. I use the bone folder to press it. Plus it will give it a nice crisp look.

5. Now, Adhere the branch to the cover. Then, the larger flowers. Followed by the leaves and the smaller flowers which I added a bit of foam adhesive.
 

Nest, adhere the bird to the branch having the back leg touching the branch. Then, add the sentiment onto a banner and adhere to the bottom flap.
 
   
6. Now, for the closer - I peel off one Velcro tab and center it onto the other - stacking them. The Velcro has strong adhesive this is why I only expose one side first - I then center the Velcro stack onto the lower tab - press in place - then remove the remain plastic backing and press the lower tab closed.
 

Finally, Add a few embellishments. I added a few sequins at the top left and by the sentiment. I added one to each of the flower centers.  

Now, your Mini Notepad Holder is complete!
You can Modify this tutorial using a masculine design and colors.

Materials Used:
Hero Arts Stamp Layering Bird and Branch CL866
Heavy Weight Textured White Cardstock
Liquitex Gesso
Dollar Tree Mini Notepad
Sakura Metallic Gelly Roll Pen - Gold
Heidi Swapp Colorshine Gold
Tim Holtz Distress Spray Spiced Marmalade
Recollections Brand Purple cardstock
Tim Holtz Distress Oxide Inks: Victorian Velvet, Shaded Lilac,
Wilted Violet, Blueprint sketch, Tattered Rose, Worn Lipstick,
Bundled Sage, Forest Moss, Gathered Twigs, Squeezed Lemonade
Doodles Paper Playground Sparkle Blend: Sunshine and
Birthstone Collection: February Amethyst

Thank you for stopping by the blog today. I hope you found some inspiration!
Annie

Monday, September 17, 2018

Poetic Petals Card Set with A2Z Scrapbooking

As we are nearing the holiday season most of us will be invited to parties and functions. A hostess gift is always a nice thing to bring and give. Or perhaps you are already working on your gifts for the upcoming season.
A simple set of small cards perfect for quick thank you's or hello's is a nice and easy thing to have ready to give.
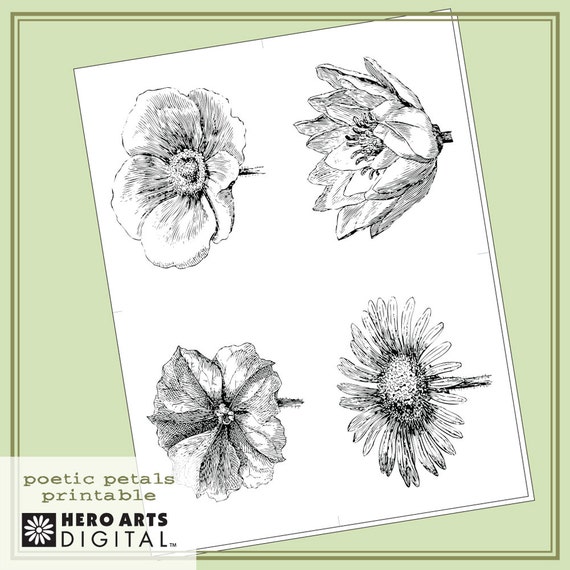
I created this set of card using the Poetic Petals Digital from Hero Arts Poetic Petals Digital from Hero Arts  which is perfect for these small cards.

image 0

These are the cards I created. I kept them simple to fit the current challenge over on A2Z Scrapbooking. 


First, I resized the flowers and printed them onto alcohol marker friendly paper. Then I colored them with my Spectrum Nior Markers (see below for colors).


Second, I cut 4 pieces of heavy weight white cardstock to 3" X 8". Score at 4". Then, I put a circle color from Distress Oxide ink. (you can use any ink here) that compliments the flowers. This will provide a landing spot for the flowers.


Third, Place foam adhesive behind the flowers and place onto the circle of color. Then, add some finishing touches with some Tonic Studios Nuvo Drops. Repeat for all cards. 


Now you have a full set of cards. Add some mini envelops and place them in a gift card box. You have the perfect hostess gift.
Supplies used:
Hero Arts Poetic Petals
Recollections Heavy Weight Cardstock - White
Spectrum Nior Markers(Sunflower: Petals-GY3, GY4 & GY5 Center-EB1, EB2 & EB3) (Poinsettia:Petals-HB1,HB2 & PL3 Center-GY4) (Magnolia:Petals-CT1, IG1 & Blender Center-CT3) (Poppy: Petals-DR1, DR5 & DR7 Center-IG4, IG6 & GY4) ALL Stems - JG5
Sakura GellyRoll Metallic Gold Pen
Distress Oxides Inks Shaded Lilac, Fossilized Amber, Bundled Sage & Broken China
Tonic Studio Nuvo Crystal Drops in Pale Gold
Scotch 3M Foam Tape