Thursday, March 28, 2019

Happy Easter Cards with White Rose Crafts LLC

Hello Crafty Friends - Annie here with 2 Cards 1 stamp set. 

I wanted to create one playful card and one more grown-up card.  
Because I was creating 2 cards I kept the design pretty simple and this post quick.


I used the Woodware Easter Bunnies Stamp Set. I kept my supplies to a minimum. Using the same pattern paper and similar colors for both cards. 

Card 1- I used the bunny, small basket, the small chick in egg and the tulip. I used some the Green Mulberry paper for my grass. I stamped one of the sentiments from the set. 

 Card 2 - I stamped the bunny in the basket and the small cluster of eggs. I backed the stamped and colored images onto the Craft Creations White & Gold Foiled pattern paper. I used the 
and embellish the card with the Delicate Flowers - in Violet

With so many beautiful stamps, papers, Specialty papers & Inks in the shop 
I know you are bound to create something wonderful!

Thank you for stopping by the blog today!

If you would like to join in the fun for the White Rose Crafts March Sketch Challenge, and other fun activites and conversations make sure you join the 
White Rose Crafts Gallery group on Facebook! 

Tuesday, March 26, 2019

Happy Easter Bunny Card with Rinea Foil Paper

Hello Crafty Friends - I am here with an adorable Easter card. 

This care is mostly done with die cutting. However, the shapes are simple and it can be replicated by hand. A few circles, ovals, triangle and some flowers.

Some simple layering and you have created a cute bunny who is all ready for Easter. The Bunny can be easily modified to a masculine bunny wish a simple bow tie or hat.


A close up of the flowers and sentiment.

Materials Used: 
Evaney Design Bunny/Chick Die
Sue Wilson Designs - Flowers
Hero Arts Stamp Celebrate CL498 Set
Ranger Liquid Pearls - Gold Pearl
Adhesive - Tape Runner, Liquid - Scotch 3M
Jot Brand - Low profile Foam adhesive
Manual Die-cutting Machine

Thank you for stopping by the blog today - I hope you found some inspiration.
Don't forget to stop by the shop to purchase some of the beautiful Foil Paper.

Sunday, March 24, 2019

HI - Floral Shaker Card with Doodles Paper Playground

Hello Crafty Friends - I am here with a fun Spring shaker card perfect to send to anyone.

With a few simple die cuts, you can easily create multiples of this card. I used 2 Sparkle Blends for the shaker - Sparkle Blends: Flower Power & Sparkle Blends: Flaming Sunset

No photo description available.
For a floral fanatic, this blend is perfect!  Flowers in this bright, happy blend! 
 Flower styles range from simple daisies to Fimo slices and holographic blooms.

Image may contain: food
The beautiful hues of red, yellow, orange and gold sequins, crystals, 
seed beads, and colorful spheres gives this blend just the right tone.


So, Let's get started!

I gathered my supplies. Then, I die cut the word HI using my big letters from heavyweight white cardstock and some flowers from glitter cardstock and vellum.


Next, I used some Tim Holtz Distress Oxide Spray in Spiced Marmalade and Some TH Distress Oxide Ink in Squeezed Lemonade on the card front panel that I die cut my greeting from. I set it aside to dry.


Then, I worked on the flowers. I added a bit of liquid glue to the center of the vellum flowers and added the glitter flowers on top. I then curled the petals a bit for some dimension.  


Now, that the front panel is dry; I turn it over and adhere some clear packaging (you can use acetate) to the back. I then add some foam adhesive all over the back of the front panel - expect where the greeting is. Next, I add a mix of the Sparkle Blends into the open area. Add the Light Orange cardstock backing to the panel.


Now, adhere the flowers to the front panel. I added some Sparkle Blends to the center of the flowers for a finishing touch.

Now, the card is complete!

Supplies Used


Sue Wilson Dies - Finishing Touches - Striped Nasturtiums

Recollections Brand: Heavy Weight Cardstock:
White & Light Orange

Colorbok Brand: Heavy Weight Glitter Cardstock:
Lemon Yellow and Orange

Thank you for stopping by the blog today! 

Be sure to tag us Doodles Paper Playground on social media 
if you create a project with our Sparkle Blends.
 All of our Sparkle Blends can be purchased on the 


Hello Card with Dies R Us

Hello Crafty Friends - I am here with a really quick card for you.

I did some simple inlay work on the sentiment of this card. 
 Back the flowers with some vellum for a lighter feel. 


So let's get started - Gather the materials needed. 


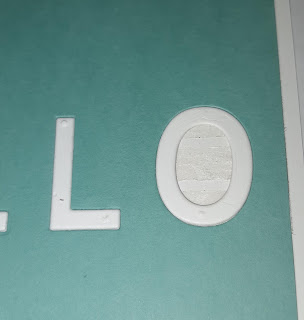
First I lined up my letters on my grid mat so I got them straight. Then, I applied some washi tape to the letters. This way I can move them all together.


Next, I placed the letters onto light teal cardstock and die cut them. I repeated the process on white cardstock. Next, I die the flowers from Light Orange Glitter cardstock and vellum.


Once, I had all the components cut. I added adhesive to the back of the teal cardstock even over the die cut letters. Next, I place it onto the white cardstock that I die cut the letters from. This will be my mat for the front panel.

Then, I started inlaying the letters into place. Making sure to keep the teal center for the O.


Once, all the letters are in place I start working on the flowers. I put a small dot of glue (I used liquid glue) in the center of the vellum flower and placed the glitter flower on top. 

I gently curled the petals of the flowers to give a bit of dimension to the flowers.

I adhere the flowers to the bottom left of the card and add jewels to the centers for a finishing touch.

Now your card is complete. Simple inlay and beautiful results.


Supplies Used


Recollections Brand: 
Vellum, White Cardstock, Light Teal Cardstock 
Colorbok Brand: Light Orange Glitter Cardstock
Jewels: Elle TRU Jewels - Medium Orange
Adhesive: tape

Wednesday, March 20, 2019

3 Cards One Kit with White Rose Crafts LLC

Hello Crafty Friends - I am here with 3 cards for you today.

I wanted to show how versatile the White Rose Crafts kits are that I created 3 cards one a bit more detailed than the next. So, no matter what level card maker you are you can definitely create plenty of cards from the kits.

I am using the  March "Blue Skies" Subscription Kit This kit is beautiful - it has shades of blue, rich gold, butterflies, uplifting quotes and a fantastic paper and stamp by Kaisercrafts.

Card 1. Do Small Things With Great LOVE
For this card I kept it simple. I used a pattern paper (the stripes) from the kit, another pattern specialty paper from the add-on section(yellow with gold foil) and a cut apart from the large Blue Moon paper from the kit. A small piece of the gold specialty paper that come in the kit to mat the main sentiment. Along with blue cardstock from my stash. I add 2 flowers as embellishments. I added a bit of glitz to the word LOVE with Wink of Stella pen and a bit of gold to the center of the flower with a Gelly Roll Gold Gel pen.


Card. 2 - Escape the Ordinary
This may seem like a complicated card but it's actually easy because Kay has included a pre-scored, pre-die cut card and the matching shaker holder in the kit. I simply cover the front of the card. Cut away the cloud shape to fit the shaker holder. Filled the holder with some of the Sparkle Blends - Sunny Skies from the kit. Seal the back up with a piece of paper now the shaker is complete. I embellish the card with a few strips of the pattern paper from the kit (this paper contains several phrases and patterns like washi tape). I added a blue flower from the kit. 


Card 3. Your Wings Already Exist All You Have To Do Is Fly
For this card, I again used one of the cut apart from the large Blue Moon paper. I matted it onto light green cardstock. I cut my card front panel 4" X 5-1/4" I then adhered 2 strips of ribbon from my stash that coordinated with the kit in a diagonal.  Then I matted the white panel onto dark blue cardstock. Next, I adhered using foam adhesive the sentiment. For the embellishments, I used the Silver Peel off Butterflies from the Add-on sections and place them onto some of the beautiful light green Mulberry paper. I trimmed away any of the extras I didn't want. I kept the little silver flowers to add to the card. I then adhered them using a bit of foam tape to the card front panel.

There's still so much left from the March Blue Skies Kit - I have already created 6 cards and I can easily create another 6 more. Kay of White Rose Crafts LLC really packs these kits.

All the Supplies Used:
Ingio Skies Pattern Papers, Gold cardstock, 
Sparkle Blends - Sunny Skies & Flowers
Add-ons: 

Other supplies:
Recollections Brand Heavy Weight Cardstock:
 Dark Blue, Light Green & White
Sakura Gelly Roll Pen in Metallic Gold
Zig Wink of Stella - Clear Glitter
American Crafts - Blue ribbon


Thank you for stopping by the blog today!

If you would like to join in the fun for the White Rose Crafts March Sketch Challenge, and other fun activites and conversations make sure you join the 
White Rose Crafts Gallery group on Facebook! 

Tuesday, March 19, 2019

Easter Canvas with The Robin's Nest

Hello Crafty Friends - I am here with an Easter Mini Canvas. 

This canvas features the Dew, Diamond and Tear Drops; along with some chipboard ephemera.


To create this canvas I painted the canvas and set aside to dry. Then, I stamped the sentiment onto the ephemera card - set aside. Next, I die cut the oval shape from white cardstock and adhered the Dew Drops onto it. 

Once, the canvas was dry I adhered the Easter egg onto the canvas. I adhere a piece of the doily to the top of the ephemera card and one to the bottom of the card. Next, I added foam adhesive to the back of the ephemera card and place it onto the canvas. Finally, I adhered a butterfly Dew Drop to the left corner of the canvas. 

Supplies Used

Sun Shower Tear Drops

Baby Tear Drops

Fall Gems Diamond Dew Drops

Sunset Diamond Dew Drops

Shimmer Diamond Dew Drops

Precious Boy Diamond Dew Drops

Black/White/Silver Dew Drops

Butterflies Dew Drops

Doillie Die Cuts

Rosy Cards

Other Supplies
Evanvey Stamps & Dies Stitched Oval Die
Hero Arts Celebrate Stamp Set CL498
Tsukineko Versafine Ink - Onyx Black
Plaid-Folk Art Paint - Georgia Peach
Aleene's Tacky Glue
Dollar Tree - Mini Canvas 4" x 6" 

Thank you for spending some time with me today here at the Robin's Nest Blog.
 Be sure to share with us if you create any tags
you create featuring our Dew Drops, Ephemera Cards & Glitter Chipboard. 
Have a Great Crafty Day!!
Stop by and visit us at Robin's Nest StoreFacebook  & YouTube

Monday, March 18, 2019

March's Blue Skies White Rose Crafts Blog Hop

Welcome Rosies to the March "Blue Skies" Blog Hop.  This month's hop will Run from today, March 18th- Friday, March 22nd at noon EST.  

If you are not familiar with blog hops, it’s fun and easy way to see what the Rosie Design Team is creating!  Simply click on the first name in the list below to visit our Design Team.  Each blog will have the same list of links on their blogs and you just follow them in order to go to the next blog!

And to make it more fun there is a chance for you to win a $15 WRC Gift Card just for hopping along with us and leaving a comment at each stop along the way!  

The Hop will run all week until Friday, March 22nd at 12pm EST.  Once the hop has closed, we will randomly pick a winner of someone who has commented all along the way, who will be announced on the 19th right here on the WRC blog!

And as an added bonus, do you want your work to be featured on our blog when we announce our hop winner.  Share your White Rose Crafts projects over on our Facebook Gallery, and you might just be a featured project right here!

Now onto the our Hop...

Have you seen our March "Blue Skies" Subscription Kit?  There are only a few left in stock, so don't miss out on a chance to own your own bit of Festive Winter Elegance.  But did you know that with each of our kits, there is always an Kit Add-On section of the Store that compliments your Monthly Subscription Kit?  And did you know you can get anything in that March Kit Add-On section for 10% off using the code March Add Ons!!!

Today our design team is playing around with the vast array of crafting supplies you can find in the March Kit Add-On.  So prepare yourself for all the fun and the very cool line up of projects our team has prepared for you.

And when you get done hoping come back to White Rose Crafts Blog and let us know which add on you would be most excited to play with.

For this hop I created 2 cards.

Card 1: I used 2 strips of pattern paper from 
the Blue Skies Kit (the blue leaves & blue floral). 
I used the Scrapberry mini ink pad, white lace,  blue ribbon, 
Sequins are part of the embellishment pack. 
As my Add-on I used 
DoCrafts Anita's Foiled Decoupage Kit (the main focal point) 
I also added some flowers the little white one and 
Pink - they are Mulberry Paper flowers.
 The sentiment came from one of the pattern papers in the Blue Skies Kit. 


Card 2: I the pattern paper, pre-folded card,
floral stamp & sequins from the Blue Skies kit.
I used the following Add-on; Pink Mulberry paper to
accent the flowers (I did the feathering technique on it),
I used the light green trim & some of the
New Tim Holtz Distress Oxide Sprays in
Spiced Marmalade & Mermaid Lagoon(the little splatters) and
the Woodware Crafts Collection Words Peel Offs.


Your next stop along the hop is Kim
We've included here on the blog some sneak peeks just to entice your curiosities!!!


Kim


Come back to the beginning and let the WRC team know
which Add-On you are most excited to play with!