Sunday, October 28, 2018

Thankful with Dies R Us

Hello Friends today I am sharing a Fall wreath card - perfect to let that special someone know that you are Thankful to have them in your life.


Let's get started with the tutorial.


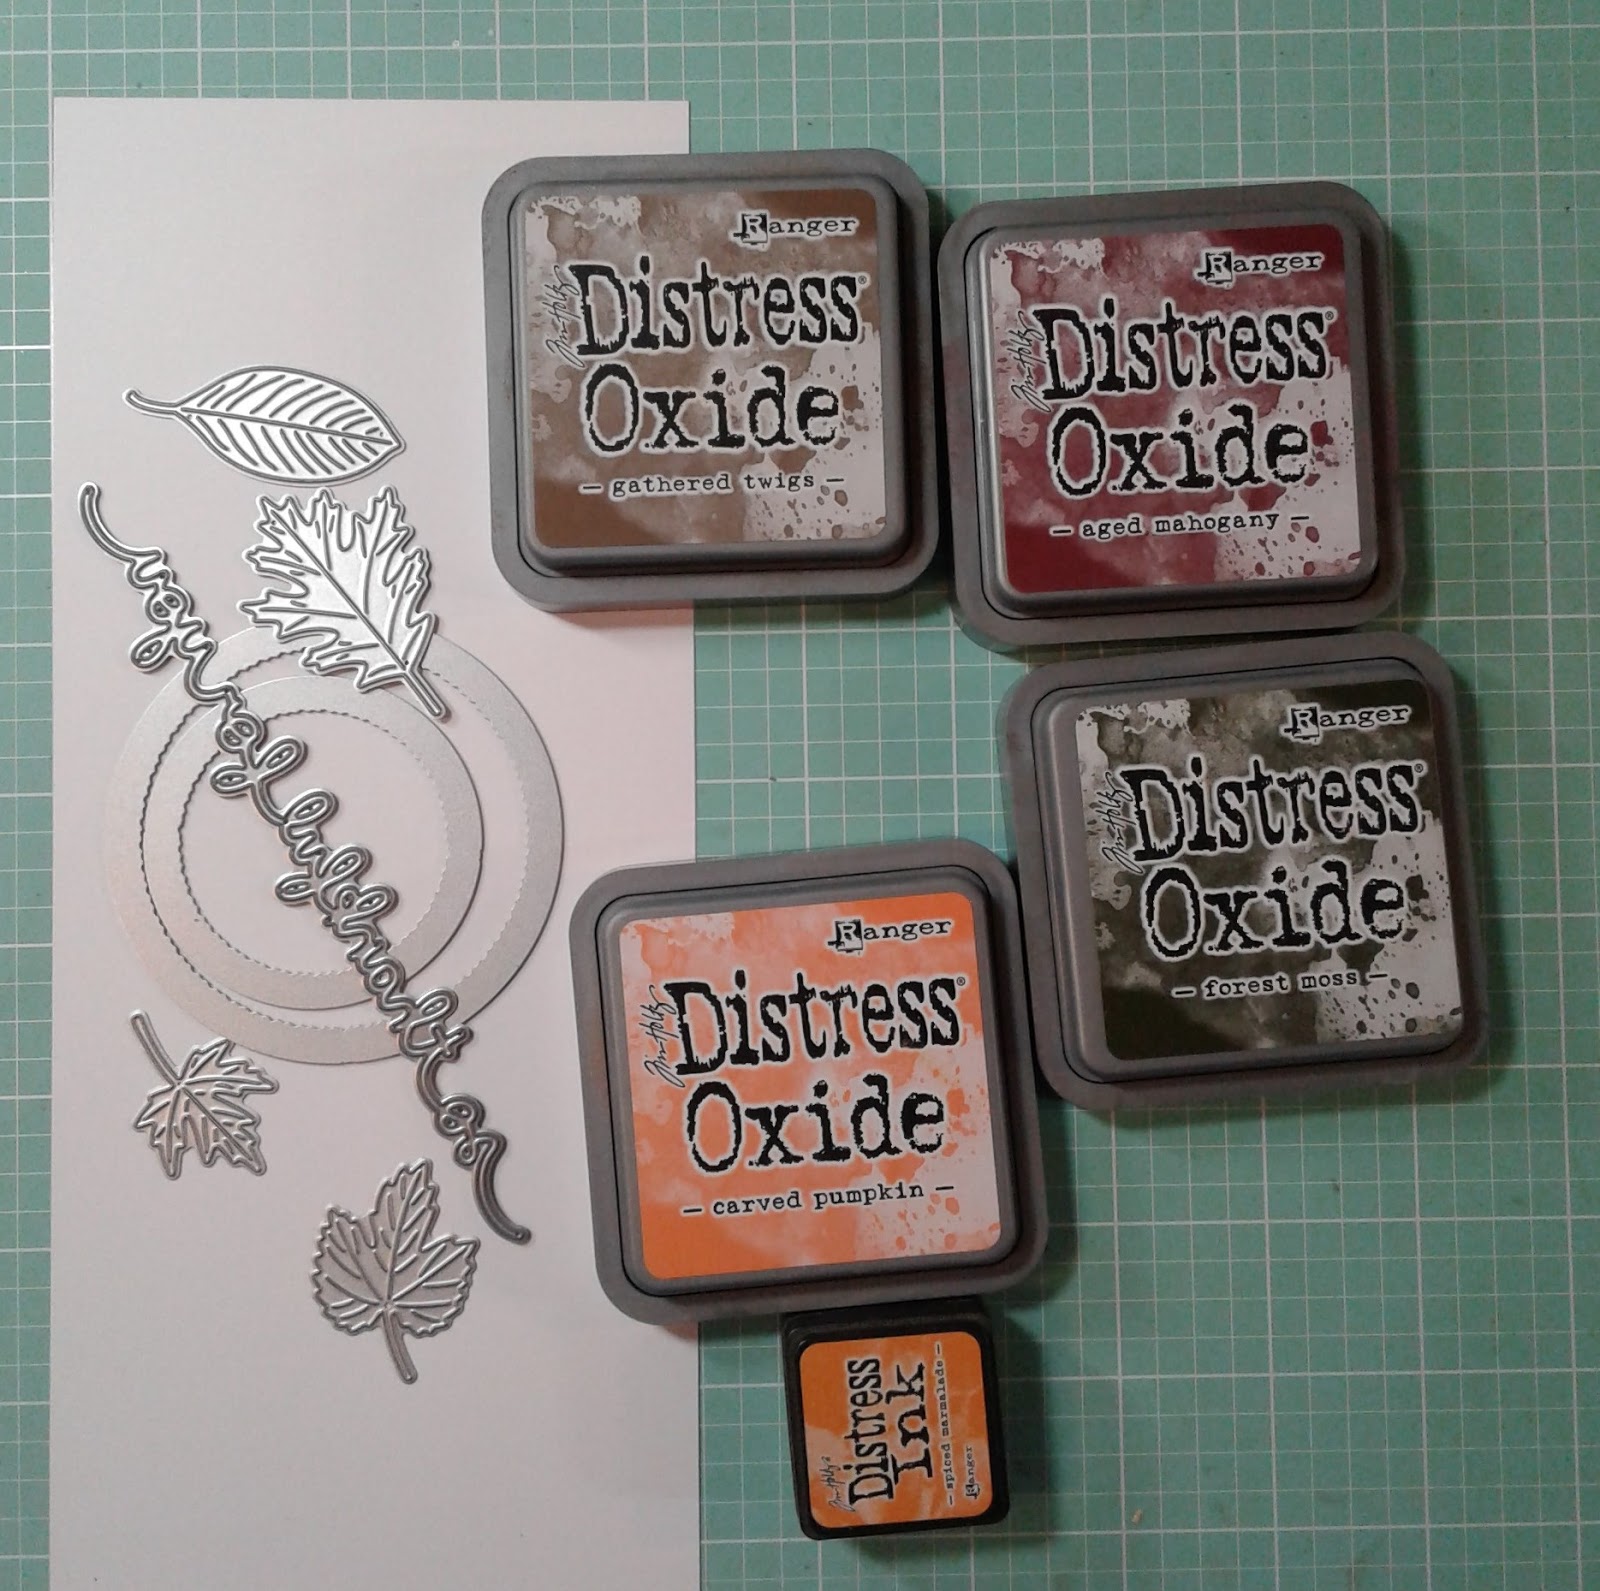
First, gather your supplies. Next, on Bristol Smooth or White card stock apply some Distress Oxide ink. I just did a few circle making sure to blend into each other. Then, Do a few spritz of water to oxide the ink.


Next, I added a few droplets of Heidi Swapp Colorshine in Gold, Bronze and Tea. Then, I set it aside to dry.


Next, I die cut my circle shape this will help me with my wreath. I also die cut the word Thankful 4 times - 3 times from medium orange and 1 time from gold foil paper.
 

Now, the cardstock with the oxide ink is dry. I die cut the leaves from it I cut several of each leaf. I rather have extras that not enough. 


Now, that I have all the components ready - it's time to assemble the card. I start by trimming a bit off my circle. Then, I stack my word by gluing between the layers


Now, I start adhering the leaves to the circle to create the wreath.

  
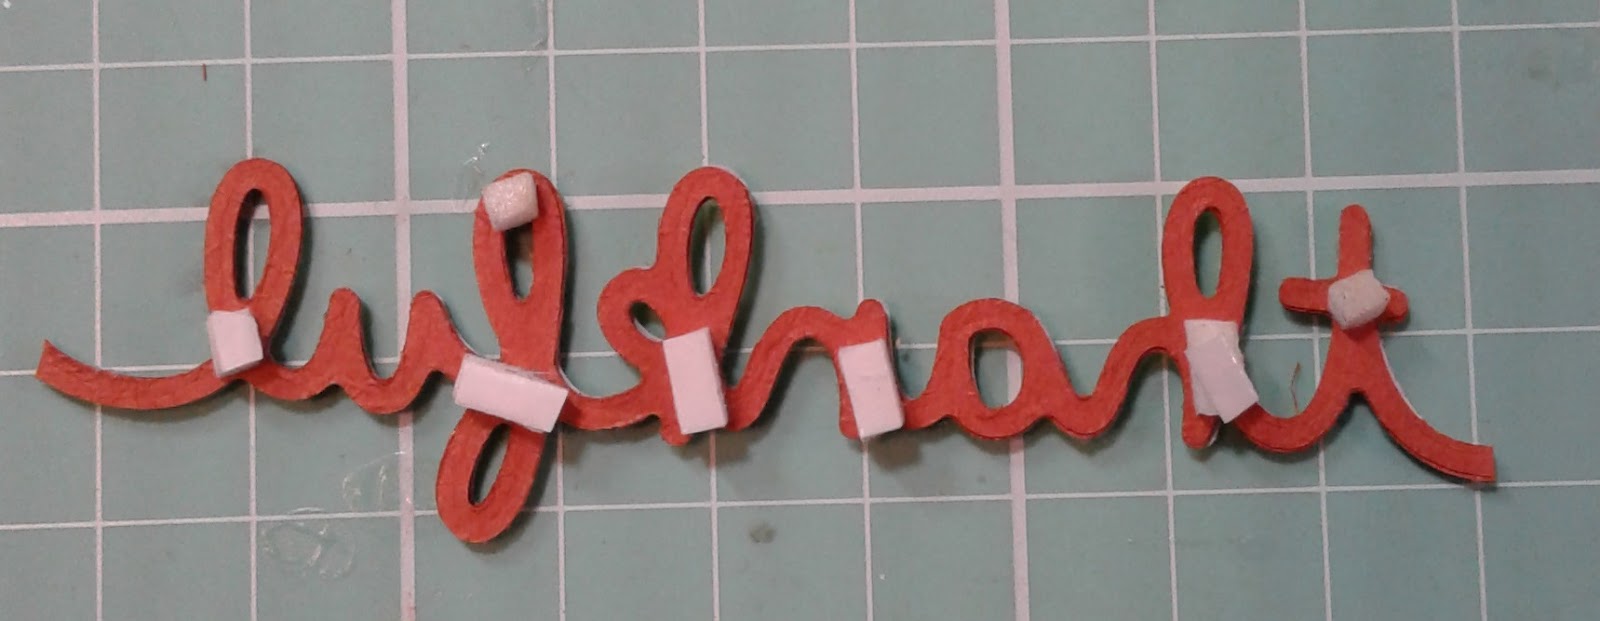
Once the wreath is finished I flip it over and add foam adhesive to it. I like to use the thin strips from the foam squares

I do the same thing to the Thankful word.

Now, to place onto the front panel and card base. I used a scalloped tan card stock I had left over from another project for my front panel. I will link a scallop die set below.  I adhere the scallop front panel onto the brown card stock card base. Next, I place the wreath onto the card. Then, centering the word in the center of the wreath I place it onto the card.
  

Now, for some finishing touches. I used some sequins in three places on the wreath.
  
The card is complete. You may have noticed I lowered my wreath a bit on the card. I felt it looked better that way.


Saturday, October 27, 2018

Treats for All with Hero Arts and A2Z Scrapbooking

Hello Crafty Friends - Annie here with a fun project. Today we're creating some treat holders using the Hero Arts Spooky Labels Halloween Digital Kit.

image 0


I created two quick treat holders. Using store bought library pocket and goodie bags.

So, let's get started.

Treat Holder One:

I printed the Spooky Labels onto Orange colored cardstock. I then trimmed out the ornate label(bottom left corner). I then cut a slit in to middle of the label - so I can insert the goodie bag into it. I added a bit of adhesive to the goodie bag tab and pressed into place. 

Next, I added a treat and seal it with a bit of re-positional adhesive. Then, I decorated the label with October 31st label. I cut the label in half added a bit of purple cardstock behind the October portion and some foam adhesive. I added a bit of lime green cardstock behind the other half of the label. I layered the October portion on top of the rest of the label and adhered it to the ornate label.

Treat Holder Two:

From the printed the  Hero Arts Spooky Labels Halloween Digital Kit on Orange cardstock. I then trimmed out the spooky treats label(top left). I fishtiled one end of the label. I also trimmed a piece of purple cardstock to mat the label also fishtailing it. I punched the straight end to create a tag. I tied a bit of bakers twine to the label.

Next, I adhered the label tag to the library pocket front. Then, I added my treat to the pocket and seal it with a bit of Halloween washi tape. 

       
Quick and Simple! The  Hero Arts Spooky Labels Halloween Digital Kit does all the work for you! I hope you give them a try! 


Thank you for joining us today!!  


Annie
Supplies:
  • Hero Arts Spooky Labels at A2Z Scrapbooking
  • Recollections Brand Cardstock - Orange, Lime-green & Purple
  • Doodlebug Brand: Goodie Bag
  • Dollar Tree Brand: Library Pocket
  • Studio G Brand Baker's Twine in Black & White
  • Scotch Brand 3M Foam  & ATG Adhesive


Friday, October 26, 2018

Sugar Skull Fun with Rinea

Hello Friends - Annie here with a fun project just in time for Halloween. Today, I am making a sugar skull using the Haunted Variety Crafter's Pack This is a pretty easy and quick project.


Let's gather our supplies and get started on our project:
Plastic Skull - Dollar Tree
Plaid Mutli-Surface Paint - White
Aleene's Clear Tacky Glue
Various Dies - Spellbinders, Momenta, Sizzix, Memory Box
Tools: Paint brush, Die Cutting Machine, Scissors

I started by painting my grayish skull white. Then I set it aside to dry. 


While the skull was drying I die cut various hearts, flowers, leaves and swirls from the Haunted Variety Crafter's PackViolet/Gold Glossy Foil PaperTurquoise/Gold Glossy Foil Paper


Next, I played around with my arrangement. I pulled out a few pieces of the New Foil Paper Shreds in Starstruck Fuchsia/Fuchsia Foil Paper I used it to right down the front of the head to the tip of the nose. I just adhered the shapes to the skull with the Aleene's Clear Tacky Glue. The liquid glue gives you a bit of wiggle room to adjust the shapes as needed. What I do love about Rinea Foil Paper is that it holds it's shape. Which is perfect for those heart shapes around the eyes and the flowers inside of the eyes. Below are various photos showing all the shapes adhered to the skull. 


You can make this as colorful as you would like or monochromatic. It's totally up to you. That's it you have now created a sugar skull for your Halloween decorations.

Thank you for stopping by today - I hope you create a project or two with the wonderful Rinea Foil Paper and share them with us on Social Media!!