
Hello Crafty Friends - I am here with a fun Holiday gift box featuring
our New Release Rinea: Merlot/Merlot Starstruck Foiled Paper
Using the Holiday Star Box SVG file from Simply Crafty SVGs
I created this wonderful Holiday Star gift box.


Materials Used
Bazzil Basic Cardstock: Green
Art Glitter Glue
Brother Scan N Cut Machine
Let's get started!
I cut all the pieces for the box using my Brother Scan N Cut Machine. I cut the box pieces from green cardstock. I then cut the decorative pieces of the box from
All the pieces:
2 green lid side panels, 5 green start pieces, 2 green box bottom pieces,
1 Rinea: Merlot/Merlot Starstruck Foiled Paper inside panel,

The Lid
This is the fussiest part of the box. So, take your time with it,
I adhered the decorative Rinea: Merlot/Merlot Starstruck Foiled Paper onto the lower section of lid side panels. then, I adhered the Rinea: Gold/Gold Glossy Paper to the upper section of the lid side panels.


Next, I adhered the two sections of the lid sides together.

Star section
This is the fussy part of the lid.
I start by adhering the Rinea: Merlot/Merlot Starstruck Foiled Paper onto one section of star panels. then, I adhering the Rinea: Gold/Gold Glossy Paper onto the other side.
I repeat this to all the start panels.

Next, I put adhesive onto the tab of one of the star section and press them into place. This will form one of the points of the star. I repeat this to the rest of the star panels.


Next, I put some adhesive onto 2 of the tabs on the side of the star panel and press them into place. This will start creating the star. I repeat this with all the star panels until I have a full star.


This is the top of the star and the bottom. We will be covering the bottom. Set it aside.


Then, I put some adhesive on the tab of lid side panels and press into place. The star shape will form once the tabs are secure.


Next, I put adhesive onto the star tabs and press them onto the lid side panel we just made.
This will take some time to work just take your time.


The star lid is formed.


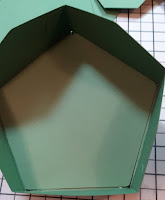
Next, I adhered the green panel to the inside of the lid.
This will cover all the tabs and make the inside look more finished.

The Box Bottom
I folded all the score lines.

Next, I glued the tabs on the side section together. Then, I put some adhesive on all the bottom tabs and press the base onto them. I turn the box over and press on the inside of the box to make sure its all secure.


Finally, I adhere the Rinea: Merlot/Merlot Starstruck Foiled Paper panel
to the inside to make it look nicely finished.


The finished box size is 4.9” x 4.7” x 3.8” tall.
Now the Holiday Star Gift Box is complete!


Thank you for stopping by the blog today. I hope you found some inspiration!


