Showing posts with label Distress Oxide Inks. Show all posts

Wednesday, October 20, 2021

Magic About Card with Fairy Stamper

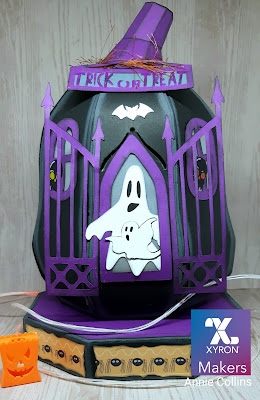
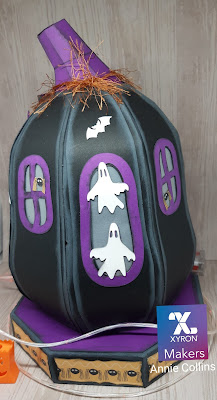
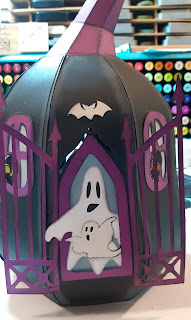
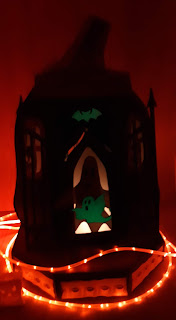
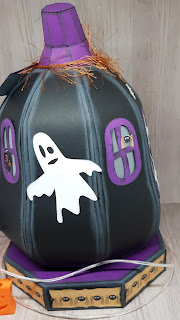
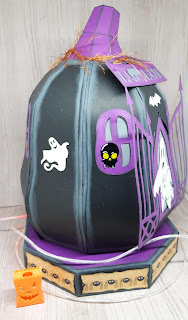
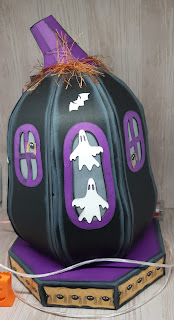
Hello Crafty Friends - Annie here with a lovely scene card featuring a variety of Fairy Stamper products.


Video Tutorial

Products Used:
Fairy Stamper Stamp: About You - FHS-129
https://tinyurl.com/rrjmsecv

Fairy Stamper Stamp: Moon Dust - FHS-207
https://tinyurl.com/dd4mv6z5

Fairy Stamper Stamp: Wreath Builder -FHS-229
https://tinyurl.com/aaankxyc

Fairy Stamper Stamp: Meadow Grass-FHS-220
https://tinyurl.com/ycnf672h

Fairy Stamper Stamp: Fancy Birds - FHS-207
https://tinyurl.com/4fh5wy97

Distress Oxide Ink: Dusty Concord
https://tinyurl.com/4nt6y8bz

Distress Oxide Ink: Blueprint Sketch
https://tinyurl.com/5883hb95

Distress Oxide Ink: Speckled Egg
https://tinyurl.com/v8anmjrc

VersaFine Clair Ink: Nocturne
https://tinyurl.com/c74h3dnu

Cosmic Shimmer Pixie Powder: Midnight Blue
https://tinyurl.com/4v274rpv

Gel Press: Gel Plate 6x6
https://tinyurl.com/2dd2skj5

Fairy Stamper: Tape
https://tinyurl.com/96d4bmft

Art Glitter Glue
https://tinyurl.com/3b6fkxrv

Royal Brush: Soft Grip Fan Brush Size 4
https://tinyurl.com/h98tsuzx

Speedball Brayer
https://tinyurl.com/hdc6ppsc


Thank you for stopping by the blog today. I hope you found some inspiration!

Fairy Stamper Resident YouTube Artist
Annie Collins

Friday, November 13, 2020

Wednesday, October 14, 2020

Wednesday, September 9, 2020

Grateful Fairy Card with Lavinia World

Hello Crafty Friends - I am here with a fun fall card featuring Harietta Fairy. 
You can purchase Harietta at the Lavinia World store

You can also join us at our FB Group for inspiration. As well as our Challenge group.


This is the card I created.


Here is the Video Tutorial.


Supplies Used from Lavinia World: 

Other Supplies:
 Copic Markers: 
Skin: E0, E11 & E93
Lantern: Y17 & YR09  
Dress:V04, V06, Y02 & Y04
Wings: B01 &BO2

Thank you for stopping by today. I hope you found some inspiration!

Friday, August 21, 2020

2 Cards using Pencil Me In Set with Joy Clair Designs

Hello Crafty Friends - I am here with 2 cards today featuring our 

Pencil Me Digital Stamp Set, Illustrated by Lindsay Adreon,
features 27 images and sentiments that can be separate for multiple uses. This set is designed to put color to the life. Twenty seven illustrations and sentiments. Exclusive Digital Download purchase includes files in 3 formats: Regular PDF, PNG and JPEG


Here are the 2 cards I created with this set.


Wishing You A Colorful Day

Materials Used:
Copic Markers: Paint Brush - C1, C2, YG06, YR12, YR68

Tim Holtz Distress Oxide Ink: Mermaid Lagoon
Tim Holtz Distress Oxide Ink: Squeezed Lemonade
Tim Holtz Distress Oxide Ink: Twisted Citron
Tim Holtz Distress Oxide Ink: Wilted Violet
Zig Wink Of Stella: Clear Shimmer
MFT: Stitched Fishtail Sentiment Banners
Recollections Brand 110lb Cardstock: White
The Paper Studio Brand Pattern Paper: Bright Blocks
Accent Brand 80lb Ultra Smooth Cardstock: Bright White
Doodles Paper Playground Sequins: Lavender, Yellow. Lime & Lagoon
Art Glitter Glue
Jot Brand: Thin Foam Tape


Pencil Me In Card
Materials Used
Copic Markers: Pencil & Hearts: Y00, Y02, Y32, C5, R20

American Cards Project Life Card: Teen Collection
In Love Arts Die: Stitched Label
Tim Holtz Distress Oxide Ink: Worn Lipstick
AC-Amy Tangerine: Rise and Shine Collection
Recollections Brand 110lb Cardstock: White
Recollections Brand 65lb Cardstock:  Black and Pink
Accent Brand 80lb Ultra Smooth Cardstock: Bright White
Fimo: Tiny Hearts & Stars
Art Glitter Glue
Jot Brand: Thin Foam Tape


Thank you for stopping by the blog today. I hope you found some inspiration!

Please remember to join us on Social Media.

Wednesday, July 15, 2020

Hello Friend Fairy Card with Lavinia World


Hello Crafty Friends - I created this tone on tone shimmery night Hello Friend Fairy card.
Using a variety of products from Lavinia World store.


Lavinia World store: https://laviniaworld.com/
Anything Lavinia Facebook group: https://www.facebook.com/groups/AnythingLavinia/


Video Tutorial

Items Used: 

Distress Oxide Inks: 

Strathmore Bristol Smooth 100lb Cardstock
Recollection Brand 110lb Cardstock: White
Recollection Brand 80lb Cardstock: Medium Blue
Colorbok Brand Glitter Cardstock: Blue
Imagine Crafts: On Point Glue
Jot Brand: Low Profile Foam Adhesive
3M Tacky Glue 

Thank you for stopping by the blog today. I hope you found some inspiration! 

Resident Artist/Design Team Member 

Annie Collins

Wednesday, July 1, 2020

Christmas in July with the Die Cut Divas

Hello Crafty Friends - I am here with a fun Christmas window shaker card 
as my DT project for Die Cut Divas.


our new challenge this month-  Celebrate Christmas in July!


And our wonderful sponsor is-


Cheapo Dies has increased its inventory with the addition of well-known die brands like
 Elizabeth Craft Designs, Memory Box, Sizzix, Hero Arts, PoppyStamps, Lawn Fawn, and a whole lot more. Be sure to check Cheapo Dies out here.

Cheapo Dies offers a $15 gift certificate as the prize for our winner of the July challenge, 
so get started on the Christmas cards!

Here's my card.

A close-up of the shaker.

Materials Used:
Tattered Lace Pattern Paper
Recollections Brand 65lb Cardstock: Light Red, Red, Light Green, 
Green, Kraft, Cream, and White
Recollections Brand 65lb Cardstock: Gold Foil Kraft Cardstock
Recollections Brand 110lb Cardstock: White (card base)
Doodles Paper Playground: Sparkle Blends
Tim Holtz Distress Ink: Tumbled Glass and Dusty Concord
Tim Holtz Distress Oxide Ink: Forest Moss, Vintage Photo, and Victorian Velvet
Hero Arts Ink: Hero Hues Unicorn
Zig Wink of Stella Pen: Clear
L.A. Colors Mini Gems: Gold
Darice Brand: Thin Foam Tape
Acetate

Thank you for stopping by the blog. I hope you found some inspiration!

Don't forget to join the challenge over at The Die Cut Diva's Blog

Wednesday, June 3, 2020

Hello Card with Lavinia World

Hello Crafty Friends - I am here with a Hello Card featuring 3 Lavinia stamps.
This card is quick and easy.


Supplies used are from Lavinia World Store


Here's the card I created.

Materials Used

Stamps and Dies 
Mama Elephant Hello Die 

Inks 
Imagine Crafts Sheer Shimmer Spray 

Papers 
Strathmore Bristol Smooth 100lb Cardstock 
Recollections 110lb Cardstock: White and Black 
Simon Say Stamps Brand: Masking Paper 

Embellishments 
Recollections Brand Sequins: Tiny Black Hearts


Here's the video tutorial of how I created this card

Please share your cards/projects with us at Lavinia World Challenges
The winner receives a $15 USD coupon to spend at Lavinia World!


On Facebook

Our Youtube Channel 

Follow us on Instagram 

Thank you for stopping by the blog today. I hope you found some inspiration! 

Lavinia World Design Team Artist

Annie Collins

Friday, May 15, 2020

Party Cupcake on a Stand with Simply Crafty SVGs

Hello Crafty Friends - I am here with a cute cupcake box and a small stand perfect for your next party. You can place a cupcake in your cupcake or use it as a goodie box. Create it larger for a gift box.

I am using the New release Cupcake SVG file and Cupcake Stand SVG file 

Simply Crafty SVGs files are so easy to use, you're provided with a PDF and video tutorial for each file in the shop.

Here's my take on this fun Cupcake SVG file and Cupcake Stand SVG file


Materials used:
Simply Crafty SVGs: Cupcake SVG file 
Simply Crafty SVGs: Cupcake Stand SVG file
DCWV Pattern Paper: Good Eats Collection
Recollections Brand Cardstock: Kraft and Light Green
Tim Holtz's Distress Oxide Inks: Broken China, Cracked Pistachio, 
Vintage Photo, and Worn Lipstick
Fiskers Brand: Scollaped Punch and Crimper
Sizzix Brand: Thinlit Die - Party
Aleene's Tacky Glue
Brother Brand: Scan n Cut CM350

 Thank you for stopping by the blog today. I hope you found some inspiration!

Be sure to join the Simply Crafty SVGs Creators FB Group and share your creations with us.

Thursday, January 30, 2020

Sweet Love Card with Dies R Us

Hello Crafty Friends - I am here with a lovely and easy Valentine's Day card or just a love card.

I only used dies and a bit of ink to create this card - which makes it easy to make multiples if needed.


Here's the card I created.

I gathered all the dies, cardstock and specialty paper. I die cut all the components for the card. 

I then used Distress Oxide ink in Bundled Sage to color the stems of the blooms. Next, I used Distress Oxide in Tattered Rose for the buds.
  

I trimmed one of the buds off the stem. I will use this stem for my hearts. 
I  adhered the hearts to the stem.
  
Next, I adhered the lattice to the pink cardstock panel.
 Now, I am ready to adhere the blooms to the panel.
 

I start by tucking the first bloom at the bottom left of the panel. Then I follow with the heart buds and then I finally trim and tuck the last bloom.
  

Next, I adhered the sentiments die cuts to the top right-hand corner of the panel. I then adhered the card front panel to the card base.

For finishing touches, I adhered a few Jewels in red, pink and white.
Now, the card is complete.

Material Used

 ScrapMan - Dies - Bloom

Sue Wilson Designs - Shadow Boxes -  Stitched Lattice Frames


Distress Oxide Ink Pad - Tattered Rose
Distress Oxide Ink Pad - Bundled Sage
Nuvo Deluxe Adhesive

Recollection Brand 110lb Cardstock:  White
Recollection Brand 65lb Cardstock: Light Pink
Die Cuts With a View: Pink Shimmer Cardstock
Jot Brand Foil Cardstock: Red
Elle Tru Jewels: White, Pink and Red
Crafter's Edge Crossover II Machine

Thank you for stopping by the blog today. I hope you found some inspiration!


Before I write the list of the supplies I used, I wanted to share some exciting news with you.  Dies R Us now has a sister store called Didi Crafts, which has warehouses located in the USA and Canada.  Didi Crafts carries some of the same products as Dies R Us, but most are different and you will be able to purchase a huge variety of crafty supplies for a variety of crafts.  Having this sister store means that our Canadian crafting friends won't have to worry about huge taxes or shipping fees.  Isn't that great?!  Go take a peek and be pleasantly surprised!

Don't forget to come and join in the fun at the Dies R Us Challenge Blog. There's a new challenge theme offered on the 1st and 15th of each month and one lucky randomly drawn winner will receive a gift voucher prize to the Dies R Us Store. For your convenience, all the important Dies R Us links are provided below.

Saturday, January 11, 2020

Sending You Love with Doodles Paper Playground

Hello Crafty Friends - I am here with a fun Valentine's Day/ Love card.

I used Doodles Paper Playground Sparkle Blend: Grapefruit and Sparkle Blend: Awesomesauce for this card. I love fun pinks, yellows, happy face and flowers from these blends.

Sparkle Blend: Grapefruit


Sparkle Blend: Awesomesauce 

Here's the card I created. I placed one of the fun happy faces on the top, and a flower and tiny flat sequins on the hat of Winter Marcie.

Materials Used:
 Doodles Paper Playground Sparkle Blend: Grapefruit 
Doodles Paper Playground Sparkle Blend: Awesomesauce 
Lala Land Crafts Stamps: Winter Marcie
Clearly Besotted Stamps: Bah-Hum-Bug (sending you)
MFT Die: LOVE
Nuvo Alcohol Markers: 473, 475, 477
Distress Oxide Ink: Worn Lipstick
Prismacolor Color Pencils: Pink PC 929, 
Pink Rose PC 1018,  & Salmon Pink PC 1001
Sakura Gelly Roll Pens: White & Gold
Imagine Crafts: On Point Glue
Imagine Crafts: Tear It Tape
Spectrum Noir Markers: CR2, CR3, CR5,  CR6, 
IG3, IG4, IG5, IG6, IG7, LY2, LY3, GY2,
 MG1, TB2 & Blender
Recollections Brand 65lb Cardstock: White, Yellow & Pink
Recollections Brand 110lb Cardstock: Cream & White (card base)

Thank you for stopping by the blog today. I hope you found some inspiration!

Be sure to tag us Doodles Paper Playground on social media -
if you create a project with our Sparkle Blends. 

There is also a new Facebook group where you can share 
creations you have made with Sparkle Blends!
Come check it out, share some inspiration!

Monday, October 21, 2019

Halloween ghostly Pumpkin With Xyron

Hello Crafty Friends - I am here with a fun 3D Project using Xyron's Creative Station Lite and Xyron Teresa Collins Mega Runner with 1/4" adhesive.

I used the Ghostly Pumpkin cut file from Simply Crafty SVGs for my project today.

Here's my Project. 


I added some Glow in the Dark Ghosts and Bats.

Let's get started!

I am going to break it down into sections. It will be easier to follow this way.
I start by downloading the Ghostly Pumpkin cut file and then uploading it into my Brother Canvas Workspace Software. **(if you have another electronic die cutting machine you can use that. If you don't you can use the PDF as a reference)

I then cut all the pieces I need to create the Ghostly Pumpkin. Then, I get some Distress Oxide Inks to ink the edges of the papers.

I ink the Black pieces with Hickory Smoke Distress Oxide ink and the Purple pieces with Black Soot Distress Oxide ink.

Next, I run the outer panels of the pumpkin, the windows, door ghosts, bats, spiders, and small decorative panels through Xyron's Creative Station Lite. This will make decorating the pumpkin quick and easy.

Pumpkin Base Assembly
The base pieces are numbered 1-8. I put some Mega Runner adhesive on the tabs and start adhering the panels together. Take your time with this it's your foundation. You want to move slow to make sure your pumpkin forms nicely.


When all the panels are adhered your pumpkin base is done.

The Stem Assembly
Now, the stem is small and can be a bit tricky. but if you take your time you can do it. I added Mega Runner adhesive to all the tabs. 

Next, I adhered the two pieces together. 
The stem will have a tilt to it. Then, I adhered the ends together. 
  

Next, I pushed down on all the small tabs of the top of the stem. I slowly line up the top flap and press in place. Then, I insert the stem into the pumpkin and press the tabs onto the inside of the pumpkin. **(you can decide which way you want your stem to be. Tilt to the left, right or back)


Outer Panels
I cut the panels apart. The Xyron Creative Station Lite strip is long and I want to work with each panel individually. I gently shape each panel to match the form of the pumpkin base. **(You can emboss your panels using an embossing folder. I chose not too. I chose to ink my edges). 
 

Next, I peel one end of the panel and place it onto the pumpkin base. I then slowly remove the backing of the Xyron Creative Station Lite strip and press the panel into place. The Xyron Creative Station Lite makes this part so easy. No messy glue to worry about just peel and go.
  

Door and Windows
I remove the plastic cover from the door and windows. I gently start placing them onto the pumpkin. Again, the Xyron Creative Station Lite makes this part so easy. No messy glue to worry about just peel and go. I start with the door frame then move onto the windows.
 

I decided I wanted to add a bit of vellum to my windows. You don't have to do this if you prefer not to. I just cut small rectangles of vellum and using the Xyron Teresa Collins Mega Runner with 1/4" adhesive I just ran a bit of the adhesive on the edges of the vellum and press into place. I just did this on the inside of the pumpkin.
  

Decorating the Ghostly Pumpkin
I started with the ornate gate for the door.  I simply used the Xyron Teresa Collins Mega Runner with 1/4" adhesive on the small side of the gate and then pressed the gate into place next to the door. One gate door on either side of the door opening. 
 

Next, I placed the ghosts in the door and window, along with some spiders, bats, and skulls
I cut some glow in the dark ghosts and bats from pattern paper. I thought it would give a fun effect. **(if you can't find this glow in the dark pattern paper. You can always heat emboss your ghost with some glow in the dark embossing powder or use some glow in the dark paint).


Platform Assembly
I added some Xyron Teresa Collins Mega Runner with 1/4" adhesive. to all the tabs(small triangles) of the platform.  Then, I press the side up onto the tabs. Making sure the tabs are inside. 


Next, I put some Xyron Teresa Collins Mega Runner with 1/4" adhesive on the edge of the black octagon panel and press it onto the platform to close the base.
  

I flipped the platform over and adhered the purple octagon onto the platform base. Then, I added the pattern paper panels to the platform base edge. Again, quick and easy because of the Xyron Creative Station Lite 


Sign Assembly
This is a simple one. I added adhesive using Xyron Teresa Collins Mega Runner with 1/4" adhesive on the edge of the backside of the word part of the sign. I press it onto the gray cardstock piece and the sign is ready for some string to hang it.
  

I used a bit of Eyelash yarn for some whimsy. I simply strung the yarn through the top part of the sign and wrapped it around the stem and tied a knot on the back. I added a bit of adhesive on the back of the sign to secure it in place. I also added a bit of Nuvo Glitter Drops in white blizzard for a bit of sparkle.
 

Now, the Ghostly Pumpkin is complete!

With the lights off - showing the glow in the dark ghost and bat


Materials Used:
Xyron Creative Station Lite
Teresa Collins Mega Runner
Xyron .25" Mega Runner Adhesive Refill

CM350_frontopen


img
img
img
img

Rose Gold Yarn Bee Gilt Eyelash Yarn

Thank you for stopping by the blog today. I hope you found some inspiration!