Showing posts with label Lawn Fawn Stamps. Show all posts

Tuesday, January 14, 2020

2 Shopping/List Pads with Imagine Crafts


Hello Crafty Friends - I am here with a fun project featuring a variety of Imagine Crafts products.

They are 2 list pads. One is for right-handed people and the other is for left-handed people.
Below you will find a YT video on how I created them.


Here's the YT video showing you how to make them.
Materials Used
Imagine Crafts/Tsukeniko Products
Memento Dew Drop Ink: Desert Sand 
Memento Dew Drop Ink: Bamboo Leaves 
Memento Dew Drop Ink: London Fog
Memento Ink Pad: Tuxedo Black
VersaFine: Onyx Black
Imagine Crafts: Tear It Tape
Other Products Used:
My Favorite Things: Limelight 3-1/2"x5-1/2"
Accent Brand 80lb: Ultra White Smooth 2"x2"
Lawn Fawn Stamp Set: Let's Toast
Dollar General Brand: Mini Legal Pad Post-it
Scraptastic Stamp Set: Take Note
Sakura Gelly Roll Pen: White
Spectrum Noir Markers: CG1, MB1, LG5

Thank you for stopping by today. I hope you found some inspiration!

Thursday, November 21, 2019

Thanksgiving Table Decorations with Xyron

Hello Crafty Friends - I am here with some fun Thanksgiving table decorations.

I used my Xyron Creative Station Lite and Xyron Mega Runner along with cut files from
  Simply Crafty SVGs for these wonderful decorations.


Let's begin!

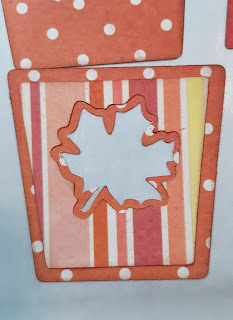
I start by cutting  The Autumn Takeout Box  SVG files on my Brother Scan N Cut CM350. I then inked all the edges of the papers and shapes. I also die cut a few extra leaves to decorate the sides of the box.

I ran all the decorative panels and leaves through the Xyron Creative Station Lite for easy no-mess application.

Next, I layered the decorative panels. I then placed them onto the box fronts. 
  

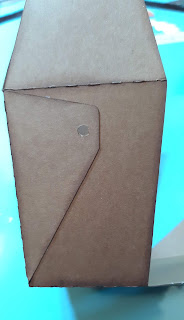
I then used some Xyron Mega Runner on the inside of the side panels of the box. I pressed them into place. Making sure that the holes line up. 
  

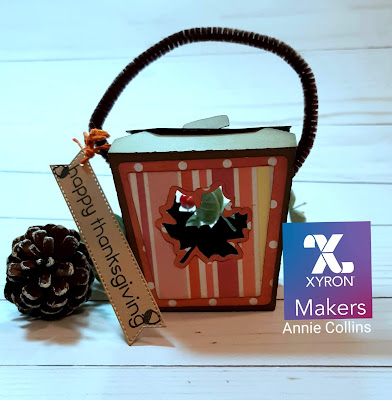
Now, that the box is formed, I add a Pipe Cleaner into the holes and curl the ends to hold. You can put some Xyron Mega Runner for extra hold. I didn't because I want the handles to move. I then decorated the sides with some leaves. One of the leaf from the front cut out panel and a Gold die cut leaf.
 

Fill your box with goodies (I will be doing this Thanksgiving Morning). Close the box by simply sliding the tab through the slot.
 

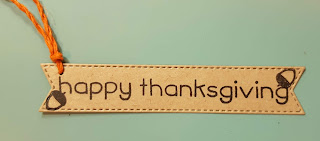
I die cut a fishtail sentiment banner and stamped Happy Thanksgiving along with a few acorns in Memento Dew Drop: Brown Sugar. I then punched a small hole in the corner and tied some DMC floss in a medium Orange. I attached the tag onto the box handle.
 

Now the box is complete!
Materials Used:
Brother Scan N Cut CM350
Crafter's Edge Crossover II Die Cutting Machine
Memento Dew Drop: Brown Sugar
DMC Floss: Medium Orange
Distress Ink: Ground Expresso
Darice Brand: Pipe Cleaner- Brown
Scenic Route Paper Co: Sentimental Silly Strip/Dot Pattern Paper
SEI Brand: Kraft Basic Foil Cardstock - Gold
Recollections Brand Cardstock: Kraft
Impression Obsession Dies: Leaf
Lawn Fawn Stamp: Forest Feast


Let's begin!

I start by cutting The Pilgrim Hat Box SVG files on my Brother Scan N Cut CM350. I then inked all the edges of the papers and shapes. I also die cut a few extra leaves to decorate the sides of the box. I also ran my hat top panels through the Crafter's Edge Crossover II Die Cutting Machine along with a Fiskars Embossing template - Carpet.

Next, I ran all the leaves through the Xyron 3" Disposable Sticker Maker

To create the bottom of the hatbox I added some Mega Runner adhesive to the side tab and pressed the other panel into place. I then added some Mega Runner adhesive to the other tab and pressed the side into place. I added some more Mega Runner adhesive to the inside of the top tabs and pressed the small hexagon to the inside of the bottom section of the box I just formed. The tabs will be hidden by the circle. I then adhered the hexagon box onto the circle base - making sure to center it.


To create the top of the hat. Simply run some Mega Runner adhesive onto the tab of the section of the hat that has the hexagon top attached to it. Press the other section onto the tab. Next, apply some Mega Runner adhesive onto the tabs and press the Hexagon top down onto the hat form.


To create the band simply apply some Mega Runner adhesive to one of the tabs. Press the other tab onto it. 
 

Slide the buckle onto the band. You can add a bit of Mega Runner Adhesive to the middle bar of the buckle to hold it in place.
 

Add the decorative leaves to the side of the hat.

Now, the Pilgrim Hat box is complete!
Materials Used:
Brother Scan N Cut CM350
Crafter's Edge Crossover II Die Cutting Machine
Distress Ink: Ground Expresso
Darice Brand: Pipe Cleaner- Brown
Scenic Route Paper Co: Sentimental Silly Strip/Dot Pattern Paper
SEI Brand: Kraft Basic Foil Cardstock - Gold
Impression Obsession Dies: Leaves
Recollections Brand Cardstock: Black
Fiskars Embossing template - Carpet

Thank you for stopping by the blog today. I hope you found some inspiration!

Thursday, October 31, 2019

Happy Thanksgiving Card with Dies R Us


Hello Crafty Friends - I am here with a fun interactive card featuring Lawn Fawn Products.

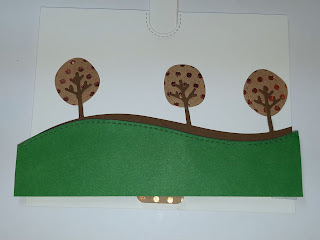
This is the card I created. The second image shows the hidden Chickie and sub-sentiment.


Let's get started.

I stamped, colored, fussy cut the images. I die cut all the components for the card.

Next, I start assembling the card. I adhered the trees first because I need to die cut the slot for the pull tab through the tree layer. I line up the slot die with the notch at the top of the card and run it through my Crossover II die-cutting machine.
 

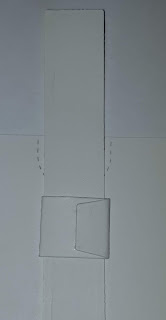
Then, it's time to work on the pull tab. I first fold on the scoreline close to the long pull handle. I fold inwards towards the pull handle. Then, I fold on the next scoreline away from the handle.
 

Next, I slip the pull handle through the slot I created on the card panel. I then cover the folded section with adhesive and placed a piece of pattern paper onto it. *Note: I covered the fold section because my image is smaller than the folded section. If your image is the same size or a bit larger than skip this part.
 

Then, I folded on the scorelines of the pull handle holder. * Not sure if that's the real name for this piece but it's what I am calling it for now.

I adhere it to the back of the card panel beneath the pull handle. Making sure the handle is straight. Then, I wrap the handle holder around the handle and adhered the small tab onto the larger one.
 

Then, I adhered the first layer of grass using foam adhesive. Making sure that the pull handle mechanism isn't obstructed. 
 

Next, I trim off the extra of the pull handle. I do this by checking with my image is well covered by the first layer of grass. I then adhered the decorative arrow tab to the top of the pull handle.
 

Then, I adhered the top layer of grass. I gathered all my images and start decorating my card by creating the little Forest Feast.
 

Once, my scene is adhered in place I then add my sentiment to the top left corner of the panel. I just tucked it under my trees to anchor it to the scene. I then adhered the card front panel to a Kraft card base to complete my card.


Materials Used:
Lawn Fawn - Forest Feast Stamps

 Lawn Fawn - Party Animal Stamps

Lawn Fawn - Let's Toast Pull Tab Add-On Dies

Lawn Fawn - Stitched Tree Borders Dies

Lawn Fawn - Stitched Hillside Borders Dies

See the source image

Best Glue Ever

Thermoweb - 3D Foam Squares Combo Pack - White .25" &  .5"
Other supplies:
Recollections Brand Cardstock: White, Kraft, Green & Brown
Recollections Brand Specialty Cardstock: Copper dot on Kraft & Solid Copper
Sakura Gelly Roll Pens: White & Black
Tsukineko Ink: Memento -Tuxedo Black
Tsukineko Ink: Versafine - Onyx Black
Spectrum Noir Alcohol Markers

Thank you for stopping by the blog today. I hope you found some inspiration!

Don't forget to come and join in the fun at the Dies R Us Challenge Blog. There's a new challenge theme offered on the 1st and 15th of each month and one lucky randomly drawn winner will receive a gift voucher prize to the Dies R Us Store. For your convenience, all the important Dies R Us links are provided below.