Showing posts with label Design Team Work. Show all posts

Monday, July 20, 2020

You Are My Sunshine Slimline Shaker Card with The Maker's Movement

Hello Crafty Friends - I am here with a fun slimline shaker card featuring

I have a video tutorial posted below.

You can shop for them at The Maker's Movement.


Card Tutorial Video

Items Used:


Other:
Canson: Watercolor paper
Artist Loft: Watercolor Palette
Artist Loft: Shimmer Watercolor Palette
Darice Brand Sequins: Gold Squares, Gold Round, and Opal Round
LA Colors Mini Gems
Elle Tru Jewels
Recollections Brand 110lb Cardstock: White
Recollections Brand Acetate
Craft Foam Adhesive
3M Scotch Brand Liquid Adhesive
Tsukineko Versafine Clair Ink: Nocturne


Thank you for stopping by the blog today. I hope you found some inspirations

Maker's Movement Design Team
Annie Collins
IG: @anniec09

Wednesday, July 15, 2020

Hello Friend Fairy Card with Lavinia World


Hello Crafty Friends - I created this tone on tone shimmery night Hello Friend Fairy card.
Using a variety of products from Lavinia World store.


Lavinia World store: https://laviniaworld.com/
Anything Lavinia Facebook group: https://www.facebook.com/groups/AnythingLavinia/


Video Tutorial

Items Used: 

Distress Oxide Inks: 

Strathmore Bristol Smooth 100lb Cardstock
Recollection Brand 110lb Cardstock: White
Recollection Brand 80lb Cardstock: Medium Blue
Colorbok Brand Glitter Cardstock: Blue
Imagine Crafts: On Point Glue
Jot Brand: Low Profile Foam Adhesive
3M Tacky Glue 

Thank you for stopping by the blog today. I hope you found some inspiration! 

Resident Artist/Design Team Member 

Annie Collins

Thursday, June 11, 2020

Happy Father's Day Card with Rinea

Hello Crafty Friends - I am here with a quick and easy Father's day card 

Just like our other beautiful Foil papers, it comes in both Starstruck Cobalt and Glossy Cobalt.

Materials Used:

Let's get started!

I gathered all the supplies and then I die cut the Rinea Foil Paper: Starstruck Cobalt with Lawn Fawn Cross-Stitched Rectangle Die and the Rinea Foil Paper: Glossy Arctic White/ Gold with the MFT Stitched Fishtail Sentiment Strip. I also punched out the Craft UK Vintage Bikes pieces I needed.
Next, I ran the base of the bike and the Rinea Foil Paper: Starstruck Cobalt panel through the Xyron Creative Station Lite. 
 

Now, that all the pieces are ready I placed the Rinea Foil Paper: Starstruck Cobalt panel onto the black card front panel. Then, I layered the bike base onto the Rinea Foil Paper: Starstruck Cobalt 
I then added some foam adhesive to the other pieces of the bike and place them on top of the bike's matching base.
 
You will have some nice dimension to the bike (as you can see below).
 

Next, I took the Hero Arts - Happy Father's Day stamp along with the StazOn Ink and stamp it onto the Rinea Foil Paper: Glossy Arctic White/ Gold banner strip.  I gave it some time to dry(if you want to move quickly you can use a heat tool to set the sentiment). Then, I used some foam adhesive and adhered the sentiment to the left top of the card front panel. I then adhered the card front panel onto a white card base. 

I added a few Dew Drops for a finishing touch.

Thank you for stopping by the blog today. I hope you found some inspiration!

Please tag us on social media if you create any project using any of our wonderful Foil Papers!
Don't forget to stop by the shop Rinea.com

Wednesday, June 10, 2020

You are BEAR-Y Special Card with Doodles Paper Playground

Hello Crafty Friends - I am here with a cute Panda shaker card. I used the New Release 


You're Pand-tastic  Doodles Paper Playground: Sparkle image 0
 We've mixed lots of cute panda head-shaped Fimo slices into a basic neutral black & white blend. We've made sure to include lots of textures for extra interest with glossy black spiral sequins, Fimo rings, dots & sprinkle shapes & a wide size range of cupped sequins ranging from iridescent to satin-matte finish & a sprinkling of white mini bugle beads & black mylar crunchy beads for plenty of satisfying shakes.

Here's the cute shaker card I created.

Materials Used:
Craftsmart Stamp: Bear Hugs
Copic Markers: C1, B00, B01, and B02
Tsukineko Memento Ink: Tuxedo Black
Imagine Crafts: Tear It Tape
MFT Die: Die-namics -Blueprint 27
Sakura Gelly Roll Pens: Black and White
Recollections Brand 110lb Cardstock: Black and White
Recollections Brand 80lb Cardstock: Teal Blue
Acetate

Thank you for stopping by the blog today. I hope you found some inspiration!

Be sure to tag us Doodles Paper Playground on social media -
if you create a project with our Sparkle Blends. 

There is also a new Facebook group where you can share the
creations you have made with Sparkle Blends!
Come check it out, share some inspiration!

Wednesday, June 3, 2020

Hello Card with Lavinia World

Hello Crafty Friends - I am here with a Hello Card featuring 3 Lavinia stamps.
This card is quick and easy.


Supplies used are from Lavinia World Store


Here's the card I created.

Materials Used

Stamps and Dies 
Mama Elephant Hello Die 

Inks 
Imagine Crafts Sheer Shimmer Spray 

Papers 
Strathmore Bristol Smooth 100lb Cardstock 
Recollections 110lb Cardstock: White and Black 
Simon Say Stamps Brand: Masking Paper 

Embellishments 
Recollections Brand Sequins: Tiny Black Hearts


Here's the video tutorial of how I created this card

Please share your cards/projects with us at Lavinia World Challenges
The winner receives a $15 USD coupon to spend at Lavinia World!


On Facebook

Our Youtube Channel 

Follow us on Instagram 

Thank you for stopping by the blog today. I hope you found some inspiration! 

Lavinia World Design Team Artist

Annie Collins

Monday, June 1, 2020

Hope Your Day is Fun - Interactive Card with Maker's Movement

Hello Crafty Friends - I am here with this cute and fun card
using a variety of Maker's Movement Products.


Here is the card I created.
You can see the tutorial linked below on how I created this fun card.


Materials Used:
Lawn Fawn Pattern Paper: Spring Fling 
Lawn Fawn Stitched Hillside Border Dies 
MFT Brand: Stitched Fishtail Sentiment Die 
Doodles Paper Playground Sparkle Blends: Hey Chickie 
Xyron Creative Station Lite 
Tsukineko/Imagine Crafts Inks: Memento Tuxedo Black, 
Versa Magic: Turquoise Gem, Versa Magic: Mango Madness,
and Versafine Ink: Onyx Black 
Sakura Gelly Roll Pens: Metallic Gold and Sparkle 
Copic Markers: Y04, Y11, Y13, Y17, C1, C2, B23, B32, BG13, 
BG15, RV11, RV13, BV01, BV02, and YG17 
Accent Ultra Smooth 80lb Cardstock: Bright White 
Recollections Brand 110lb Cardstock: White

Video Tutorial - Be sure to follow me on YouTube.


Thank you for stopping by the blog today. I hope you found some inspiration!

Tuesday, May 26, 2020

What Time Is It? with Rinea

Hello Crafty Friends - I am here with a fun project using some Rinea Foil Paper and
 a Clock Kit from Plaid.

Materials Used:
Black Chipboard: 6" X 6"
Memory Box: Honeycomb Background Die
Poppystamps Brand: Little Kindness Stamp Set
Tsukineko/Imagine Crafts: StazOn Ink: Jet Black
Copic Markers: Y13, and B00
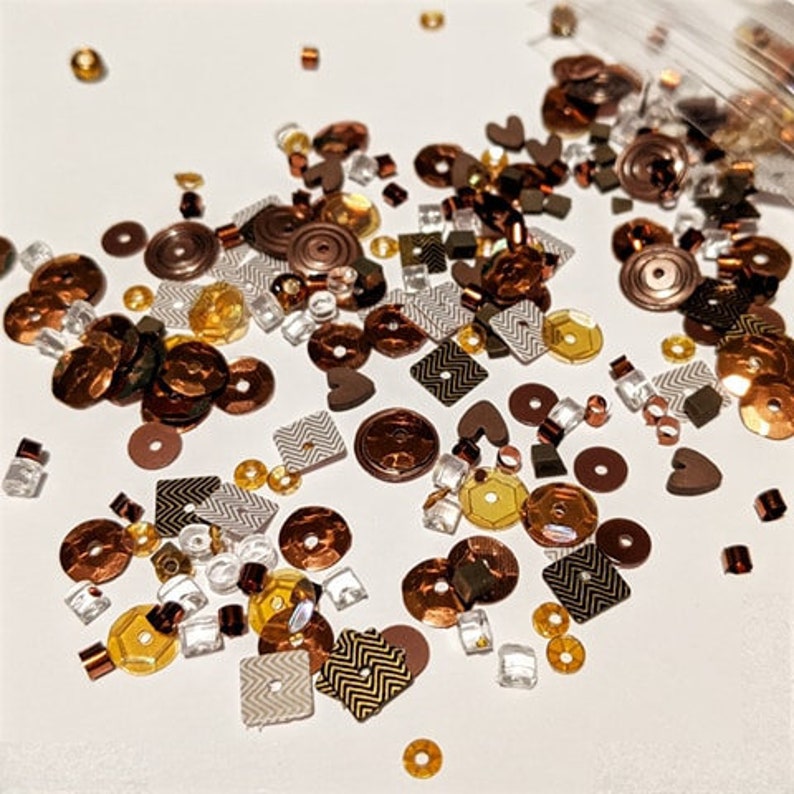
Jewels: Butter Yellow
Nuvo Glitter Drops: White Blizzard
Crafter's Edge Crossover II Die-cutting Machine

Let's get started.

I gathered all the supplies I needed for the project.

I die cut the honeycomb from Rinea Foil Paper: Starstruck Gold/Gold then I set it aside.

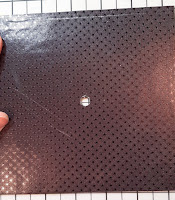
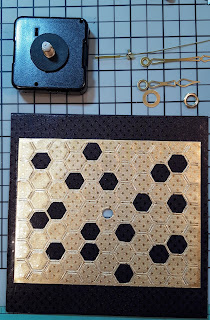
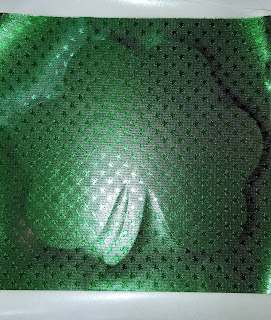
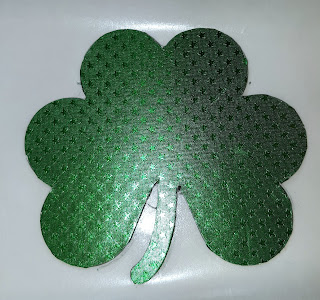
Next, I covered the Black Chipboard with Rinea Foil Paper: Starstruck Ebony/Ebony (this will be the base of the clock)I then made a hole in the center of the chipboard for the clock mechanism to fit into.
  

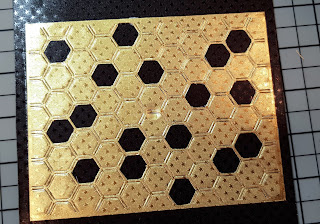
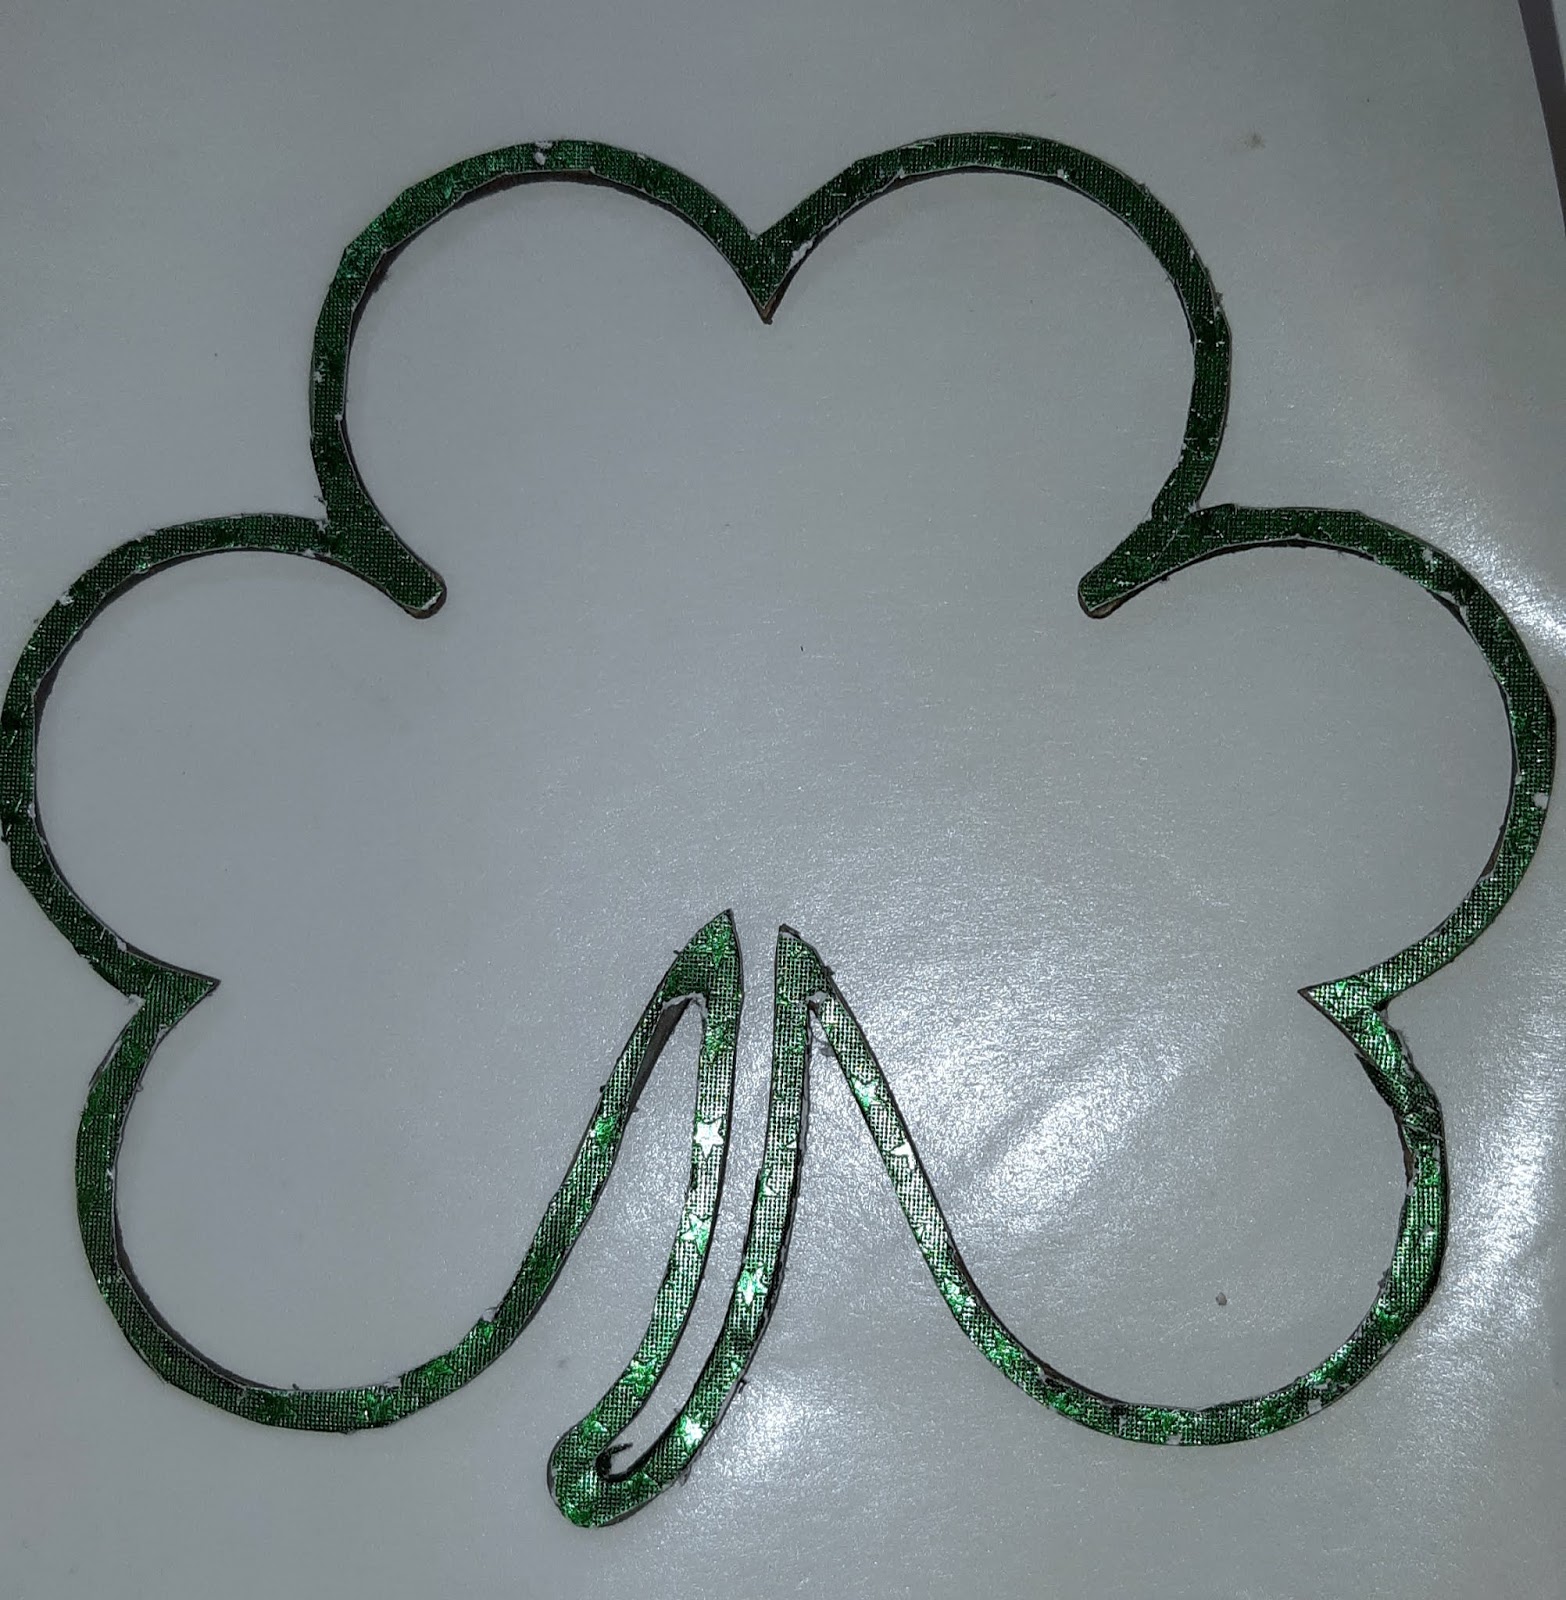
Then, I covered the base of the clock with the honeycomb panel. (I made the center hole on this panel too). I set it aside to dry completely
 

I stamped the 4 flowers onto Rinea Foil Paper: Starstruck TurquoiseTurquoise using the Poppystamps Little Kindness set, with StazOn Jet Black Ink and the Rinea Clear Round Stamp Block. I then trimmed them out. I also stamped the tiny Bee from the set onto a scrap piece of white cardstock and colored it with Copic markers.


Now, that we have all the components ready let's assemble the clock.
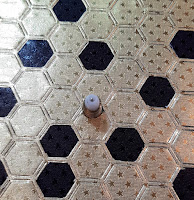
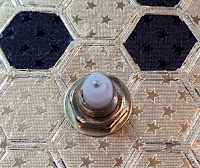
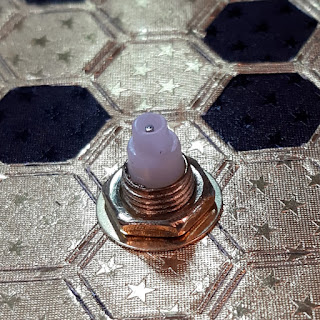
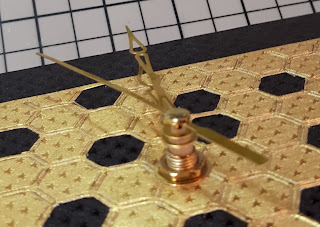
 First, insert the clock battery box from behind the clock base through the center hole. Second, slide the washer onto the stem of the clock box. Third, screw on the nut onto the stem. Making sure it is secure and tight the clock base panel. 
  

Fourth, you see the white portion of the stem - you slide the hour hand onto it until you hear it click, Fifth, you repeat this with the minute hand. 
 
 Sixth, you snap on the second hand onto the stem - pressing down until you hear it click. *Note: your hand may bend a bit during this process just gently unbend them. 

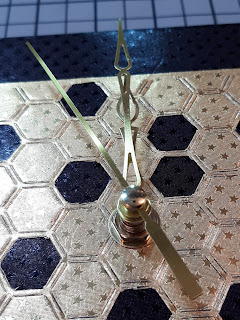
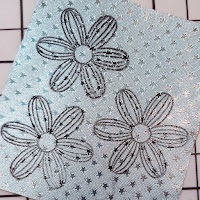
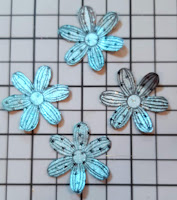
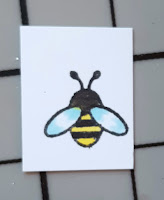
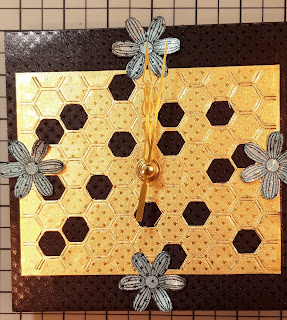
Next, we can decorate the clock with the flowers and bee. I simply placed the flowers at 12 O'Clock, 3 O'Clock, 6 O'Clock, and 9 O'Clock. I adhered the tiny bee to the second hand so he could fly around the clock. As a finishing touch, I added a few jewels to the center of my flowers and a bit of Nuvo Glitter Drops to the bee.
 

Now, the clock is complete! I hope you give this project a try. You can use any of the wonderful variety of colors Rinea Foil Papers has to offer. 

Thank you for stopping by the blog today. I hope you found some inspiration!

Please tag us on social media if you create any project using any of our wonderful Foil Papers!
Don't forget to stop by the shop Rinea.com

Sunday, May 24, 2020

Thanks A Latte with Not 2 Shabby Shop

Hello Crafty Friends - I am here with a fun Coffee card. 

Because if you know me then you know I love coffee. What goes better with coffee than donuts. Well, in my book every dessert goes perfect with coffee.

I used the wonderful digital images by Jamie from the Not 2 Shabby Shop called Cafe Latte with Whip and Donut. The price point on the digital stamps are perfect for anyone.

Here's the card I created.
Materials Used:
DCWV Brand: Pattern Paper - Good Eats Collection
Recollections Brand 110lb Cardstock: Black
Accent Ultra Smooth 80lb Cardstock: Bright White
Doodles Paper Playground: Sequins and Sprinkles
Stampabilities Brand: Coffee Set - Sentiment
Copic Markers: YG11, YG41, G12, R22, R42, E11, E13, E33, & YR24

Thank you for stopping by the blog today. I hope you found some inspiration!

Please remember to stop by the Not 2 Shabby Shop for the digital stamps and more.

Saturday, May 23, 2020

But First Coffee with Doodles Paper Playground

Hello Crafty Friends - I am here with a fun coffee themed shaker card featuring 
one of Doodles Paper Playground - May's new release Sparkle Blends called Iced Coffee.

Iced Coffee  Doodles Paper Playground: Sparkle Blends image 0
A rich, bold blend of deep brown tones sprinkled with 
Dark Coffee colored Fimo Cubes & Hearts and Clear acrylic Ice Cubes.

Here's the card I created with Iced Coffee.


Materials Used:
DCWV Pattern Paper: Retro Print Stack
Tsukineko Versa Craft Ink: White
Tsukineko Versa Magic Ink: Mango Madness
Tsukineko StazOn Ink: Jet Black
Creative Embellishments: Coffee Shaker Kit
Recollections Brand 80lb Cardstock: Brown
Recollections Brand 110lb Cardstock: White - card base
Stampabilities Brand: coffee Stamp - Sentiment
Xyron Creative Station Lite
Therm-o-web Brand: Zots Bling Tiny Adhesive
Aleene's Tacky Glue
Dollar Tree Brand: Orange Straw

Thank you for stopping by the blog today. I hope you found some inspiration!

Be sure to tag us Doodles Paper Playground on social media -
if you create a project with our Sparkle Blends. 

There is also a new Facebook group where you can share the
creations you have made with Sparkle Blends!
Come check it out, share some inspiration!

Friday, May 15, 2020

Party Cupcake on a Stand with Simply Crafty SVGs

Hello Crafty Friends - I am here with a cute cupcake box and a small stand perfect for your next party. You can place a cupcake in your cupcake or use it as a goodie box. Create it larger for a gift box.

I am using the New release Cupcake SVG file and Cupcake Stand SVG file 

Simply Crafty SVGs files are so easy to use, you're provided with a PDF and video tutorial for each file in the shop.

Here's my take on this fun Cupcake SVG file and Cupcake Stand SVG file


Materials used:
Simply Crafty SVGs: Cupcake SVG file 
Simply Crafty SVGs: Cupcake Stand SVG file
DCWV Pattern Paper: Good Eats Collection
Recollections Brand Cardstock: Kraft and Light Green
Tim Holtz's Distress Oxide Inks: Broken China, Cracked Pistachio, 
Vintage Photo, and Worn Lipstick
Fiskers Brand: Scollaped Punch and Crimper
Sizzix Brand: Thinlit Die - Party
Aleene's Tacky Glue
Brother Brand: Scan n Cut CM350

 Thank you for stopping by the blog today. I hope you found some inspiration!

Be sure to join the Simply Crafty SVGs Creators FB Group and share your creations with us.

Sunday, May 3, 2020

You're a Rare Find Mermaid Shaker Card with Doodles Paper Playground

Hello Crafty Friends - I am here with a fun Mermaid shaker card for Mer-May Month!

If you didn't know this already Mermaids are always celebrated during the month of May. 

I used the Sparkle Blend: Mermazing for this shaker card.


Materials Used:
Duff Design Stamps: Seas The Day Set
Recollections Brand 110lb Cardstock: White
Recollections Brand 80lb Cardstock: Yellow
Recollections Brand 80lb Specialty Cardstock: Mermazing Specialty Paper
Accent Brand 80lb Ultra Smooth Cardstock: Bright White
Acetate
Copic Sketch Markers: V04, V06, RV11, R02,
Y02,Y11, YG13, BG10, G21,BG15,E93, E00, E000
Spectrum Noir Markers: PV1. CR3, FS9

Thank you for stopping by the blog today. I hope you found some inspiration!

Be sure to tag us Doodles Paper Playground on social media -
if you create a project with our Sparkle Blends. 

There is also a new Facebook group where you can share the
creations you have made with Sparkle Blends!
Come check it out, share some inspiration!

Friday, May 1, 2020

You're Cool Daddy-O Card with A Perfect Time To Craft

Hello Crafty Friends - I am here to share this month's challenge over on the 

A Perfect Time To Craft blog. As you know we have a challenge every month. 
I hope you join us for all the fun. 


Our sponsors for this month's challenge are


This is always an Open Challenge and always "Anything Goes”. You're welcome to add unlimited entries per challenge and you may enter any crafting project with any theme.
For full details on our rules and on how to enter, please visit our rules page.


Our prizes consist of…

1st Prize: 3 sponsor images from the collages below, a certificate and a badge.
2nd Prize: 1 sponsor image from the collages below, a certificate and a badge.
3rd Prize: 1 sponsor image from the collages below, a certificate and a badge.
DT Favourites: a certificate and a badge.
Spotlight Winners: a certificate and a badge.

Here's the card I created using Artystamper Digital: Crusin

Thank you for stopping by the blog today. I hope you found some inspiration!

Don't forget to join the challenge over on the A Perfect Time To Craft blog!

Wednesday, March 11, 2020

Shamrock Shaker Card with Rinea and Creative Embellishments

Hello Crafty Friends - I am here with a fun and easy Shamrock shaker card.

This month Rinea Design Team is collaborating with Creative Embellishments.
I know you will be inspired by all the wonderful projects the Design Team has created.  

If you haven't heard of Creative Embellishments let me tell you a bit about them.
They create laser-cut Chipboard, Wood Veneer, and Stencils. They also have their own brand of Stamps and Flair.

This the card I created using the combined products.
Materials Used:
Recollections Brand 110lb Cardstock: White (card base)
Recollections Brand 65lb Cardstock: Green
Darice Brand Twine: Green and White

Let's Get Started!

I gathered all the components to the card. 
 Along with my Xyron Creative Station Lite and

I start by inking* all the edges of my Creative Embellishments: Shamrock Shaker Set.
I set them aside to dry.
  

Then, I inked the words good luck from the
 I then set them aside to dry.
  

the sentiment, and the open shaker components through the Xyron Creative Station Lite
  

Then, I pressed the Rinea Emerald/Emerald Starstruck Foil Paper onto the solid part of the 
Creative Embellishments: Shamrock Shaker Set which is the bottom of the shaker. I then trimmed the extra Rinea Emerald/Emerald Starstruck Foil Paper away leaving the base covered. I did the same thing with one of the open shamrock pieces creating the top of the shamrock.
 

Next, I pressed the Rinea Gold/Gold Starstruck Foil Paper onto the green cardstock which is 
cut to 4-1/4" x 5-1/2. Then, I adhered the shamrock base onto the card front panel. 
I slid the twin under the stem of the shamrock. Next, I stacked the open shamrock pieces onto 
 

I filled the Creative Embellishments: Shamrock Shaker Set with a mix of
Doodles Paper Playground Sparkle Blend: Gold Rush. Then, I adhered the acetate piece to the shaker. Followed by the top piece of the shamrock. I then tied a bow on the stem and adhered the sentiment in place. Adhered the card front panel to my card base and the card is complete.

Thank you for stopping by the blog today. I hope you found some inspiration!

Please tag us on social media if you create any project using any of our wonderful Foil Papers!
Don't forget to stop by the shop Rinea.com