Showing posts with label Sakura Gelly Roll Pens. Show all posts

Wednesday, September 9, 2020

Grateful Fairy Card with Lavinia World

Hello Crafty Friends - I am here with a fun fall card featuring Harietta Fairy. 
You can purchase Harietta at the Lavinia World store

You can also join us at our FB Group for inspiration. As well as our Challenge group.


This is the card I created.


Here is the Video Tutorial.


Supplies Used from Lavinia World: 

Other Supplies:
 Copic Markers: 
Skin: E0, E11 & E93
Lantern: Y17 & YR09  
Dress:V04, V06, Y02 & Y04
Wings: B01 &BO2

Thank you for stopping by today. I hope you found some inspiration!

Friday, April 17, 2020

Happy Spring with Die Cut Divas

Hello Crafty Friends - I am here with a fun Spring card.


April's wonderful sponsor is Di's Digis and it's all about animals.


Prize: The prize for April's winner is a $6.00 voucher.


I used this adorable bear sleeping on a Spring day.

Materials Used:
MFT Die: Fishtail Stitched Sentiment Banner
Xyron Inc.: Mega Runner
Sakura Gelly Roll Pen: Metallic Gold and White
Woodware Craft Collection: Peel-Off - Happy Spring Gold
Accent Ultra Smooth 80lb Cardstock: Bright White
Recollections Brand Cardstock: Black
Spectrum Noir Markers: LY2, CT4, BO1, BO2, OR2, TN1, TN3, TN4,
VB2, CG1, LG3, LG4, DR1, DR6, TB2, TB3, TB5, CR3,
HB1, IG1, IG2, BG1, BG2, BG3, BG4, IB1, and blender

Thank you for stopping by the blog today. I hope you found some inspiration!

Don't forget to join the challenge over at The Die Cut Diva's Blog

Thursday, February 20, 2020

A Little Kindness Card With Dies R Us

Hello Crafty Friends - I am here with a cute and easy card featuring Poppy Stamps and Dies.


Let's get started!

I gathered all the materials for the card. 


I die cut all the components and trimmed my cardstock and pattern paper. I die cut the trees twice.
I stamped my sentiment onto white cardstock. I matted the light blue cardstock onto the yellow pattern paper. 
 
Then, I adhered the green hill to the panel. Next, I adhered the light green trees onto the dark green trees. I wanted a lighter feel to the tree.
  

Next, I put the little sheep together. I used foam adhesive on the back of the sheep's body. I inlayed the head of the sheep. Then, I attached the legs with a bit of liquid and foam adhesive. Next, I adhered the hair and ears. 
  

Then, I used the Gelly Roll Pen in glitter to make small u shapes and dots on the sheep's body. I used a white Gelly Roll pen for the eyes.

I removed the backing from the adhesive and pressed the sheep into place. 
I adhered the card front panel to the card base.
 
Next, I adhered the flowers and the sentiment to the card panel. Then, I added a drop in each flower center of Nuvo Crystal Drops in pale gold.

Now, the card is complete!

Materials Used:
Poppystamps -Dies - Simple Sheep

Poppystamps - Dies - Sloping Hillside

VersaFine Clair Ink Pad - Nocturne
See the source image
Gelly Roll Pens - Clear Glitter - Set of 2

Gelly Roll Pens - White - Set of 3
DCWV Pattern Paper
Recollections Brand 110lb Cardstock: White and Black
Recollections Brand 65lb Cardstock: Dark Green, Light Green, and Light Blue


Thank you for stopping by the blog today. I hope you found some inspiration!


Before I write the list of the supplies I used, I wanted to share some exciting news with you. Dies R Us now has a sister store called Didi Crafts, which has warehouses located in the USA and Canada. Didi Crafts carries some of the same products as Dies R Us, but most are different and you will be able to purchase a huge variety of crafty supplies for a variety of crafts. Having this sister store means that our Canadian crafting friends won't have to worry about huge taxes or shipping fees. Isn't that great?! Go take a peek and be pleasantly surprised!

Don't forget to come and join in the fun at the Dies R Us Challenge Blog. There's a new challenge theme offered on the 1st and 15th of each month and one lucky randomly drawn winner will receive a gift voucher prize to the Dies R Us Store. For your convenience, all the important Dies R Us links are provided below.


click below for:


Wednesday, October 9, 2019

Happy Halloween Shaker Card with White Rose Crafts LLC

Hello Crafty Friends - I am here with a fun Halloween Shaker card featuring Lilly Luna Stamp and the beautiful Doodles Paper Playground Sparkle Blends.

I wanted to make a Halloween card using a non-Halloween stamp set. 


Let's get started!

I stamped and colored my images. I colored them in traditional Halloween colors. I stamped and colored a witch hat from the Joy Clair October Fun stamp set I have in my stash. I then trimmed my images and gathered my supplies.

I trimmed all of my papers and die cut my frame for my shaker window.
 

I start by putting together my shaker window. I die cut a larger frame using a stitched rectangle and the smaller scalloped inner-frame. I then die cut a scalloped frame from glitter paper. I place the smaller frame inside the larger frame and adhere them to some acetate. I trim any extra acetate away. I flip over the window and place foam adhesive - 2 layers of it on the back of the window.
 

Next, I adhered the pattern paper onto black cardstock to create my card front panel.  Then, I placed a mixture of the Sparkle Blends: Trick or Treat and Something Wicked on the card panel. I make sure that the mix is in the center.
  

These Sparkle Blends have some fun pieces in them.

I then remove the lining from the foam off the window back and place it over the Sparkle Blends. I place in a bit more towards the bottom so that my sentiment can be placed in the top center. 

Now, I take the stamped images and adhered the hat onto our little witch.  I also trimmed some flowers and adhered them onto the little witch's head.  I did this because the girl image has a flower in her hair but the hat only covered a portion of it. I then added some highlights using a Gelly Roll pen in white. I added some silver touches using a Gelly Roll pen.
 

I adhered the little witch and her doggie to the front of the window and I layered the sentiment sticker onto some black cardstock trimmed it and adhered it to the top center using foam adhesive. I added some of the Sparkle Blends to the sentiment and the corner of the window for a finishing touch. I then adhered the card panel onto my card base.

Now the shaker card is complete!


Materials Used:
Joy Clair: October Fun Stamp Set (Witch Hat)
DCWV: Glitter Paper Purple
Simple Stories: Frankie & Friends Collections (Sentiment sticker)
Recollections Brand Cardstock: Black & White 
Neehan Solar White 80lb Cardstock
Sakura Gelly Roll Pen: Metallic Silver & White
Spectrum Noir Markers


Thank you for stopping by the blog today - I hope you found some inspiration!

Be sure to tag us White Rose Crafts LLC on social media 
if you create a project with products or kits purchased at the

Friday, August 23, 2019

Warm Winter Wish with Maker's Movement

Hello Crafty Friends - I am here with a video tutorial for the Maker's Movement.

I am honored to have the opportunity to create a few projects for the Maker's Movement and to try out the Die Cutting Machine the Crafter's Edge Crossover II. Along with a Stamp and Die Set and some other dies. 


The front of both cards.


Card # 1 - Warm Winter Wish -- Alpaca Your Bags


Card #2 -- Warm Winter Wishes


Inside of both cards


Here's the Video Tutorial


Materials Used for both cards:

MMT206 - 3.5" Round Awesome Acrylic Block Product Image


MSD202 - Alpaca Your Bags Stamp & Die Set Packaging

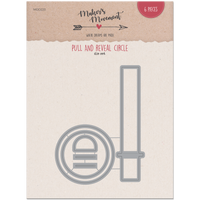
MOD220 - Pull and Reveal Circle Packaging

Xyron Mega Runner Adhesive
Tombow Multi-liquid Adhesive
Tsukeniko Memento Tuxedo Black Ink
Tsukeniko Versafine Onyx Black Ink
Tsukeniko VersaMagic Aegean Blue
Tim Holtz Distress Oxide Ink: Evergreen Bough
Sakura Gelly Roll Pens: Black, White & Sparkle
Neenah Solar White Cardstock
Recollections Brand Cardstock: Heavy Weight White, Light Blue, 
Green, Medium Blue
Martha Stewart Brand: Pattern Paper - Green Plaid

Thank you for stopping by the blog today, I hope you found some inspiration.