Wednesday, October 24, 2018

Magical Collaboration with Witt & Sass Stamps and Kindred Stamps

Hello Crafty Friends - Today I am bring you a few cards using stamps from both Witt & Sass and Kindred Stamps for Magical Friendship Week!

These stamp sets are so magical - they feature some of our favorite Magical Students and their dorm Mascots.

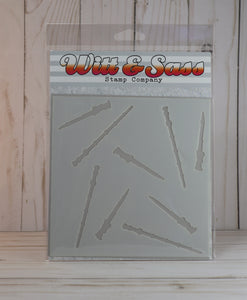
From Witt & Sass: Magical Creatures Stamp Set, Stencil Wands & Magical Accessories

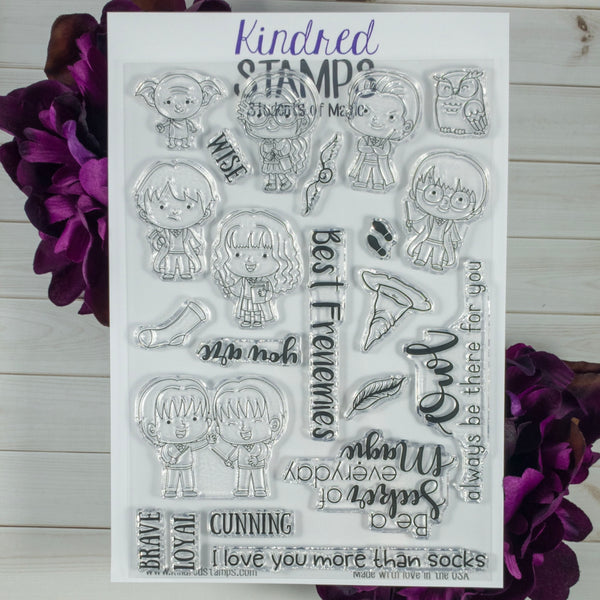
From Kindred Stamps: Students of Magic


  Stencil Wands   Image may contain: text   Students of Magic


Card one: The Potions Classroom -
I used the Students of Magic set and Magical Creatures -
 Snake as my Professor. I also used the Magical Accessories set for the background. 


Card Two: These two can't decide if they are enemies or friends - 
in the end they are Best Frenemies. The background was created using the 


Card Three: These twins are always up to something. 
I used the Students of Magic set and
 the sentiment from Magical Accessories Set.


Card Four: Three out the four Dorm Mascots are featured in this card.
The other one is busy teaching the potions class. I used the Magical Creatures 


Thank you so much for stopping by I hope you enjoyed this magical adventure.
I hope you join us all week long on both the Kindred Stamps Fan Club and the Witt & Sass Facebook Groups to see all the wonderful cards the other design team members have created. 
 Be sure to stop by both shops - Witt & Sass and Kindred Stamps to pick up your very own Magic!! 

Monday, October 22, 2018

Be Happy with Beth Duff Designs

Hello Unicorn Friends - Annie here with a happy rainbow panda card.

I figured even pandas want to be unicorns right!?
 I made this pandacorn by combining Cuddle like a Panda set and Unicorn Farts set

Cuddle Like Panda Stamp Set Unicorn Farts


I started by stamping both the panda and unicorn with Memento Tuxedo Black Ink onto Marker Paper. I colored the images with my Spectrum Noir alcohol markers. I only colored the Horn, Mane and tail of the unicorn in a rainbow of course. A bit of IG2 for the panda. Next, I cut away the mane and tail from the unicorn and toss out the rest. I then adhered them to the panda.
 Now, I have a Pandacorn!

I then die cut some clouds, grass and rainbow - set them aside. Next, I cut a card front panel - (A2 size 4-1/4" x 5-1/2") and added a bit of Distress ink in Salty Ocean for my sky. Then, I adhered the grass, rainbow and clouds to the front panel. Next, I stamped the sentiment from the Cuddle like a Panda set to the panel on the left side. I also stamped an additional sentiment from the Unicorn Farts set - cut it into a strip, added foam adhesive and adhered it to the front panel. Then, I added some foam adhesive to the pandacorn and placed it on the rainbow. For some finishing touches I added a bit of Silver gel pen to the horn. Also some Wink of Stella to the mane and tail.

Thank you for stopping by today!

Friday, October 19, 2018

Double Double Toil and Trouble with Simply Crafty SVG


Hello Friends - Today, I am bringing you a fun project using the New Witch's Cauldron from Simply Crafty SVG. 

This is a quick and simple little cauldron perfect for your desk or mantel to decorate for the up coming Halloween season. Sandy does an incredible job explaining how to put the cauldron together in her video.

This is my version of the Witch's Caudron. I used some black glitter cardstock to create my cauldron as well as glow in the dark web cardstock. a bit of pattern paper. 

 Showing the candle and orange lights and glowing in the dark

 Showing it again a bit darker room - you can still see a bit of the glow in the dark. 

Thank you for stopping by today - I hope you give the Witch's Cauldron a try this Halloween Season!

Thursday, October 18, 2018

Let it Snow with Doodles Paper Playground

Hello Friends - Today I am bring you another fun card. This one is a winter scene. Penguin, Seal and Polar Bear have all worked real hard on building a snowman.

I created a shaker card and use the New Released Sparkle Blend Frozen. I love this mix it has hues of Blue, soft Teals and white. Some snowflakes, small crystals in both clear and pale blue. This Sparkle Blend along with all the other Sparkle Blend can be purchased at White Rose Crafts LLC


To create the shaker I simply stamped the snowman image and cut away the body leaving only his arms. I then trimmed his buttons, nose and eyes to adhere them to the top of the clear acetate. I stamped and colored the other images. I then fussy cut them out and set them aside. Next, I created the back background on the same card front that I stamped snowman. I use I cloud stencil with Distress Ink to create the snow and to give a bit of color to the sky. I then sprinkled a bit of water and dried it off.

Next, I add a bit of DecoArt Snow Writer to the snow banks I created with the stencil. I also added a bit to snowball pile. Once the snow writer effects were dry I added the buttons, nose and eye to the snowman. I then flipped over the card front panel and put foam adhesive to the back to create the channel for my Frozen Sparkle Blend to sit in - then I placed a small piece of white and silver pattern paper to seal in the Frozen Sparkle Blend. Then, I adhered the card front panel to an A2 teal cardbase.

Next, I adhered the penguin, seal and polar bear using low profile foam adhesive. I adhered to the snowball pile directly to the panel - since it has the snow writer effect it has plenty of dimension. I stamped the sentiment and die cut it on a banner. For finishing touches I add a few sequins from the Frozen Sparkle Blend around the sentiment and snowman. I also added a bit of Clear Wink of Stella to the accessories (scarf, hat & earmuffs) as well as the sentiment.

Supplies Used:
Spectrum Noir Markers: BT1, TB1, TB2, TB3, OR1, OR2, BGR1, BGR2, IG1, IG2, PP1, BG1, BG2 & Blender pen
Stamps:Hunkydory:Winter Warmers & Snowy Friends(I got them as freebie from Creative Stamping Magazine)
Inks: Memento:Tuxedo Black, Distress Ink:Tumbled Glass, Salty Ocean, Distress Oxide: Faded Jeans
Paper: Cardstock:Recollections Brand:White and Teal, Pattern Paper:Recollections Brand: Silver &White 
Adhesive: Scotch ATG, Foam: Craft Foam - Darice & Low Profile: Jot Brand

Wednesday, October 17, 2018

Halloween Cards with A2Z Scrapbooking


Hello Friends today I want show you I made two quick Halloween cards. They came together really quickly. I am using the Hero Arts Spooky Labels - Halloween Digital Kit . 
image 0


Now let's get started on how I created these cards.


I started by downloading and sizing the Hero Arts Spooky Labels to the size I needed for my cards. Next, I printed them onto Orange Cardstock.

Card #1 - I trimmed the banner label and ink the edges with Hero Arts Black Ink. Then, I trimmed the Trick or Treat Sentiment & the little bat also inking the edges. Next, I trimmed my card panel from green cardstock adhered it to my black cardbase.

Then, I punched a small circle at the top of the banner label and tied some black & white Baker's Twine through it. Next, I trimmed the purple cardstock just a hair smaller than the inner part of the banner label. adhered it to the banner label - then adhered the sentiment with foam adhesive on top of the purple cardstock. I added some foam adhesive to the top and regular adhesive to the rest of the of the banner label place it onto the cardbase. Now, for some finishing touches - I adhered the little bat to the banner centered at the bottom. I popped up his wings with foam adhesive for some added interest. I then place 3 enamel dots in an angle on the corners of the card.


Card #2 - I trimmed the Boo from the printed sheet. I matted it onto the holographic paper. set it aside. Next, I trimmed a card front panel from the Purple cardstock and stamped the triangles and circles onto the panel with Wilted Violet Distress ink. Then, I adhered the purple panel onto some of the holographic orange paper. I then adhered the card panel onto the dark gray cardbase. Next, Die cut the word Happy from green cardstock 3x - next I stacked and adhered each layer so I ended up with a nice thick die cut word. Then, I stamped the -for you- onto a small pieces of lime-green cardstock - I trimmed it down and fishtailed both ends.

Now, that I have all the components ready I put together my card. I adhered the matted Boo onto the purple toward the top of the panel. Next, I adhered the die cut Happy above the boo. added the for you banner underneath using a bit of foam tape. For some finishing touches I add a few enamel dots

I hope you give the Hero Arts Spooky Labels - Halloween Digital Kit .   a try. It's perfect for your quick Halloween cards.

Annie

Supplies:
  • Hero Arts Spooky Labels at A2Z Scrapbooking
  • Hero Arts Black Ink
  • Hero Arts Happy Stamp & Cut Set
  • Distress Oxide Ink - Wilted Violet
  • Recollections Brand Cardstock - Black, Dark Gray, Orange, Green, Lime-green & Purple
  • Jot Brand Holographic Paper - Orange
  • Studio G Brand Baker's Twine in Black & White
  • Gina Marie Designs Flat Mat Enamel Dots - Black, Orange & Purple
  • Scotch Brand 3M Foam  & ATG Adhesive

Kindred Stamps October Release - Christmas Kid

Hello and welcome to the Kindred Stamps October Release Hop. I am so excited to share with you the stamp called Christmas Kid.

I created two fun cards using this set.


For my first card I created the iconic shipping crate. When opened it has the Leg Lamp - This is a fun shaker card. The packing materials are made from kraft cardstock and shredded Tinsel gift filler.  


For my second card I created the stair scene with the Christmas kid. He is coming down the stairs wearing his bunny Pajamas; his Present from the aunt.  

Side view showing a close up of the Christmas Kid and the stairs. 


The entire Kindred Stamps October release will be available Friday, October 19 at 8am PST/11am EST. Be sure to check out the Kindred Stamps blog on Friday for the full product release as well as the complete line up of all the Kindred Stamps Design Team projects from release week! If you visit and comment on all of the designers' blogs this week, you could win $15 in Kindred Stamps shop credit! So join the Fan Club and release event, show the design team some love, and get ready to empty those wallets this Friday!

Friday, October 12, 2018

Doodle Paper Playground October Sparkle Blends Release

Welcome to the Sparkle Blends October Release Blog Hop for Doodles Paper Playground! This month is full of Blends that are perfect for the upcoming holiday season and beyond! The Designing Divas will be sharing projects featuring these new Sparkle Blends on their blogs and you can check out a close-up look at each of the Blends on the Doodles Paper Playground Blog.

For my card I used the New Release Boughs of Holly Sparkle Blend.


Thank you so much for hoping along with us today! Be sure to stop by the Doodles Paper Playground Blog to see the entire New Sparkle Blends release. 

Annie

GIVEAWAY: For one of 2 chances to win a full set of all 6 sample packs from this release,
 please leave comments on each leg of the hop,
including one idea of how you would use
 the Sparkle Blend used in that Designing Diva's inspiration card!