
Hello Crafty Friends - I am here with a featuring some Hexagons and Leaves dies.

Let's get started
First, I trimmed the Kraft cardstock to 8" x 9". Then, I scored the cardstock from top to bottom at 4"I then creased the card base.


Next, I taped the card base to a clipboard and using the stencil I applied some of the Glitter Paste. I then gently peeled off the tape and place the card base onto my craft table and I did some splatters with the Heidi Swapp Bronzer Colorshine. I then set it aside to dry.


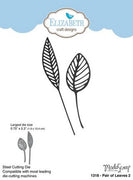
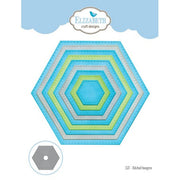
Next, I die cut from heavyweight White cardstock the following: 2 of the tall leaves, 1 small hexagon, 2 hexagon frames (I created those by nesting the hexagons and running them through the die cutting machine together), 4 hello words. I also die cut 1 hello word from the Metallic Copper cardstock.

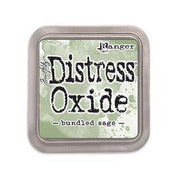
Then, I took one of the Leaves and some Distress Oxide Ink and colored the leaf. I simply smudged the ink onto my craft mat and added a bit of water. Next, I ran the leaf through the watered down ink. I heat set it with my heat tool. Then, I added a bit of Heidi Swapp Chartreuse Colorshine. I use the nozzle wand and add the color where I want it.


Now, the card base is dry and it's time to build the card.

I start by running the Hexagon frames and the hellos through my Xyron 3" Sticker Maker. Then, place the frames - the large one first, then the smaller one just overlapping and towards the top. Next, I adhered the leaves. I add a bit of Xyron Mega Runner at the bottom of the leaves and a bit of foam adhesive in the center of the leaves (I simply trimmed a small sliver of foam adhesive).


Next, I adhered the small hexagon with foam adhesive onto the card. Making sure that the leaves are just tucked under the hexagon. Then, I stacked the 4 white hellos together. Next, the Copper hello on top of the 4 stacked hellos to created a nice firm chipboard piece. I then place it onto the small hexagon.


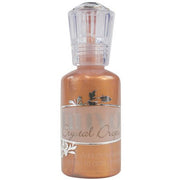
The card is almost done. For a finishing touch, I added a few drops of Nuvo Crystal Drops in Copper Penny. Next to the leaves and the sentiment and around the card.

Now, the card is complete!

Materials Used:

Heidi Swapp Multi-Design Stencil
Heidi Swapp Bronzer Colorshine Spray
Heidi Swapp Chartreuse Colorshine Spray
Xyron Adhesive - Mega Runner
Xyron 3" Sticker Maker
Artist Loft: Plastic Pallet Knife and tray
Recollections Brand Cardstock: White, Kraft & Metallic Copper
Glitter Paste: I made my own by mixing the following: Artist Loft Gloss Gel Medium,
Daler & Rowney Acrylic Gesso, Accent Jewel Crown Acrylic Paint: Barque Pearl,
Artist Loft Glitter: White Shimmer
Thank you for stopping by today. I hope you found some inspiration!
Don't forget to come and join in the fun at the Dies R Us Challenge Blog. There's a new challenge theme offered on the 1st and 15th of each month and one lucky randomly drawn winner will receive a gift voucher prize to the Dies R Us Store. For your convenience, all the important Dies R Us links are provided below.

No comments:
Post a Comment